
Were you lucky enough to receive a Cricut or other cutting machine as a holiday gift? Congratulations! The variety of projects you can make with it is incredible. You might have already ventured to the craft store to pick up supplies to use with it. But once you get home, you will find that organizing all your new accessories can be challenging. Let me help you tidy up your crafting space with these 7 stylish craft and Cricut supply organization ideas.
[My blog posts contain affiliate links. These don’t cost you anything, but they allow me to continue running this site and providing free content for my readers. Full disclosure here.]
First Things First: You Need a Crafting Space
The first few weeks I had my Cricut, I would set it up on the dining room table to use it and then haul it back upstairs to stash in the spare bedroom. But as I accumulated more rolls of adhesive vinyl and heat transfer vinyl (iron-on vinyl), I found myself trying to keep them contained in bags. It would give me anxiety just looking at the bags and boxes piling up on the floor in the corner.
When I started researching ideas for craft room organization, I found a whole range of options. There are inexpensive rolling carts, but that still left most of the supplies in plain view when not in use. At the other extreme were the floor-to-ceiling craft storage furniture units that unfold to reveal dozens of shelves and cubbies. But the price tags on those were insanely expensive for something that you would still need to build yourself.
In many of the craft room photos I found online, I kept gravitating towards the ones that used cube storage units. I envisioned having separate cubbies for each type of craft that I enjoy making. Plus, they could also be used to store books as well.
I also liked the look of fabric bins or baskets to contain some of the items to keep them out of view. Since they are available in all different colors and styles, there are ones to match any decor.
But just having a cube storage unit alone would still mean I would have to lug the Cricut down to the dining room to cut things out since it needs a clear horizontal workspace. Then I came across a photo of a rolling table that would fit in my craft room.
Yes, I had now renamed the spare bedroom as my office/craft room. So I might as well make the crafts there instead of using it just to store the supplies!
Keep reading to learn more about my seven tips for craft and Cricut supply organization.
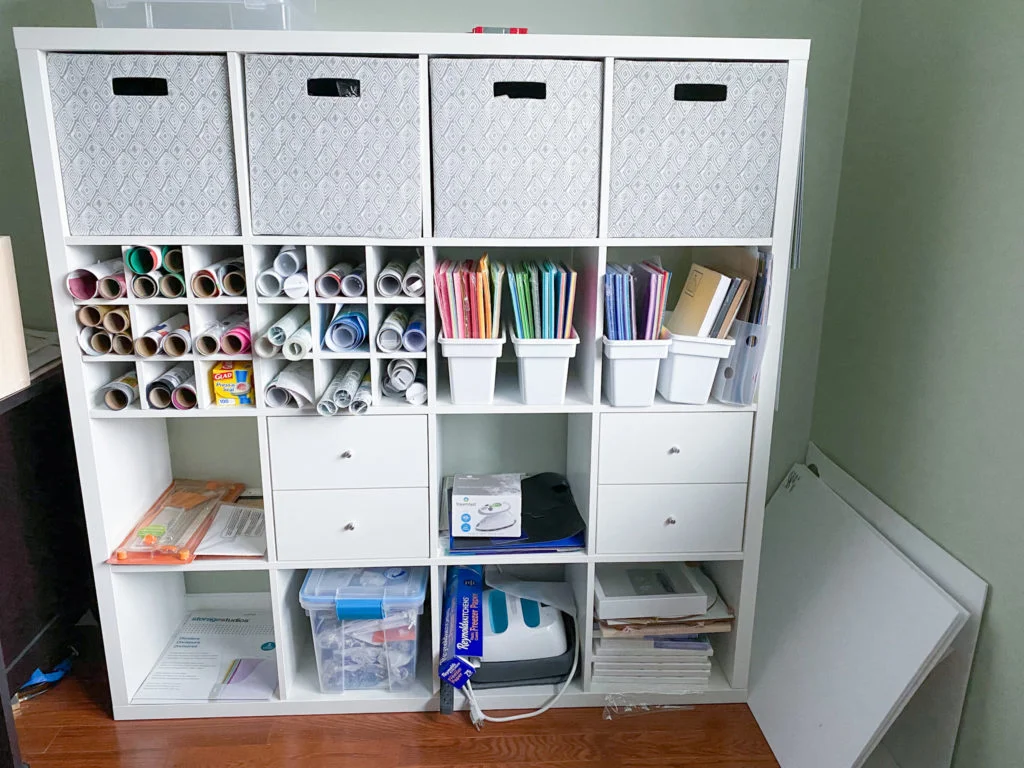
1. Ikea Kallax for the Win!
Once I decided I wanted cube storage, I checked out online reviews of different brands. I found that some of the more inexpensive ones might look good on the box, but had quality control issues in terms of looking wonky once assembled. Or, their shelves would start to bow under the weight of a few books.
The one brand that seemed to have overwhelmingly positive reviews is the Ikea Kallax product line. Not only do they look nice, but they come in a variety of sizes and colors. Plus, they are pretty easy to assemble. (More on that later.)
Luckily, I live about a half-hour away from an Ikea. So I was able to wander around the showroom to see the Kallax options in person. I knew I wanted the white to match another bookcase I already had in that room. The Kallax units also come in black-brown. Some sizes also come in walnut-effect light gray, a gray/wood-effect combination, high-gloss gray, or high-gloss white.
After figuring out how many different cubbies I would need, I decided to go with a unit that would have a couple of extra cubes so that I would have room to grow my supplies. This meant I was looking for a unit with 16 cubes.
The Kallax is available in several sizes. I purchased the 4×4 unit, which is 57 ⅞ inches wide, 57 ⅞ inches tall, and 15 ⅜ inches deep. The other combinations sold are:
- 1×4 (16 ½ inches wide by 57 ⅞ inches tall by 15 ⅜ inches deep)
- 2×2 (30 ⅜ inches wide by 30 ⅜ inches tall by 15 ⅜ inches deep)
- 2×4 (30 ⅜ inches wide by 57 ⅜ inches tall by 15 ⅜ inches deep)
- 3×3 (43 ¾ inches wide by 43 ¾ inches tall by 15 ⅜ inches deep)
- 3×4 (44 ⅛ inches wide by 57 ⅞ inches tall by 15 ⅜ inches deep)
- 5×5 (71 ⅝ inches wide by 71 ⅝ inches tall by 15 ⅜ inches deep)
Due to their popularity, some of the sizes and colors might be out of stock. Make sure to check the Ikea website before you go there to see if the one you want is in stock. If it is not in stock, it will say when it is expected to be back in the store.
The larger units come in two boxes for easier transporting. However, even one box would be too heavy and large for me to maneuver into the sedan’s trunk by myself. So I recruited my nephew with his pickup truck to help me out.
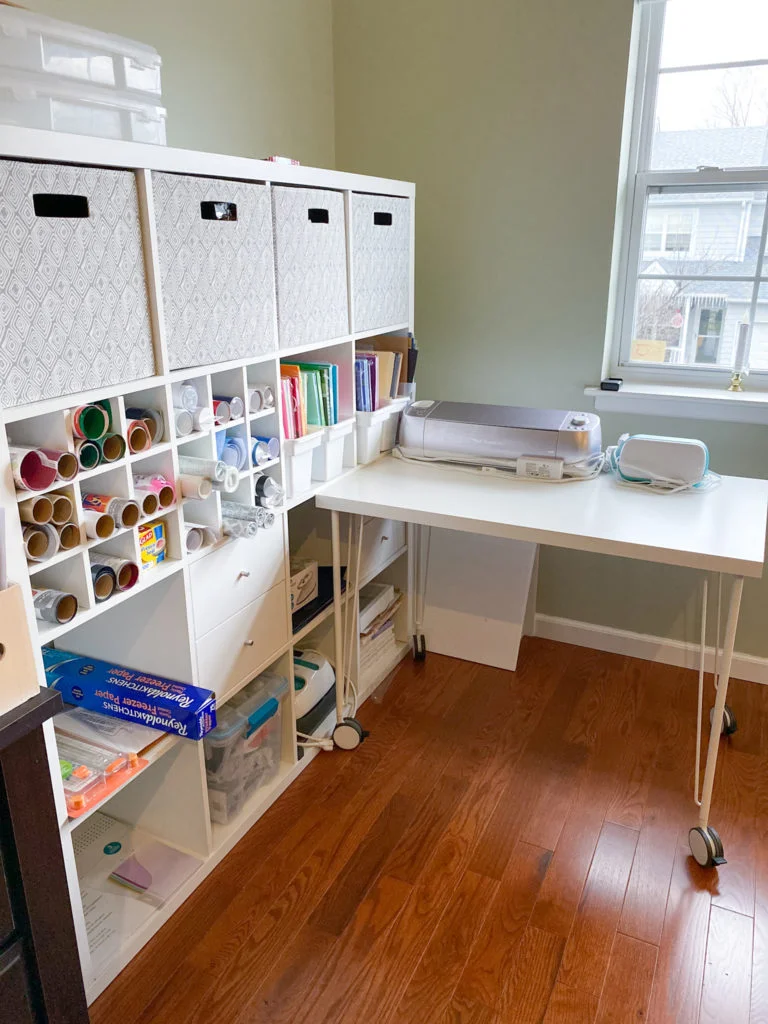
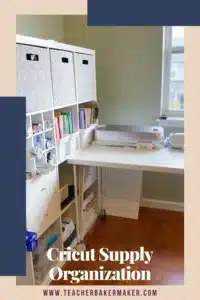
2. Matching Rolling Table
Next up was to search for a small table that I could put the cutting machine on. I fell in love with Ikea’s mix and match “table bar.” They sell table tops separately from the legs. You can create all different combinations to suit your taste and needs.
The Linnmon table top is 39 3/8 inches by 23 5/8 inches and is 1 3/8 inches thick. This perfectly coordinated with the thickness of the outer “walls” of the Kallax storage unit. It makes them look like they are part of the same product line. It is still wide enough to fit my Cricut Explore Air 2 and Cricut Joy side-by-side with room to spare.
To make sure the cube storage unit and the table would both fit in the room, I cut pieces of string in the dimensions of each piece of furniture and laid them out on the floor. I made sure there would be enough space to walk around the room. I also wanted to check that I would be able to move in my desk chair without feeling cramped.
If you are looking for a larger table, they have the Lagkapten table tops. They come in sizes of 47 1/4 by 23 5/8 inches, 55 1/8 by 23 5/8 inches, or 63 by 31 1/2 inches. These are all 1 3/8 inches thick.
Next up was to choose the table legs. As soon as I saw the Krill legs with casters, I knew they would be perfect. I can roll the table out of the way when not in use. When I want to connect my Cricut to the USB port on the computer, I can roll the table closer. I LOVE, LOVE, LOVE this feature more than I even expected. It makes vacuuming the floor a breeze. The casters can be locked in place if you have pets or small children. That way they aren’t as likely to move the table.
If you are thinking that you could just run your cutting machine as it sits on top of the Kallax, that could be tricky. Remember that the mat extends about a foot from the front of the machine, and will need about the same amount of space behind it as the mat feeds through the machine. This means you can’t put the machine up against the wall as it cuts.
I have seen some people either buy or make a stand for their Cricut so that they can store even more beneath it. The problem that could happen with this though is that the mat would bend without support underneath it as the machine is cutting. Depending on the stickiness of your mat and the material you are using, it could come loose. This would cause the cut to be defective.
Easy Assembly
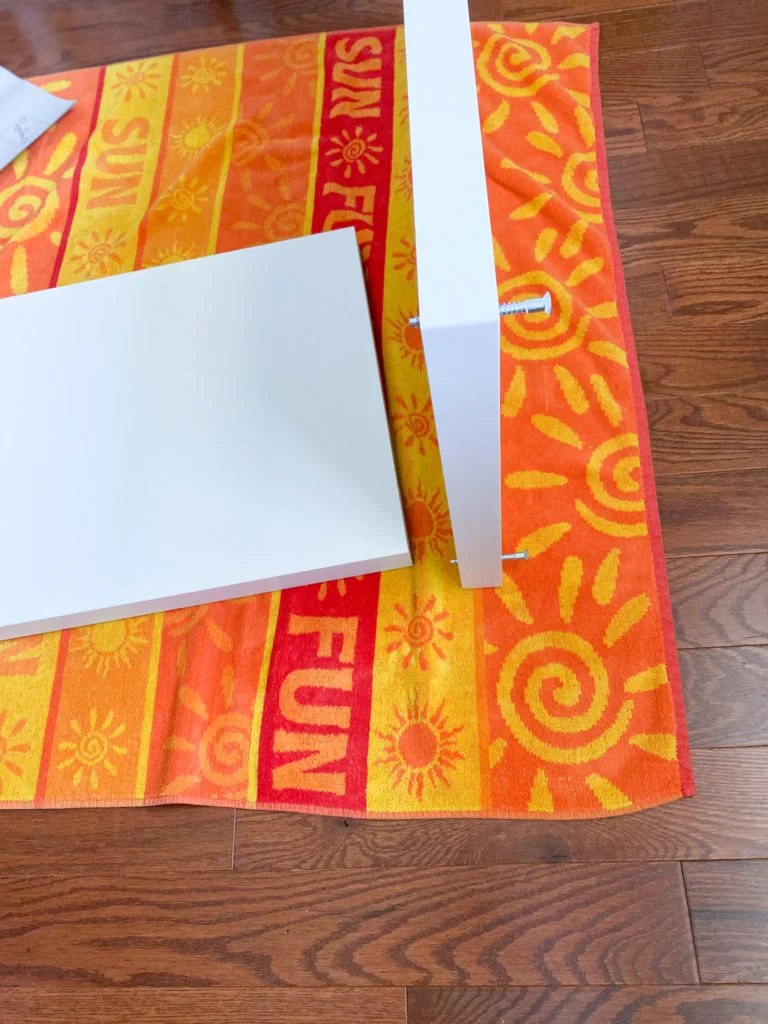
If you have ever assembled Ikea furniture before, you know that the little allen wrench that comes with it is key to tightening the screws. For the Kallax, I also used a screwdriver, rubber mallet, and level (not included).
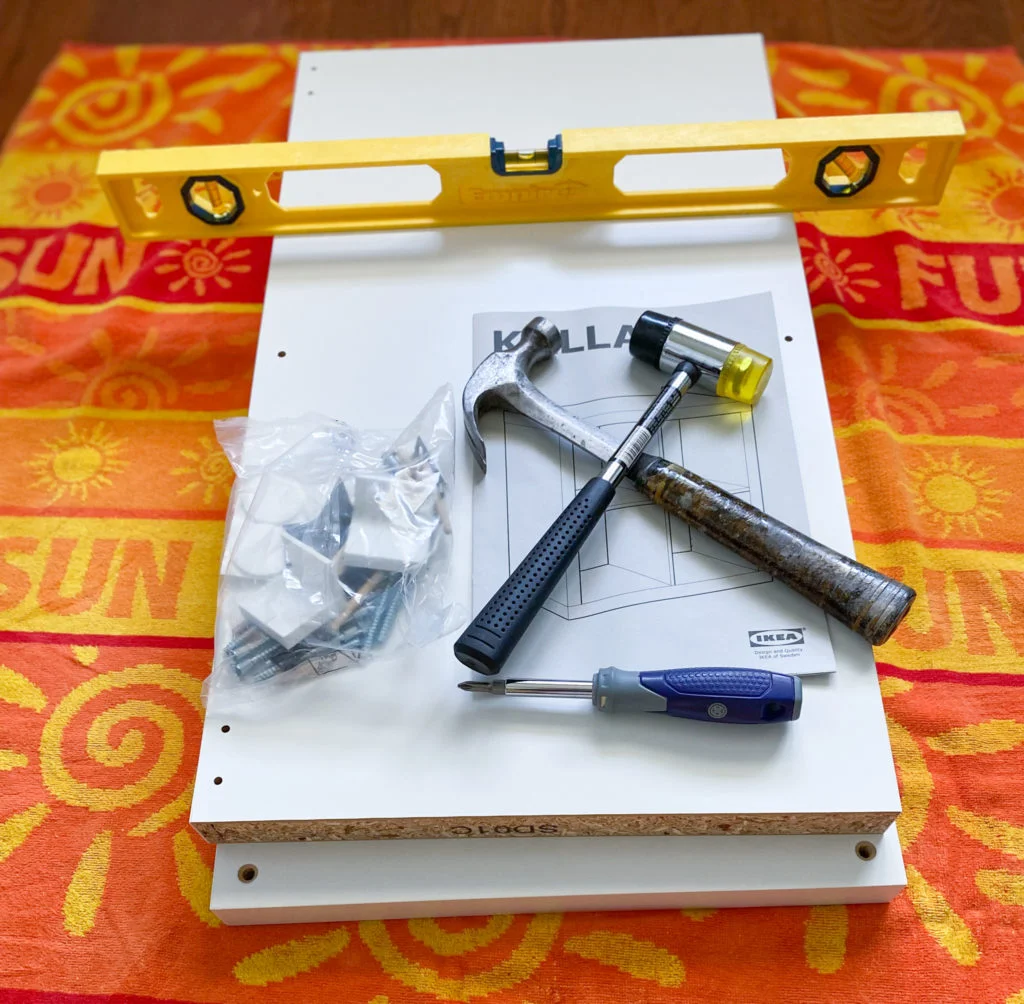
Due to the size of the 4×4 unit, the directions strongly recommend two people are needed to assemble it. This is because you actually need to assemble the unit face down on the floor. Once it is built, you then have to rotate it up to a standing position. This would be very difficult for one person to do alone.
So before you buy the unit, make sure that you have enough floor space available to build the unit as it lays face down. Also, put down a blanket or beach towel to protect your new furniture from scratches as you build it.
Ikea directions are famous for not having any words, just schematic diagrams. Here are some tips I figured out along the way:
In Step 1, you should start putting the screws first through the side walls. Make sure that the side with more holes faces the interior. Then line up the perpendicular pieces to attach them with those screws that you already started.
In Step 2, put the wooden pegs into the short board first. Then line up those pegs with the outer wall of the unit. Use the rubber mallet to fit the short board snug up against the outer wall. You don’t want any gaps, as the entire unit is built to fit exactly.
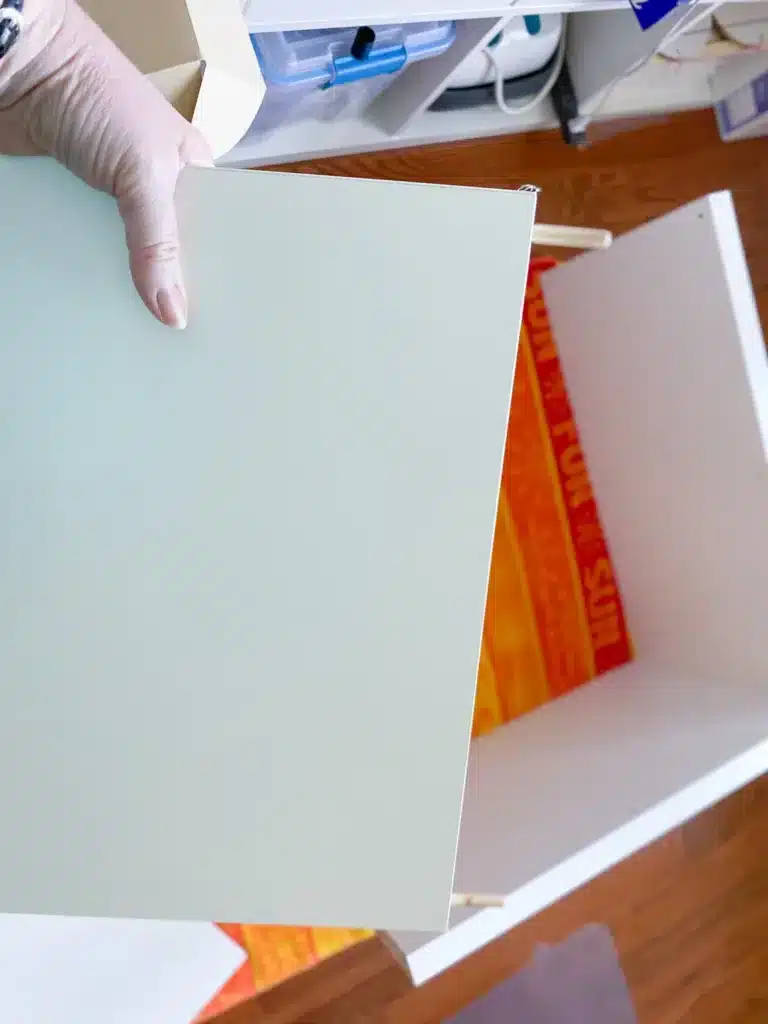
In Step 7, cover the outer wall with a towel. Use the rubber mallet to bang the outer wall snugly up against the inner dividers. Make sure that the side of the outer wall that has two holes next to each other faces inward, and is directly across from the two holes of the opposite outer wall.
For Step 8, use the rubber mallet to put the wooden dowels in first. I found it easier to turn the unit onto its bottom to get leverage to get the screws to go in all the way.
It took the two of us about an hour to build the 4×4 unit. Once you get the hang of it, it goes quickly.
The directions show how to attach brackets to the Kallax craft storage unit so that it can be screwed to the wall. This would prevent the unit from tipping over if a child or pet were to climb it. It also gives it stability if you live in an earthquake-prone area.
However, I found that the brackets won’t work if you have base molding at the bottom of your wall. I pushed my shelving unit right up against the base molding, but it is still over an inch from the wall. You would have to use other types of hardware to make this work. Or, you would need to cut away the base molding where the Kallax sits against the wall.
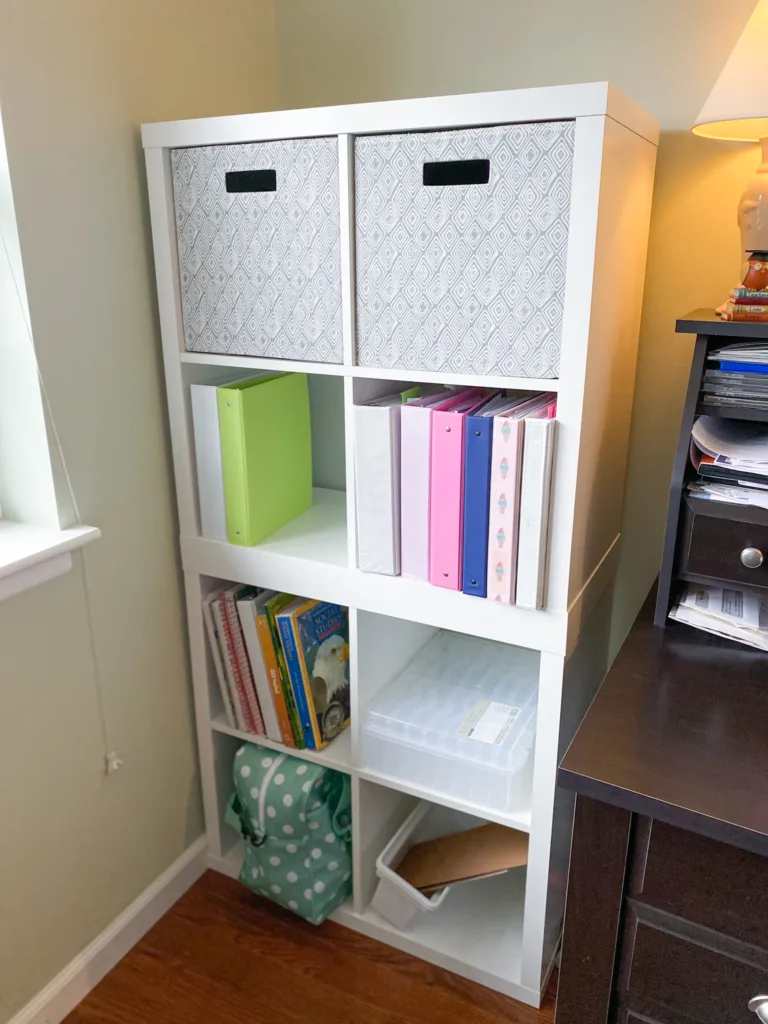
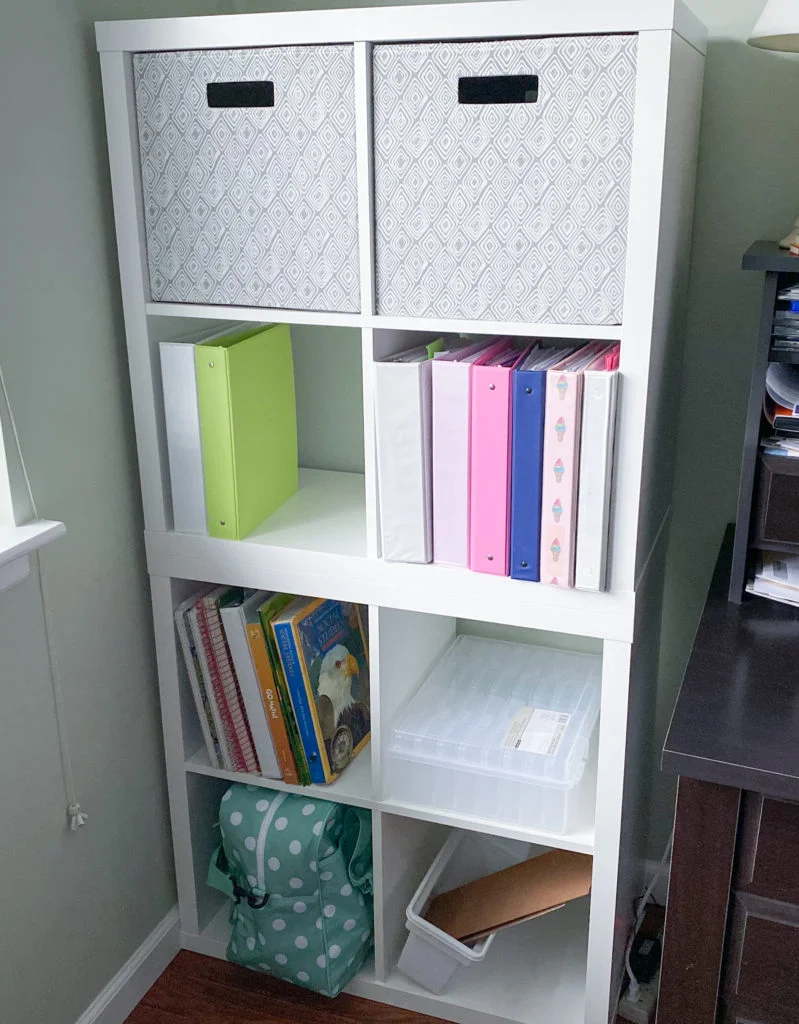
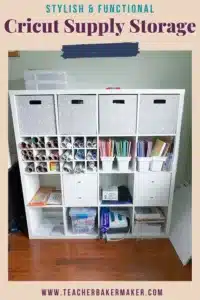
3. Fabric Storage Bins
To help with making the craft and Cricut supply organization more stylish, I use Threshold fabric cubes from Target. Recently, Target replaced that line of fabric cubes with the Brightroom line of 13 inch fabric cubes. The inner dimensions of each of the Kallax cubbies are 13 ¼ inches by 13 ¼ inches. Be forewarned that fabric bins and baskets come in various sizes. You want ones that are 13 inches by 13 inches for this particular storage unit.
The Threshold cubes came in more than three dozen different colors and patterns. I chose a gray diamonds pattern. My walls are a pale green (Behr’s “Sliced Cucumber”) so I did not want a color that would clash with the walls. The neutral gray works well with the white storage unit. I liked the playful diamonds pattern. It made it look more interesting than a solid color, yet still sophisticated enough for an adult.
Target usually carries about a half dozen of the designs in their stores. The rest are available through their website. They come flat, but are easily assembled by unfolding them and inserting the sturdy base.
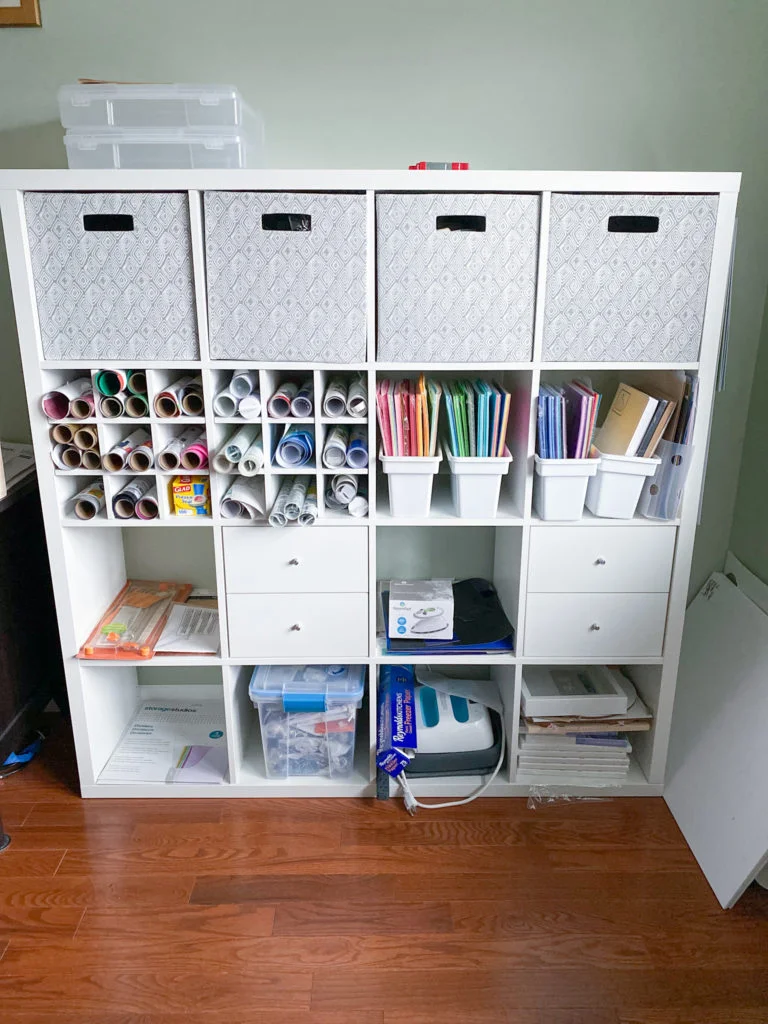
4. Vinyl Roll Storage in Wine Bottle Inserts
There are lots of different vinyl storage suggestions online. Most of these are meant to be hung on a wall or are free-standing. However, when I spotted the wine bottle rack that is designed to fit within a Kallax cubby, I knew this was the solution I needed. They assemble in just a couple of minutes and slide securely into the cubby.
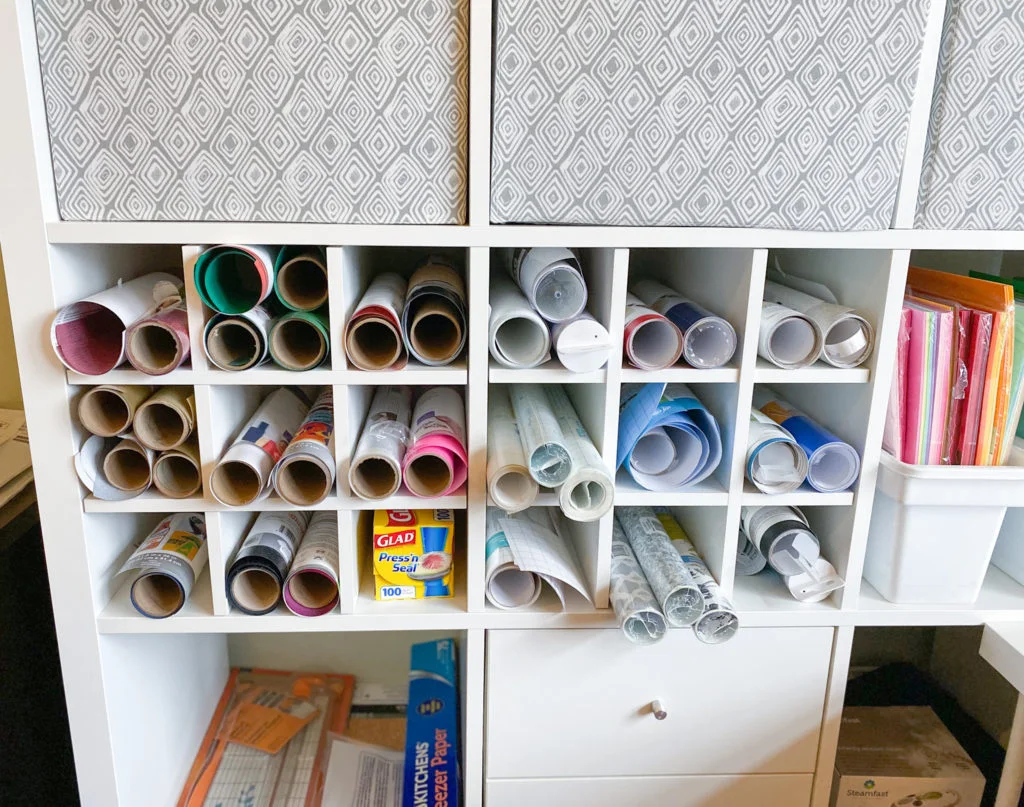
I keep my HTV (heat-transfer vinyl) in the cubby on the left, and the adhesive vinyl on the right. Each slot is large enough to hold four standard size rolls. The depth of the storage unit is perfect for the length of these 12 inch wide rolls. I also have some rolls of Contact paper that I use as transfer tape. Since those rolls are 18 inches wide, they stick out of the storage unit a little. (My base molding is about an inch thick, so the Kallax does not sit right up against the wall. So the longer rolls can be pushed through all the way to the wall. That way, they only stick out the front by less than three inches.)
5. Drawers for Quick Access
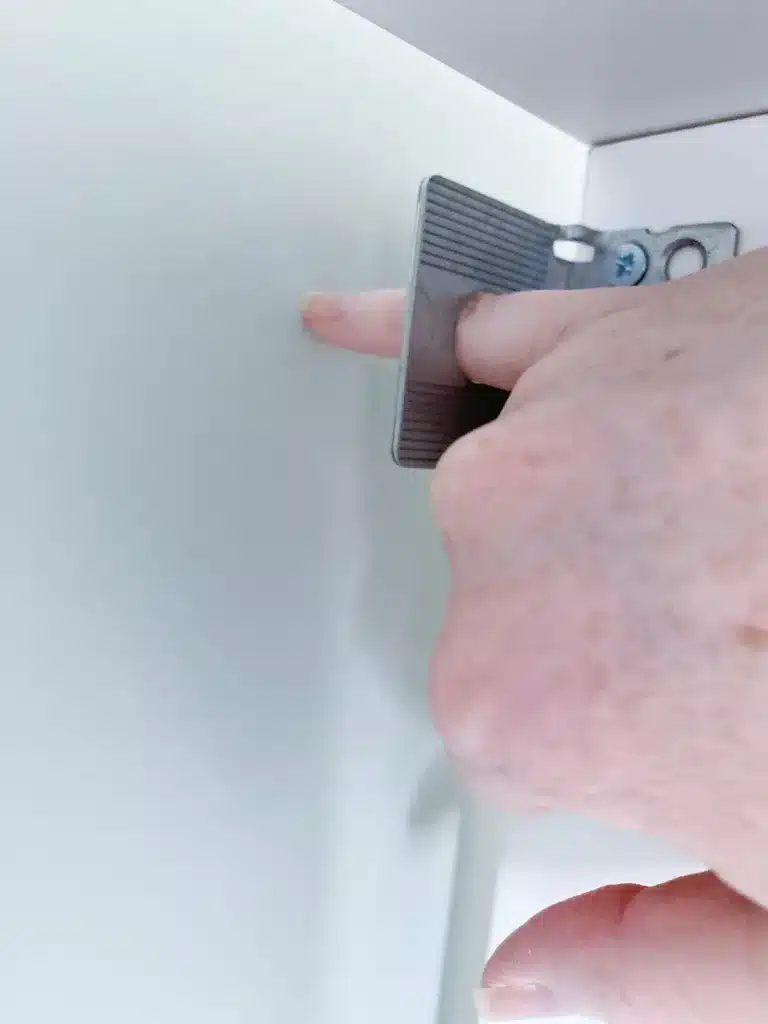
Since the fabric cubes are 13 inches deep, they can hold some pretty big craft items. However, I found that I needed access to certain small tools, and did not want to dig through a big bin to find them. So back to Ikea I went. I bought two of their 2-drawer inserts that are designed to fit the Kallax. Assembling these was only slightly trickier than the Kallax itself. This is because once you build the drawers, you have to drill into the interior walls of the Kallax cubby to attach the drawer glides. Therefore, make sure you like where the drawers are located before you install them because if you later decide to move them, you will be left with holes.
I put the drawers so that I could reach them while seated at the craft table. That way I could easily grab my weeding tools and scraper.
I keep my Cricut Joy vinyl rolls and accessories in another drawer. These are smaller and would “get lost” in the full-size vinyl storage racks.
In the video below, I demonstrate how I use the different storage solutions for my Cricut supply organization.
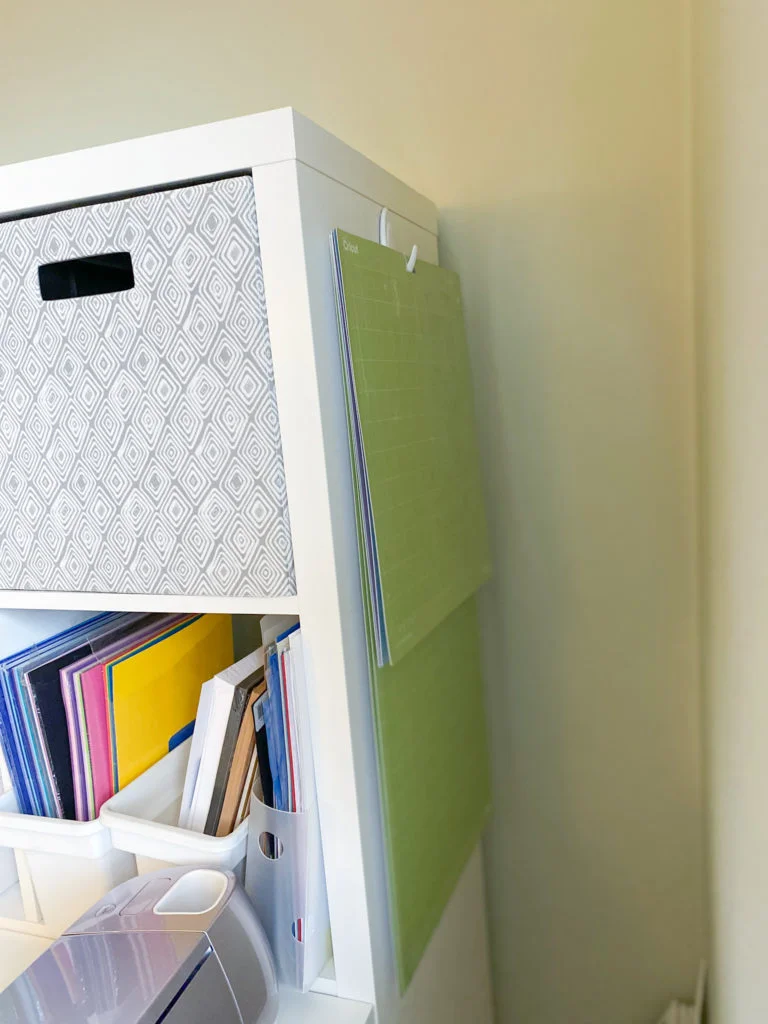
6. Mat Hooks
I added a Command hook to the outer side of the Kallax, facing the wall. I hang my 12 inch by 12 inch and 12 inch by 24 inch Cricut mats from the hook, out of sight. The Joy mats do not have a hanging hole in them, so I store those in one of the cubbies. Make sure that the hook you choose can support the weight of the mats. I chose one that has a 3-pound limit.
7. Card Stock Storage
Finding a way to store my card stock was trickier. At the time, Ikea did not sell any type of dividers that would work for this. But recently they added this inner shelving unit to its Kallax accessory line.
My workaround was to use dollar store ice bins I had bought years ago for my classroom for students to store their reading materials. I am able to fit two of these within each cubby. They are the perfect size to store my 8 ½ inch by 11-inch cardstock. I have not seen these in dollar stores for several years, but Amazon sells similar ones.
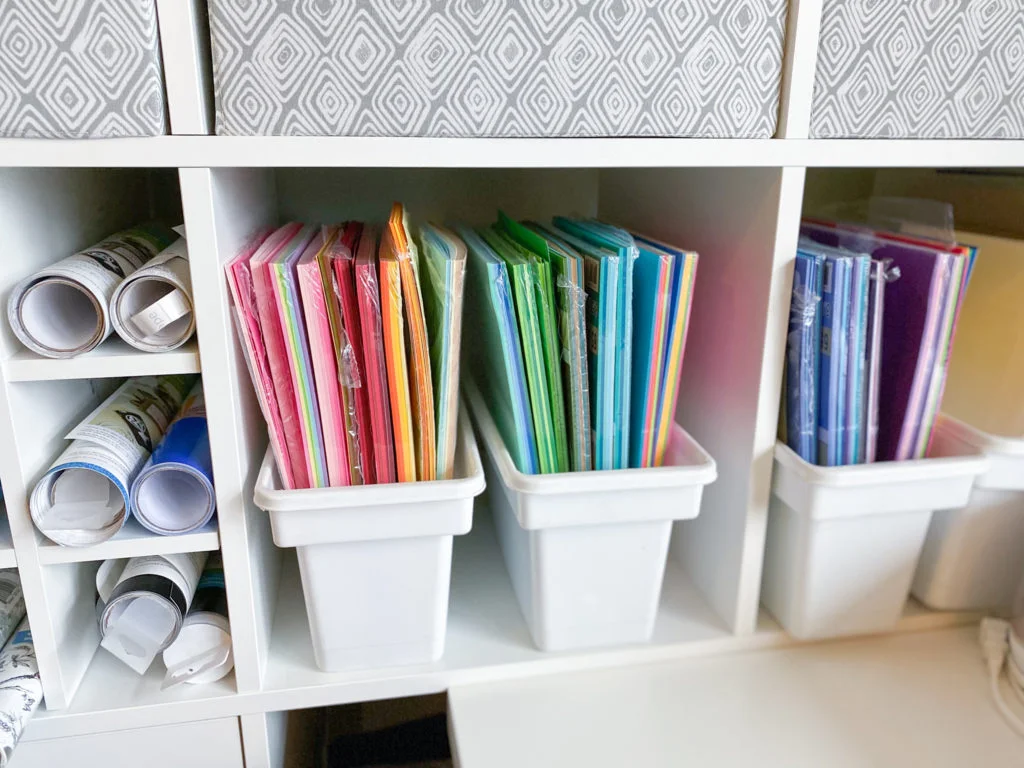
For my 12 inch by 12 inch cardstock, I use a paper holder I bought at the craft store. It is 13 inches by 12 ½ inches by 2.625 inches, so it fits perfectly in the cubby.
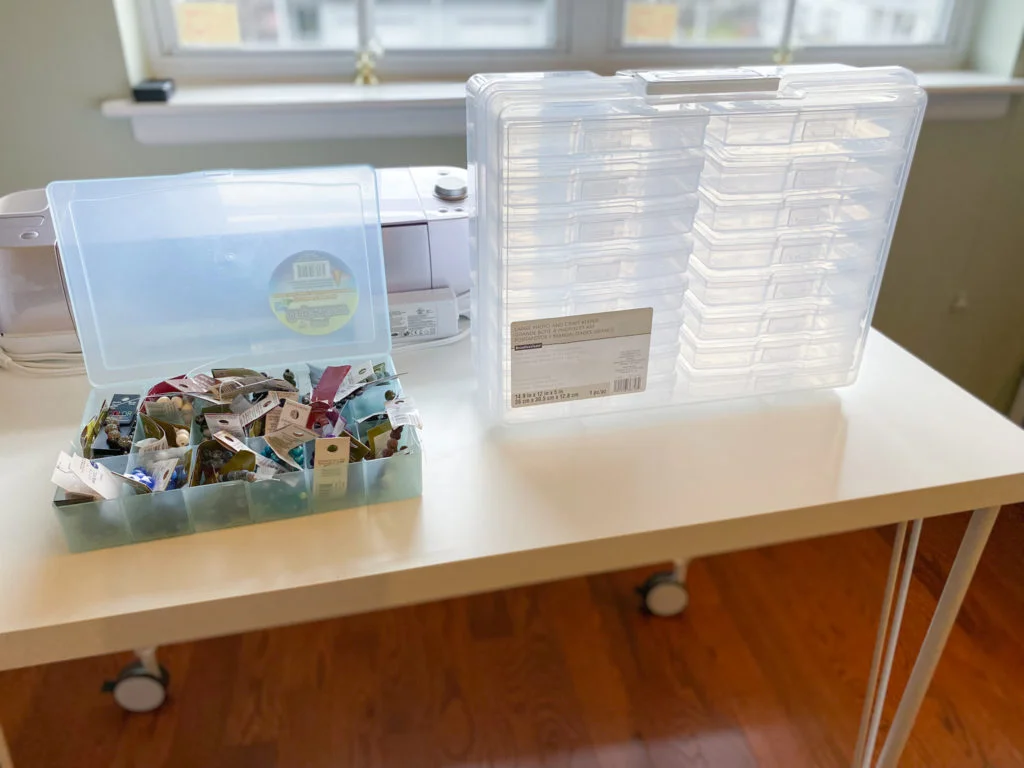
Bonus Tip: Bead Storage
Over the years, I have accumulated an assortment of beads to make mask lanyards and bracelets. To store those, I use an organizer made to store embroidery floss. I then put this along with my jewelry-making supplies into one of the fabric bins.
However, I am outgrowing that organizer. I picked up this photo and craft keeper. It comes with 16 smaller cases inside. It fits both vertically and horizontally within the Kallax cubby. You could even stack two of these on top of each other within one cubby. Michael’s often has them on sale at a great price, but you can also get similar ones through Amazon.
Going Back for More
About a year later, I decided to add more Kallax storage to my office/craft room. This time, I wanted cubbies within easy reach of my desk. I needed to store binders and materials I use for blogging, as well as my teaching materials.
You see, I originally bought the 4×4 unit in 2019. Back then, I used the room one afternoon a week for lesson planning and the rest of the time for crafting. Then, I started this blog in the winter of 2020 and accumulated lots of papers in binders, which quickly took over the desk.
In March of 2020, we all know that the world changed drastically, and I had to teach from home. I accumulated even more teacher’s manuals and resources to keep at home. In the event that I need to teach remotely again, I wanted to have adequate storage to keep these books.
I knew that the Ikea Kallax options would be the best bet, not only because they would match the unit on the opposite wall, but I could get a size that would fit between my desk and the adjacent wall. The 2×4 option would be a perfect fit. But by this time, my nephew had moved out of state. So I needed to figure out a way to transport the boxes myself.
I decided to go with two of the 2×2 units and stacked one on top of the other. The boxes for the 2×2 units were definitely more manageable for me to carry on my own. They easily fit in the back of my SUV. The combination of the two units ends up being slightly taller than a 2×4 unit would be because the “roof” and “floor” of each unit are thicker than the interior shelves. If I were putting it on the same wall as the 4×4 unit, the size difference would be noticeable. But since this is actually across the room, it did not make a difference.
Believe it or not, the biggest challenge was getting more of those same fabric bins. The gray diamonds pattern was out of stock at Target for months. I ordered some that looked like blue coral, but that clashed with the green walls. I returned those and got another gray design, but the gray was darker than the gray on my original bins.
Now, since they would not be in the same storage unit as my gray diamond ones, it would not have been the end of the world. I was too busy with school to even take those out of the package for several weeks. Luckily, during that time, the gray diamond ones came back in stock. So I exchanged the unopened ones for the matching set. Yay to having a coordinated room again!
Unintentional Zoom Background
Since the 4×4 unit is directly behind my desk chair, it shows up whenever I do a Zoom or Google Meet from my desktop computer. Over the past couple of years, I have been asked on several occasions by participants at these meetings to tell them more about where I bought the unit. A couple of people were also interested in it for craft supplies. But others wanted it to store individual bins of supplies for their students, toys in their own children’s playrooms, or as a room divider in an open concept space.
It really is a flexible storage unit that is not only functional but attractive. Because of the way they can be stacked, you can customize an arrangement to fit sloped ceilings. They would also be perfect next to a staircase since you could stack a smaller unit on top of a wider unit. Ikea has begun selling a base to put underneath it, to raise it up off the floor a few inches,. This could be useful in a garage or basement. Better yet, the Kallax is infinitely customizable with different bins and baskets, drawers, and doors.
Let me know in the comment section below how you use a cube storage system for your craft or Cricut supply organization.

12 Responses
I love your setup! My craft supply area always looks like a tornado went through. I will try and implement some of these ideas.
My previous system of keeping my craft supplies in bags just wasn’t cutting it anymore. By using vertical space, I freed up so much floor space in the room where I craft. It made me feel so accomplished to find a “home” for each supply.
These are such brilliant tips!! And I absolutely love how you organised your things they look so pleasing to look at. I currently I’m cleaning up my office so will definitely back to these tips.
That’s what I like about this type of cube storage system, because it can be used in a home office, playroom, craft room, living room, etc.
I love the Kallax for storing craft supplies. I hadn’t thought about a rolling table before, I think that’s a great idea for small spaces!
I really love the rolling table because it is the perfect size to fit all the supplies for a craft project. It would even make a great table to use when having guests over for extra seating. Just throw a tablecloth on it and it’s good to go!
I love your craft area! Mine is such a mess…actually, I don’t have a dedicated area so there are pieces all over the place. I will be using some of your fantastic tips to get myself more organized.
I know the feeling! I wish I had taken a “before” picture to show how all of the supplies used to be piled up in bags, so that I couldn’t find anything. It is so much easier with this system.
Your craft area is wonderful!
These are great tips!
I love this! You have inspired me to get busy and clean my art room! Thanks for sharing! XO
It is such a great feeling to get everything into its own little compartment instead of having to sort through bags and boxes whenever I need to find a supply.