Setting up Parent-Teacher Conference appointments was always something that we would do at Back to School Night when we would meet the families in person. But last year, I taught the 100% virtual class and had not met any of the families in person. I looked into ways to set up virtual appointments using some type of online scheduling tool. One suggestion that kept coming up in my research was Calendly. Based on my experience with it so far this year, here is my review of using Calendly to schedule Parent-Teacher Conferences.
[Note: This post was updated in September of 2021 to reflect the new features in Calendly.]
[My blog posts contain affiliate links. These don’t cost you anything, but they allow me to continue running this site and providing free content for my readers. Full disclosure here.]
My Wish List
My school district uses Google for Education products, so we were instructed to conduct our conferences using Google Meet. Therefore, my first criterion for choosing a scheduling tool is that it would generate a Meet code automatically when an appointment is booked.
Next, I wanted to make sure the tool was user-friendly. I did not want it to require the families to have to sign up for an account with the service. Nor did I want it to have restrictions that the person invited would need to have an email account with certain providers in order for it to work.
Third, I wanted a service that would only show parents the remaining appointment time slots that were not already booked. That way, I would not end up with double-booked time slots.
Finally, I was hoping for a service that would be free. Since I would only be using it for this one batch of conferences per year, it would not make sense to sign up for a paid subscription service.
Based on recommendations in a Facebook group for teachers to which I belong, I saw that several people mentioned that they had used Calendly in the past and how it worked well for setting up appointments with students’ parents. I figured it was worth looking into.
As I looked over its features, I was particularly interested to see that Calendly can generate reminder emails and even text messages to the attendees. This would definitely be helpful since the parents book the conferences in September, but the appointments themselves are in October, November, and December. So this is a great perk of using Calendly to schedule parent-teacher conferences. You can check off that you want reminders sent a certain number of days or hours before the appointment. Calendly will then automatically send them. However, the reminder feature is only available with a paid subscription. More on that later.
Setting Up Calendly
So I decided to take the leap of faith and set up a free account with Calendly. Registration is fairly easy. You can link it to a Google Calendar, so that way as parents book appointments, they are automatically added to your calendar, along with the individual Meet link. It can also be linked to Outlook, Office 365, or iCloud calendars. The free account allows you to link it to one of your calendars, which is all I needed.
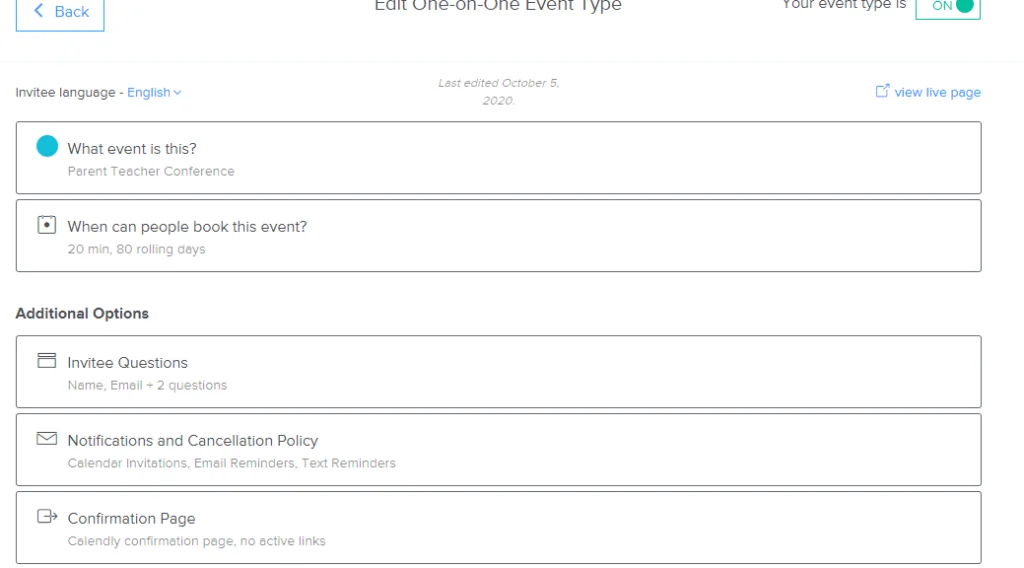
Setting up appointment time slots took a little bit of time, but was easy to do. Calendly offers templates for 15-minute, 30-minute, or 60-minute appointments. But since our conferences are 20 minutes long, I created a new event type. I know that some teachers prefer to keep the 15-minute appointment time slot and add a 5-minute “padding” before the next appointment just in case they get behind schedule. There is a way to set that up in Calendly as well.
Once you set up the event type, you are given several categories that you can customize to meet your needs.
Setting Up Virtual Meetings
In the “What event is this?” category, you can give it a title and location. If the meeting is virtual, you can change the location to Google Meet, Zoom, Microsoft Teams, GoTo Meeting, or custom options. This is a huge timesaver because it will generate the links for each individual meeting as the invitee books the appointment.
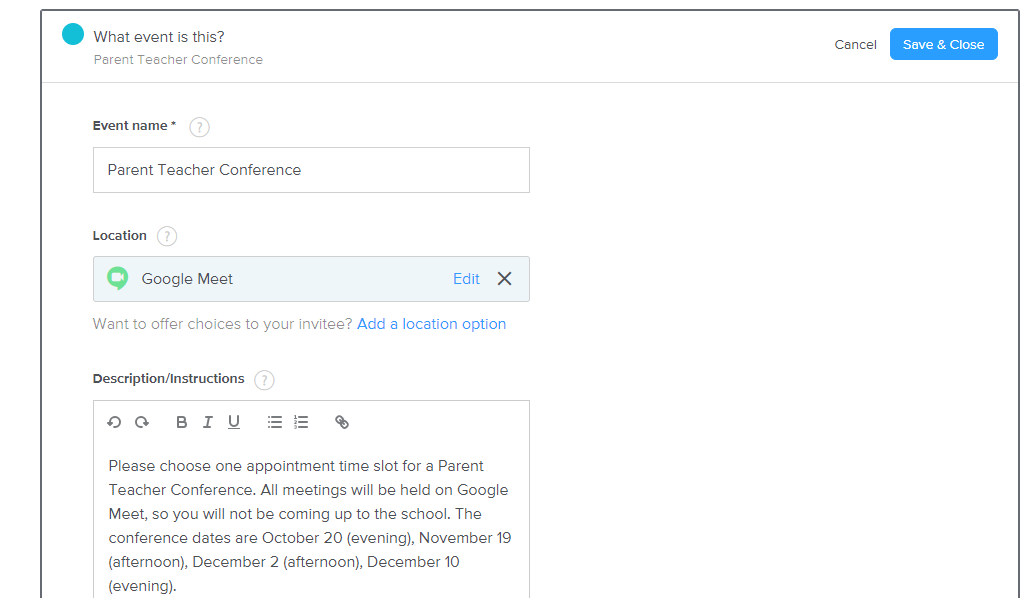
You can then type a description or instructions to the invitees to explain what they need to do to book an appointment. I said “Please choose one appointment time slot for a Parent-Teacher Conference. All meetings will be held on Google Meet, so you will not be coming up to the school. The conference dates are October xx (evening), November yy (afternoon), December zz (afternoon), December bb (evening).”
It will automatically create a URL that you can copy and paste in an email to parents, or into whatever app you use to send messages to parents. You can customize the URL if you want. You can also choose the color scheme.
Creating Appointment Time Slots
The next category is “When can people book this event?” This step took the longest, but only because I had to set up 4 specific dates spread out over two months. You choose your event duration from the preset choices or customize the length. I created a 20-minute event duration.
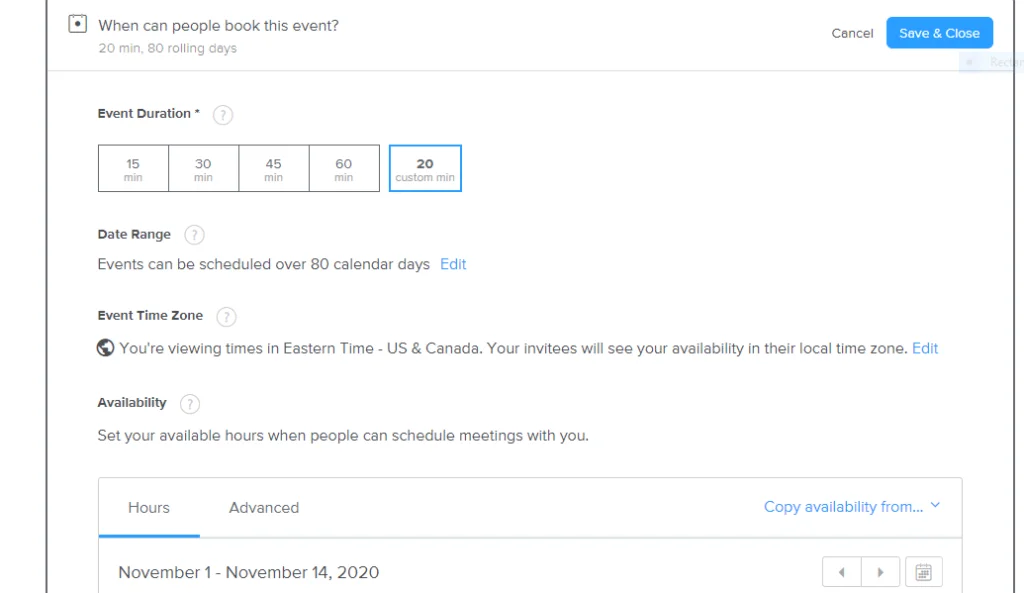
For the date range, I had to choose “up to 80 days” because we were booking possibly two and a half months into the future. This automatically created timeslots every day for 80 days, when I only needed them on 4 specific dates. But it was easy to delete the extra days. Just click on a date, and then click that you want to edit all. Then click the trash can to delete all dates.
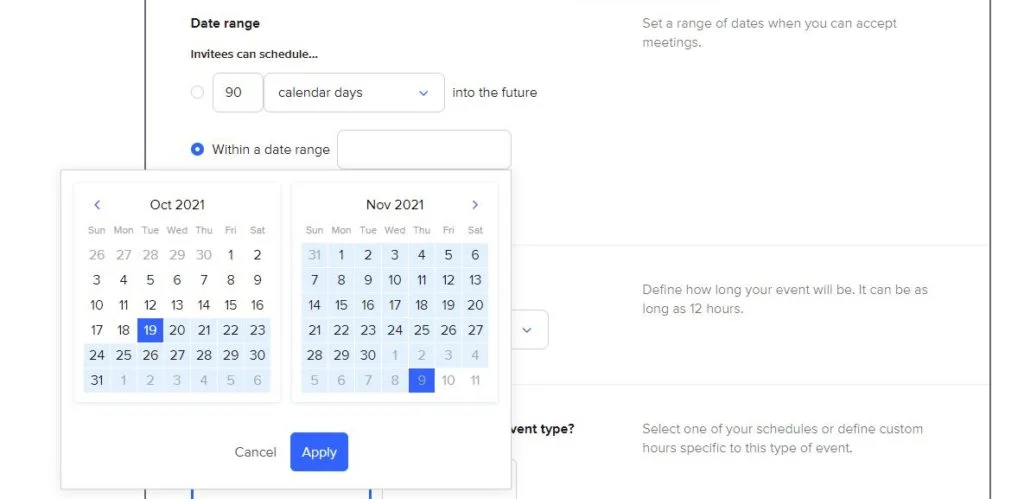
You then can click on individual dates to set the start and end times for that date. For the end time, put the time that you want your last meeting to END. For example, I wanted my meetings to end at 3:30 p.m. At first, I thought that meant I had to say that the duration had to end at 3:10. However, that meant the last available appointment it would offer was 2:50 p.m. Just double-check that so that you don’t inadvertently leave out the last appointment slot as a choice.
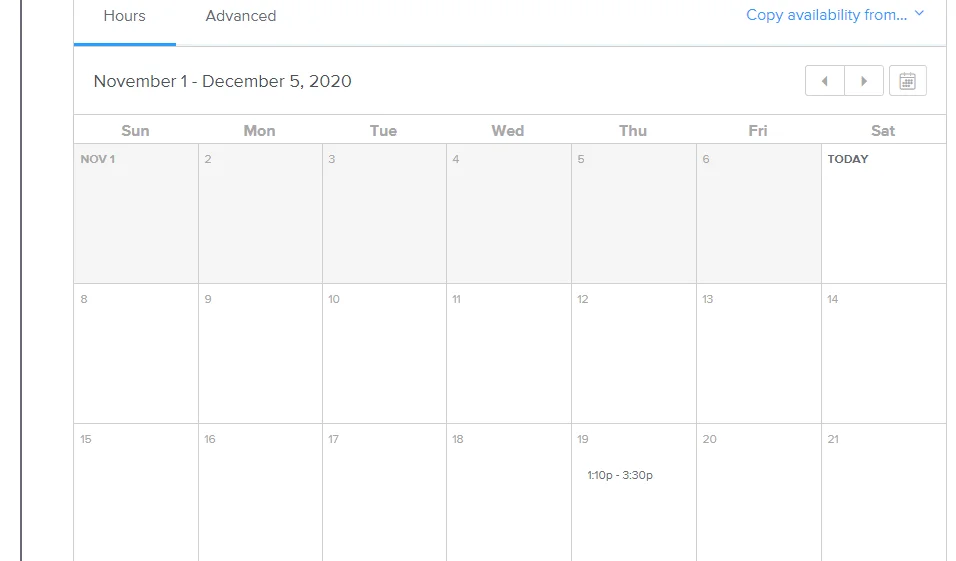
Below, it shows that on November 19, there are appointments beginning at 1:10 pm and lasting until 3:30 pm.
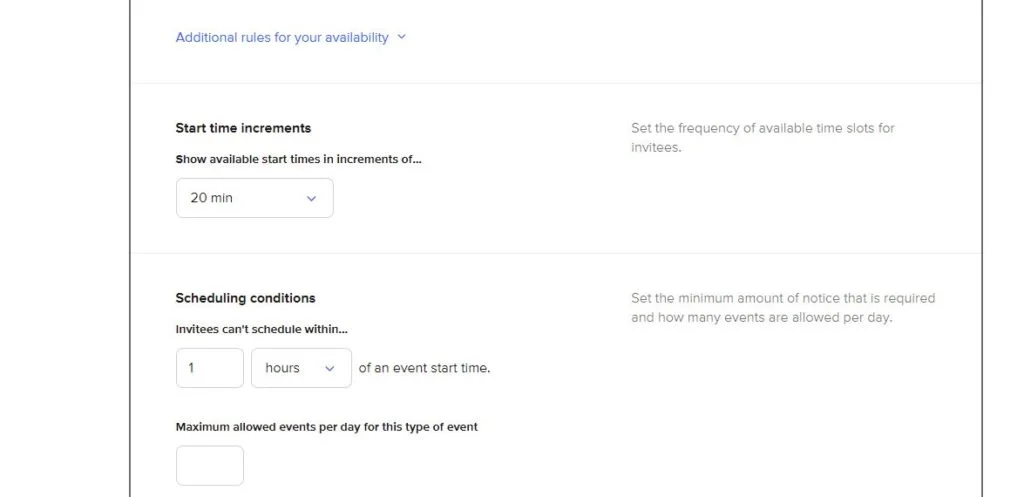
If you click on the “Additional rules” option, you can then specify the increments of time between appointment time slots.
Sign Up Page for Invitees
Next, you can customize the invitee questions, in terms of what information is required of the invitee. I asked for their name, email, and child’s name. I also added a Yes/No question asking if they would like us to give their email address to the PTA to be added to their mailing list.
The next category is the Notifications and Cancellation Policy. This is where the really cool features are! You can set it so that the event is automatically added to your calendar when someone books an appointment. The invitee will then automatically get a confirmation email with the link to the meeting. The email is a generic template. But if you upgrade to the paid version, you can customize what that email says.
One thing to note is that if you choose the option for it to automatically add the appointment to your calendar, the name of the meeting will be the invitee’s name and your name. Since many of my students have different last names than their parents, I ended up going into my calendar to manually change the name of the meeting to be the student’s name.
Reminders
The feature I was most happy about was Calendly’s ability to automatically send email and text reminders to the parents. However, it turns out this is only part of the free plan for the first couple of weeks. That worked out fine for the first meeting date. I was able to tell it to send an email 24 hours before, with the Meet link in it, as well as a text message 1 hour before the meeting. (Invitees are given the option to sign up for text reminders.)
Since it has now been more than two weeks since I signed up, this reminder feature is no longer an option. I would need to upgrade to a Premium plan, for $8 per month if you pay annually (or $10 per month if you pay monthly), to activate this option again. Instead, I pulled up the email that I received from Calendly when the parent first booked the appointment. I then forwarded that to the parent the day before the appointment. That way, they were able to find the Meet link more quickly than searching through weeks of emails. If you want to send a text reminder, you would need to be on the Professional plan, which is $12 per month if you pay annually, or $15 per month if you pay monthly.
You could create a customized cancellation policy if you have a paid plan. However, even on the free plan, if a parent books an appointment and then needs to change it, they can do so by clicking a link in their confirmation email. You will then receive an email that they changed their appointment. Their original appointment will show up as a choice on the calendar for anyone else who still needs an appointment.
There are also options to customize a confirmation page or to set up a payment page. I was fine with the invitees getting the generic confirmation message. Obviously, I would not need the payment option for Parent-Teacher conferences. So I did not change anything in these last two categories.
Checking Out the Invitee’s View
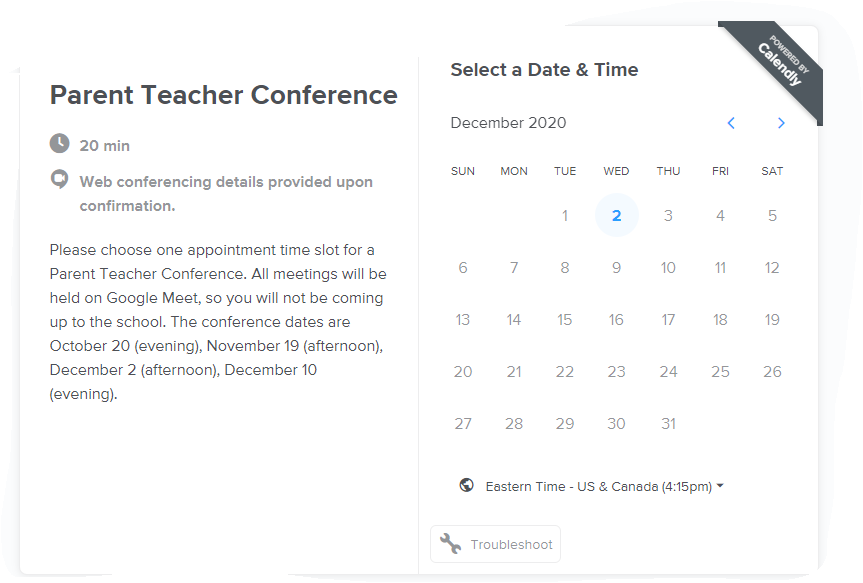
All of these steps took me maybe a total of 10 minutes to set up. Throughout the setup process, there is a link on the top right to view a live page, so you can see what it would look like on the invitees’ side. If you look closely at the sample below, you will see that December 2 is blue. This is because it still has some remaining time slots left. I also have appointments on December 10, but since those are completely booked, it does not even show that date as an option to the parents anymore.
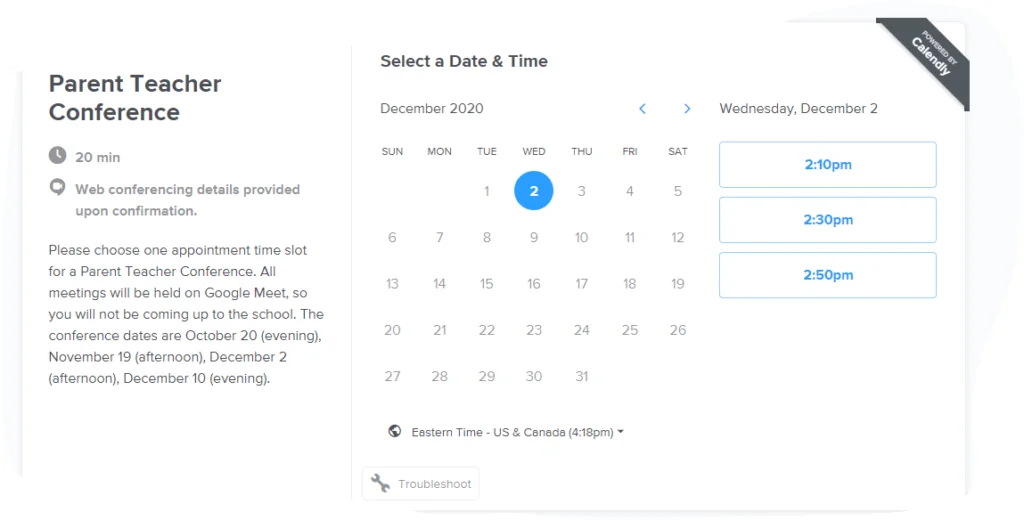
After the invitee clicks on the blue date, it will then show them the remaining available time slots. When they click on a time slot, it will ask them to confirm. It will then bring them to the page where they type their name, email, etc.
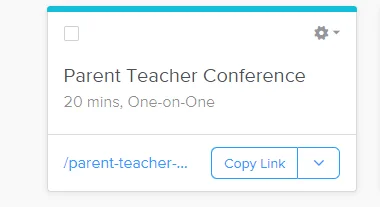
Once you have finished the setup, you go back to your homepage, where you can then copy the link. Insert this link in an email or whatever parent communication app that you use.
After I sent emails to my students’ parents using our School Messenger system, it was just a matter of minutes before I started getting emails from Calendly telling me that appointments have been booked. The emails contained the Meet links for me as well. I then forwarded these emails to the other teachers who attend certain meetings, so that they could add them to their calendars.
I did not set up multiple teachers within Calendly, because then all of those teachers would be booked to attend every appointment, whether they work with that student or not. The paid plans offer a team scheduling feature.
But . . . Did it Work?
I held my breath as I opened the Google Meet for the first Parent-Teacher Conference appointment. I was thinking that maybe the parents would not realize how to access the Meet. Or, perhaps they would have lost track of time. But, lo and behold, five out of the six families attended their meetings that first night. I sent the Calendly invitation link again to the parent who did not show up. She promptly signed up for one of the remaining appointments at a later date.
So overall, I am very pleased with Calendly. Just the fact that it created separate Meet links for each family and then automatically added the links to my calendar was such a time-saver.
In future years, even if our conferences will be in person, I would seriously consider using Calendly. Parents are easily able to see which time slots are available. This would avoid the situation of when a parent requests a conference on a day or time that is not even one of the designated available time slots. It also would allow them the ability to easily reschedule an appointment simply by clicking the link in their confirmation email and choosing another time slot.
Pros vs. Cons of Using Calendly to Schedule Parent-Teacher Conferences
| Pros | Cons |
| * Automatically creates Meet links * Customizable length of meetings * Easy to copy & paste a link into email * Simple interface for invitees *Instantly receive an email when invitee books an appointment * Can automatically add meeting and Meet link to a calendar * Invitees can easily reschedule meetings without having to contact you | * Email & text reminders only available for 14 days from date of sign-up on the free plan. * Must upgrade to a paid plan to offer the option to schedule with multiple teachers on a team |
Therefore, I feel that using Calendly to schedule parent-teacher conferences is definitely worth it. While it takes a few minutes to set it up, it saves a tremendous amount of time and avoids the headaches of double-booked appointments. It also makes it easy for parents to reschedule appointments on their own.
If you would like a survey that you can send to your student’s parents ahead of time to learn what goals and concerns they have, check out my Back to School Surveys for Students and Parents.



One Response
As a fellow teacher, I am always looking for practical ways to stay organized. I heard people talk about Calendly, but never used it myself. Now I’m definitely going to try it out. Thanks for the info!