
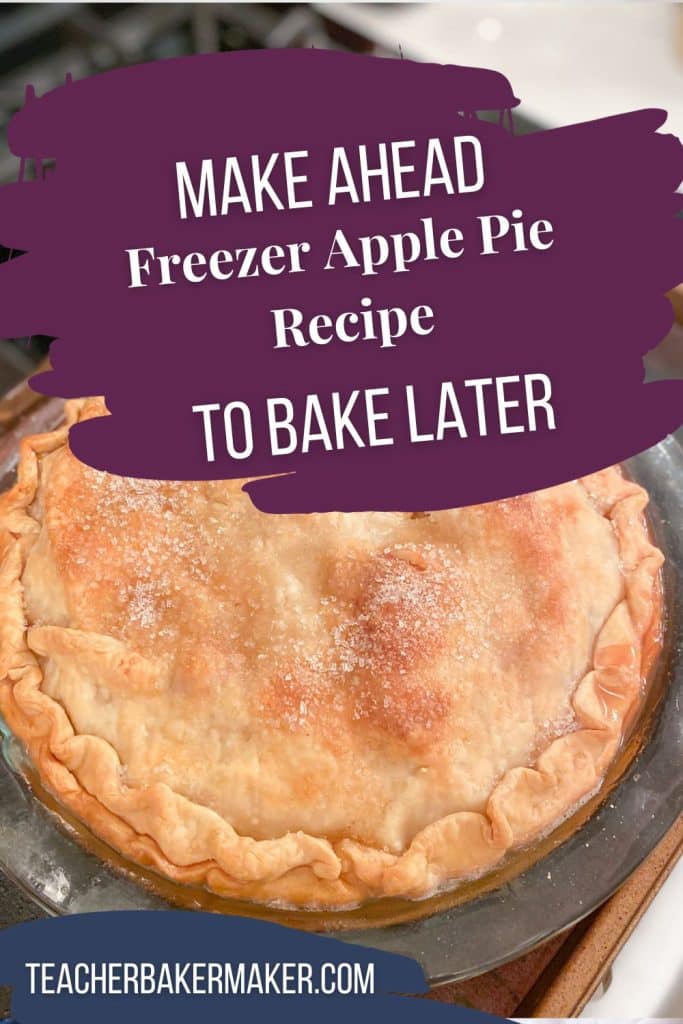
Are you responsible for bringing a dessert to Thanksgiving dinner? Do you want to impress your guests with a homemade dessert, but are short on time the day of the special occasion? Look no further than my foolproof frozen apple pie recipe. With the convenience of freezing and then baking later, you can enjoy a fresh, warm apple pie without the last-minute hassle. In this comprehensive guide, I will take you through the steps of preparing and freezing this delicious dessert, ensuring that your contribution to the dessert table stands out.
Why Choose to Freeze an Apple Pie Before Baking?
Preparing for Special Occasions
When it comes to hosting a special event, you have a lot on your plate – literally! With so many dishes to prepare, having a make-ahead dessert like a frozen apple pie can be a lifesaver. You can assemble it days or even weeks in advance, allowing you to focus on other aspects of your gathering.
Even if you are just bringing a dessert to someone else’s home, making a homemade apple pie on the day of the event might not be feasible. If you are like me and work full time, trying to assemble and bake a pie the day before an event can be a race against the clock.
If you have space in your freezer, you can prepare more than one of these pies to get you through the holiday season. Need one for Friendsgiving and another for your family dinner on Thanksgiving day? Having a potluck at work in December, and then bringing a dessert to a Christmas party? Then set up an assembly line and assemble several pies on a relatively quiet day. Pop them in the freezer until a day or two before the event.
By prepping and assembling the pie days or even weeks in advance, you can then sit back until a few hours before dinner. That’s when you can back the thawed pie, Trust me, if you show up with a warm apple pie, the guests will want to eat dessert first!
Flavors that Develop Over Time
One of the hidden advantages of freezing an apple pie is how the flavors intensify during the freezing process. The filling melds together, and the spices infuse the apples, resulting in a pie that’s bursting with deliciousness when you finally bake it.
Gathering Your Ingredients
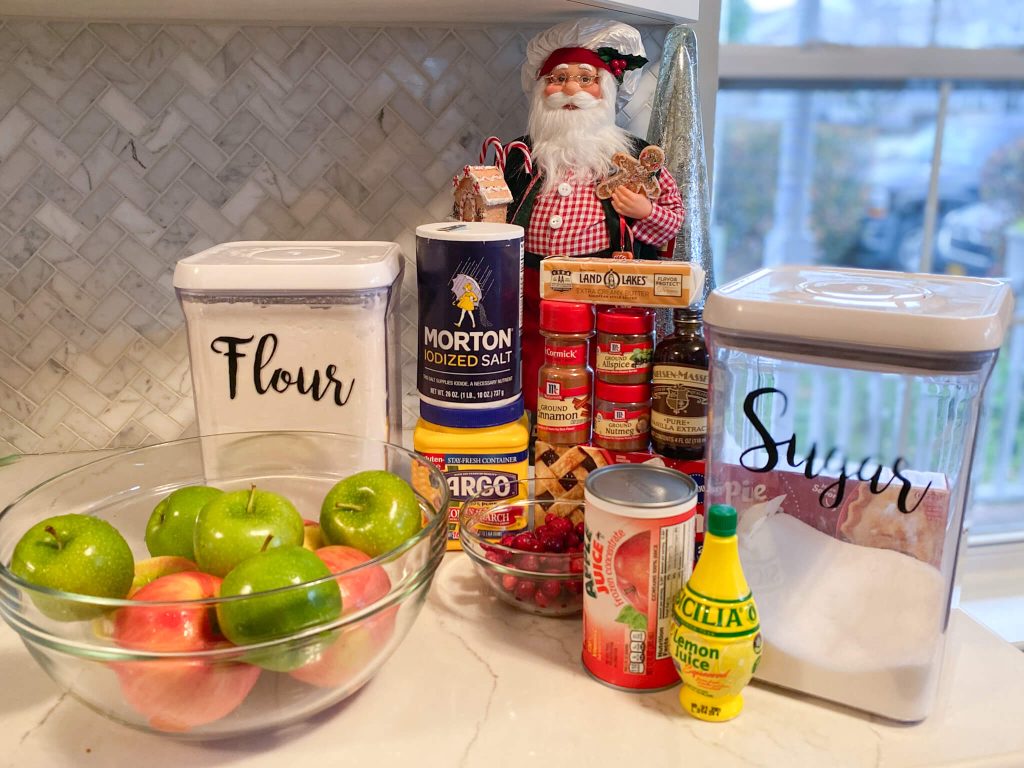
Selecting the Perfect Apples
For a fantastic apple pie, you’ll want to choose the right apples. I like to use a combination of tart green Granny Smith apples with sweet Honeycrisp apples. These apples hold their shape well during baking, ensuring a satisfying texture. These two types of apples are typically available in any grocery store.
Essential Pie Ingredients
In addition to apples, gather your sugar, spices (cinnamon, nutmeg, allspice, and salt), lemon juice, and a bit of flour and cornstarch to thicken the filling. What makes this recipe so delicious is the addition of boiled apple cider or apple juice concentrate. You can find apple juice concentrate in the frozen fruit section of your grocery store. Don’t forget the pie crusts, either – you can use store-bought crusts for simplicity or make your own if you’re feeling adventurous.
[My blog posts contain affiliate links. These don’t cost you anything, but they allow me to continue running this site and providing free content for my readers. Full disclosure here.]
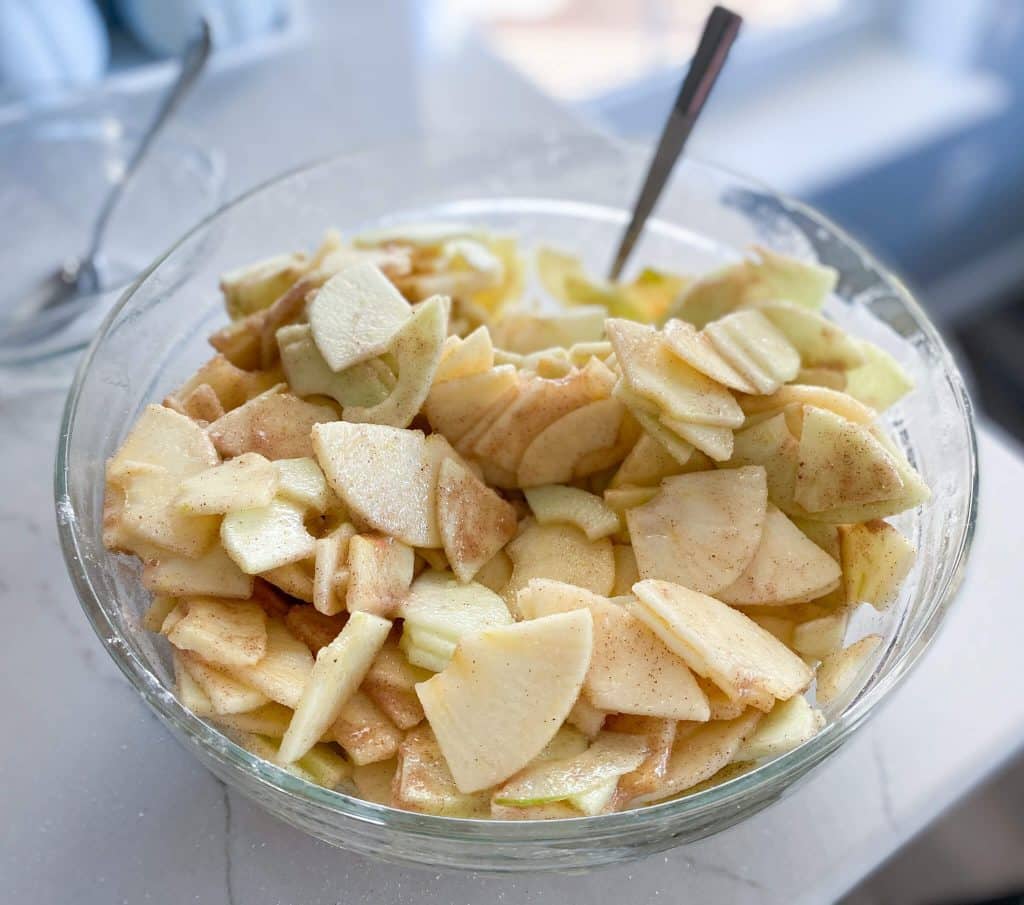
Preparing the Apple Filling
Achieving the Perfect Filling Consistency
Begin by peeling, coring, and slicing your apples uniformly. This ensures even cooking and a slightly firm bite in your finished pie. I use my KitchenAid Spiralizer, which peels, cores, and slices the apples all in one step. I take the coiled apple and slice it in half from top to bottom, making a stack of half circles. Mix them with the lemon juice. In another bowl, combine the sugar, flour, cornstarch, salt, cinnamon, nutmeg and allspice. Then stir the dry ingredients into the apple mixture. If you want to use fresh or dried cranberries, toss them in the mixture.
Next, stir in the vanilla extract and apple juice concentrate or boiled cider. Your kitchen will already smell amazing by this point!
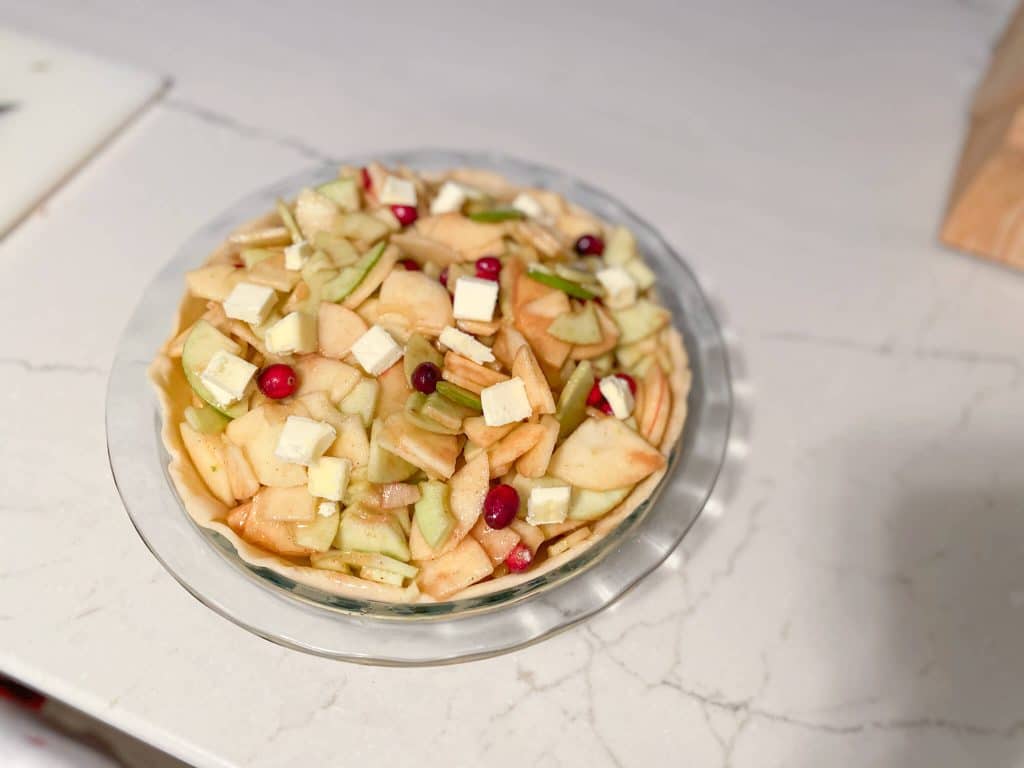
Assembling Your Pie
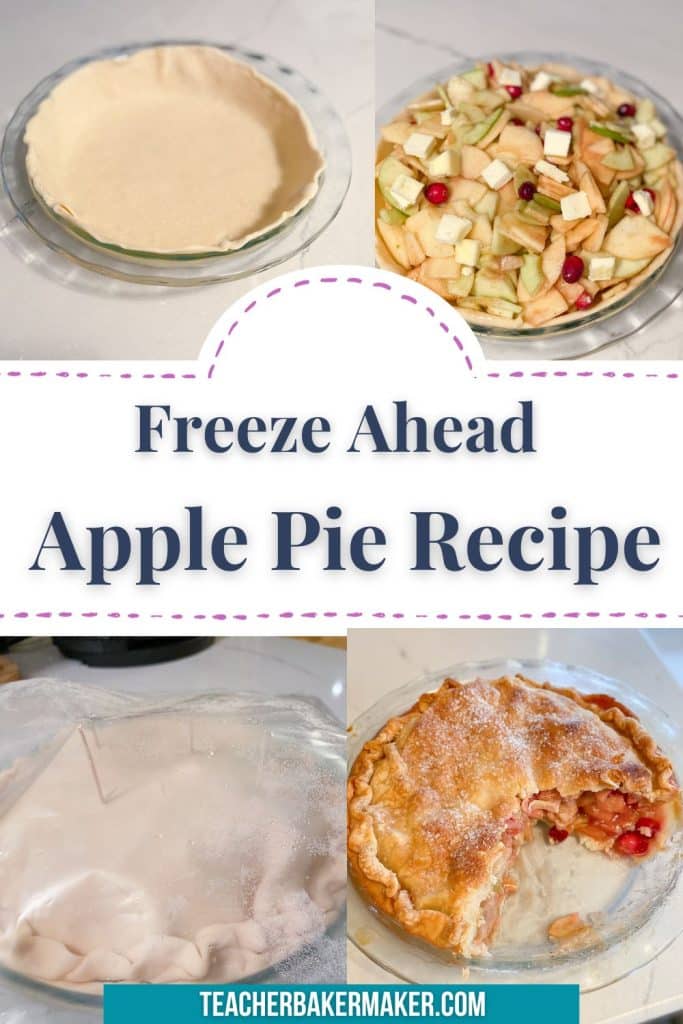
Use either butter or baking spray to lightly coat a pie dish. Unroll one of your premade pie crusts and line your pie dish. I use a deep dish pie plate, so I usually have to stretch the dough a little so it reaches the top edge of the dish.

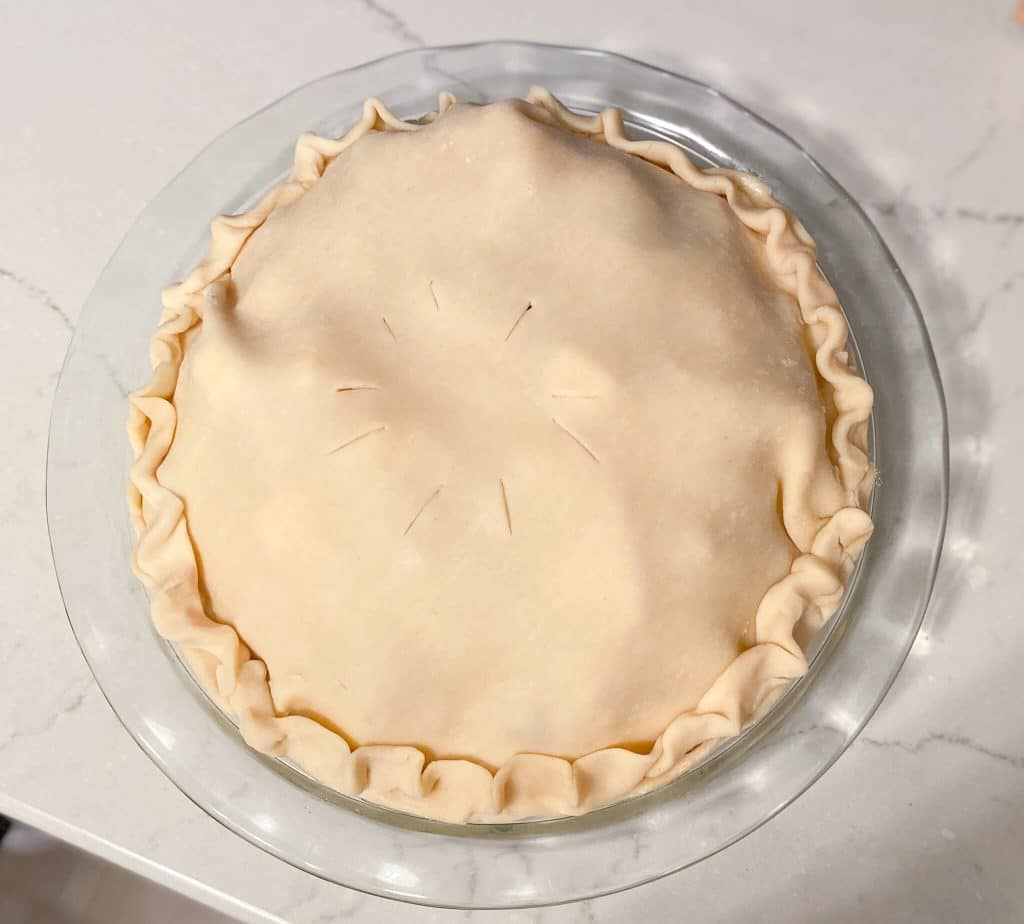
Add the apple filling, creating a gently mounded center. Don’t forget to dot the top with 2 tablespoons of diced butter for that extra touch of richness. Place the second pie crust on top, and crimp the edges to seal.
Use a sharp knife to cut at least 5 vent holes around the center of the top crust.
Freezing Your Apple Pie
The Proper Storage
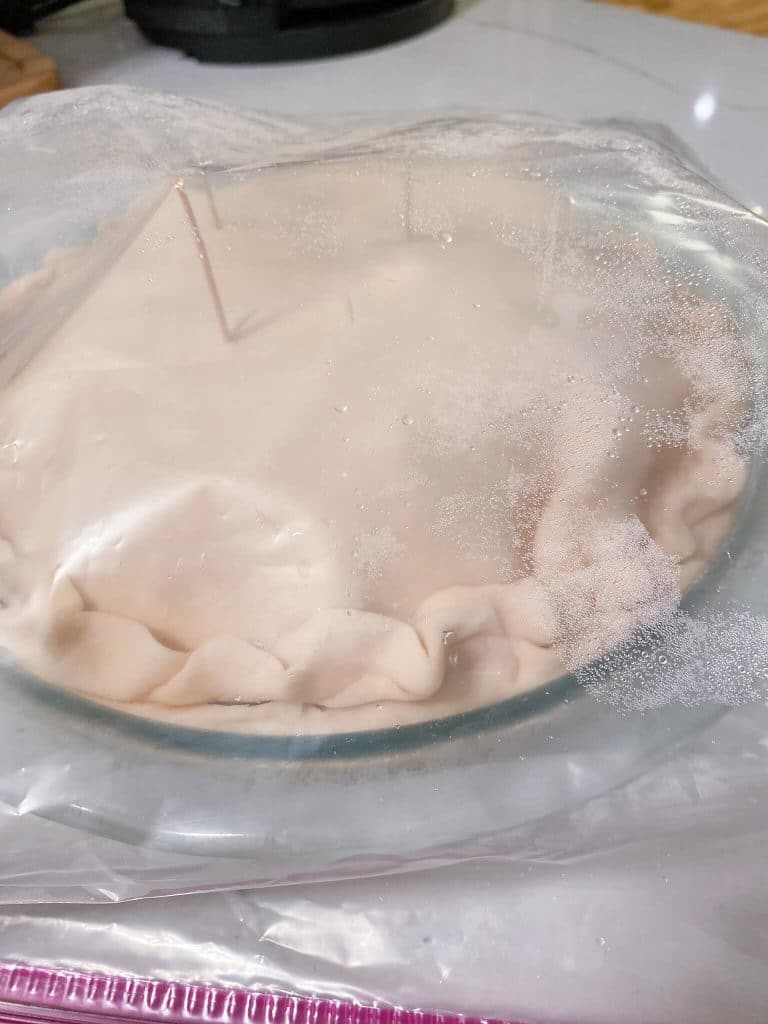
Before freezing, it’s essential to protect your apple pie. Slide the assembled pie into a 2.5-gallon freezer bag. Make sure you are using a freezer bag and not just a regular zippered storage bag, to prevent freezer burn. Make sure to label it with the date to keep track of freshness.
Timing Matters
While apple pies can be frozen for up to several months, it’s best to bake them within the first month for optimal taste. This allows you to plan well in advance for your special occasion.
Baking Your Frozen Apple Pie
Thawing the Pie
You will appreciate the fact that you used this frozen apple pie recipe to pre-assemble the pie, as the next few steps are, well, as easy as pie! The day before you want to bake the pie, take it out of the freezer. Slide it out of the bag. Then stick about 3 toothpicks into the top crust, standing up straight. Then slide the pie back into the zippered bag. The toothpicks will prevent the bag from sticking to the crust as it thaws. Put the bag in the refrigerator to thaw for about 24 hours.
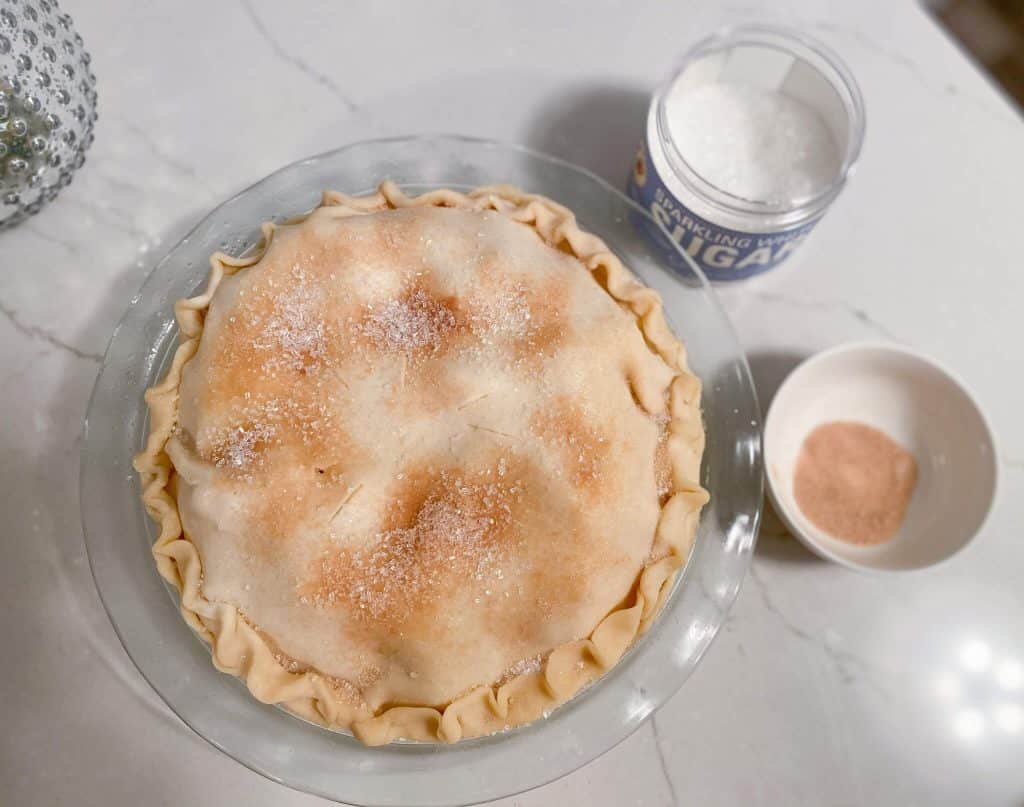
When you are ready to bake the pie, preheat the oven to 425 degrees F. While it is preheating, mix together 1 tablespoon of sugar and ½ teaspoon of cinnamon with a pinch of nutmeg. Spray or brush the top crust lightly with water, then sprinkle with the sugar mixture. For a sparkly finish, you can then sprinkle coarse sugar on top of that.
If the edges of the crust are damaged, you can reshape the flutes before it goes in the oven.
Put the pie plate onto a baking sheet that is lined with parchment paper or a silicone baking mat. This will catch any drips as the filling bubbles up in the oven. Bake the pie for 20 minutes at 425 degrees F. Then reduce the oven temperature to 375 degrees, and bake for another 40 minutes.
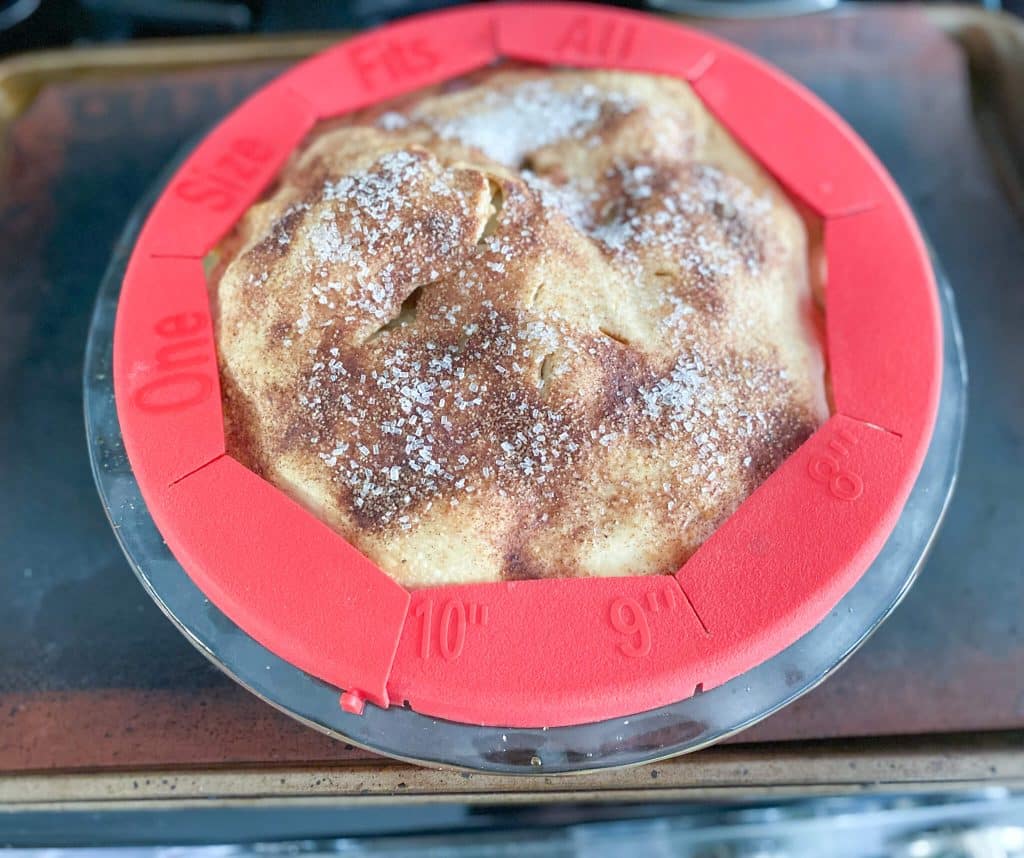
When there are about 30 minutes left on the timer, check the crust. If the edges look like they are browning, put a pie shield over them, or cover them with strips of aluminum foil so they don’t get burnt.
The Golden Brown Finish
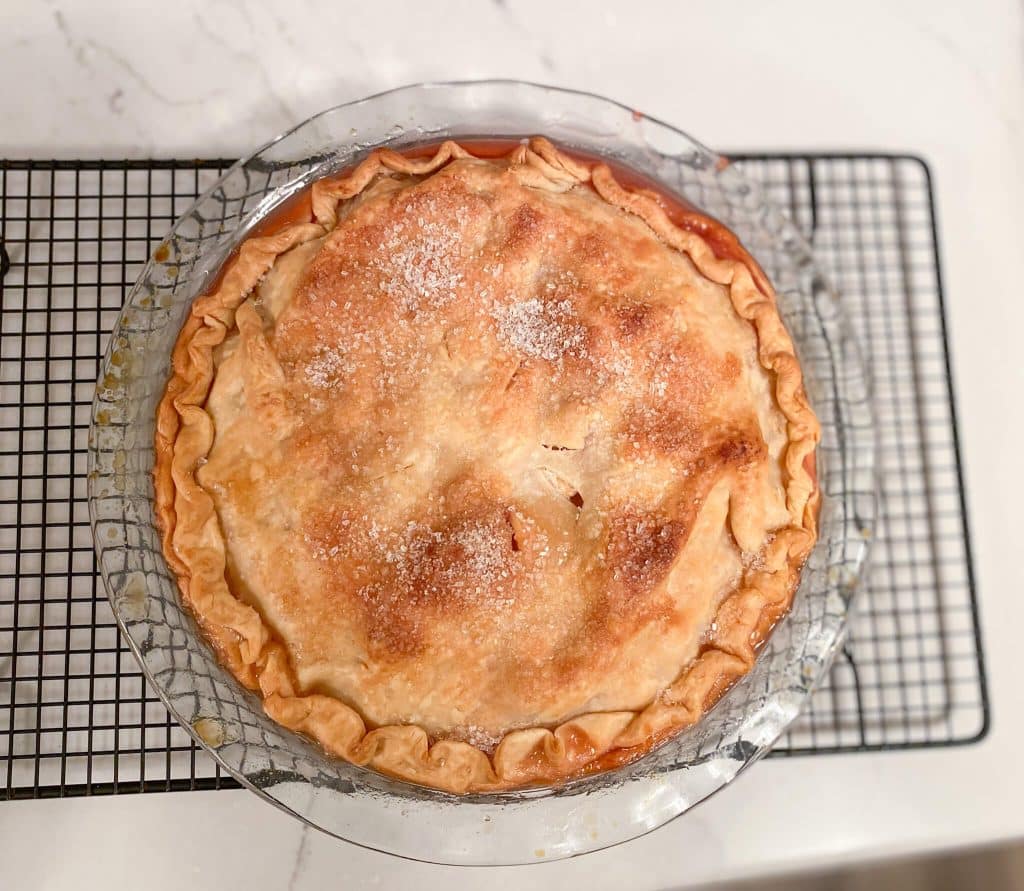
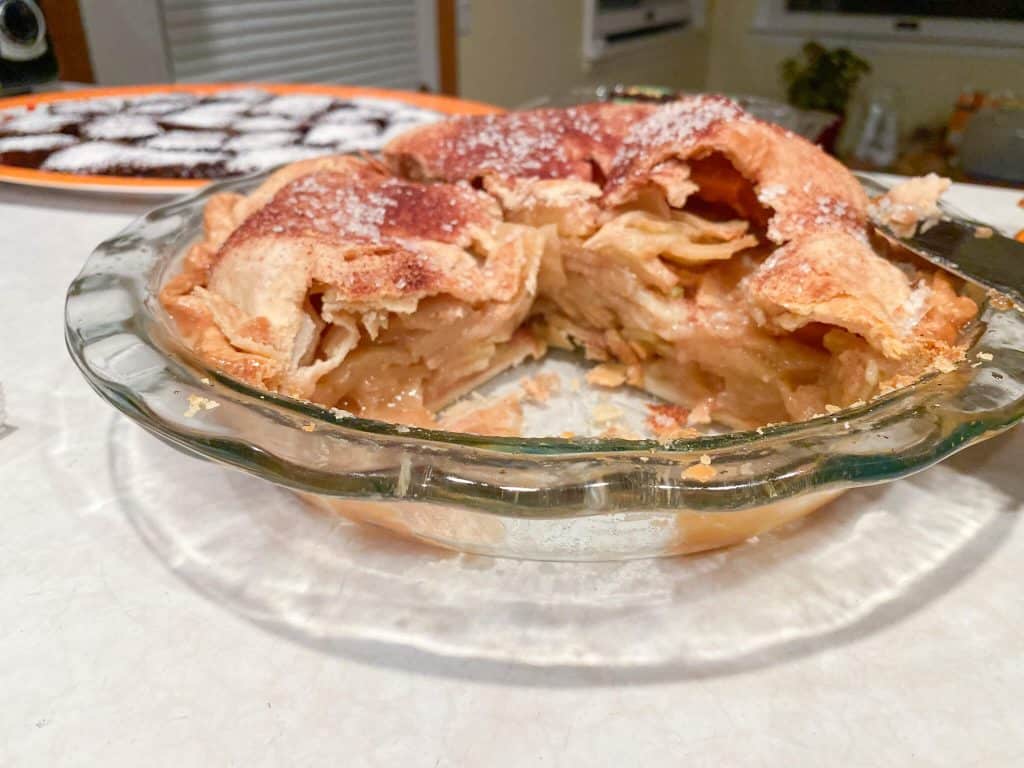
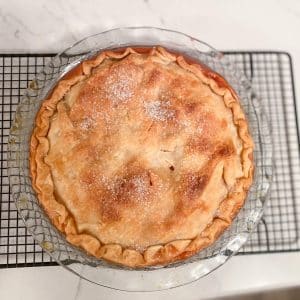
As your pie bakes, your kitchen will be filled with the tantalizing aroma of apples and spices. The key is to bake until the crust is golden brown and the filling is bubbling.
Serving and Enjoying
Let It Cool
Resist the temptation to dive into your freshly baked pie immediately. If it is cut when it is still warm, the filling will not have thickened completely and will be runny. I bake my pie the night before the event and then store it in an airtight cake carrier at room temperature.
Transporting Your Pie
Pies can be heavy, especially if baked in a glass pie dish. Therefore, it is important to use a secure carrier, held by the bottom rather than by the handle. I use my trusty Tupperware cake carrier. Since the glass dish would slide around inside of a carrier, I put a silicone jar opener under the dish.
To keep the carrier from sliding around in my car, I strap it onto my Stupid Car Tray. This car seat for food is an item you probably never knew existed, yet comes in handy whenever you have to transport pans, trays, or even takeout drink carriers.
Accompaniments and Garnishes
Enhance the experience by serving your apple pie with a scoop of vanilla ice cream or a dollop of freshly whipped cream.
Conclusion
With this frozen apple pie recipe, you have the perfect solution for special occasions. The ability to prepare ahead of time, lock in flavors, and enjoy a homemade dessert with minimal effort makes this a must-try for any home cook. Say goodbye to the last-minute baking time crunch and hello to stress-free celebrations. Try my recipe to make your special occasions even more memorable.
Make Ahead Apple Pie
Equipment
- 9 inch pie pan
Ingredients
- 4 cups honeycrisp apples cored and sliced
- 4 cups granny smith apples cored and sliced
- 2 tbsp lemon juice fresh or bottled
- ¾ cup sugar
- 4 tbsp all purpose flour (Reduce to 2 tbsp if not freezing pie before baking.)
- 2 tbsp cornstarch
- ¼ tsp salt
- 1 tsp ground cinnamon
- ¼ tsp ground nutmeg
- ¼ tsp allspice
- 2 tsp vanilla extract
- 1 cup fresh or dried cranberries (optional)
- ¼ cup apple juice concentrate undiluted
- 2 tbsp butter plus more to grease the pie pan
- 2 pie crusts
Crust Seasoning
- 1 tbsp granulated sugar
- ½ tsp ground cinnamon
- 1 pinch ground nutmeg
- 1-2 tbsp coarse sparkling sugar
Instructions
Assembling the Pie (2 days to 3 months ahead of baking)
- Peel, core, and slice the apples into consistent sized pieces. (If you have a stand mixer, the spiralizer attachment is perfect for this.) Toss them in a large bowl with the lemon juice to prevent browning.4 cups honeycrisp apples, 4 cups granny smith apples, 2 tbsp lemon juice
- In a small bowl, stir together the sugar, flour, cornstarch, salt, cinnamon, nutmeg and allspice. Add the dry ingredients to the apple mixture and stir to coat the apples evenly.¾ cup sugar, 4 tbsp all purpose flour, 2 tbsp cornstarch, ¼ tsp salt, 1 tsp ground cinnamon, ¼ tsp ground nutmeg, ¼ tsp allspice
- Add the vanilla extract and the fresh or dried cranberries to the apple mixture, and stir to combine.2 tsp vanilla extract, 1 cup fresh or dried cranberries
- Stir the apple juice concentrate (thawed) into the apple mixture.¼ cup apple juice concentrate
- Butter a 9 inch pie pan that is at least 2 inches deep.
- Lay one crust into the bottom of the pie pan. Gently press it into the bottom edges and up the sides of the pan so that it extends slightly onto the rim.2 pie crusts
- Spoon the apple mixture into the pan.
- Dice 2 tablespoons of butter into small pieces. Scatter the pieces over the top of the apples.2 tbsp butter
- Place the second crust on top. Crimp the edges of the top and bottom crusts together. Cut 3-5 vent holes around the center of the top crust.
- Slide the pie pan into a 2.5 gallon plastic bag and seal it shut. Place in the freezer for up to 3 months.
Thawing the Frozen Pie (1 day before baking)
- 24 hours before you want to bake the pie, take it out of the freezer. Remove it from the bag. Place 3 toothpicks straight down into the top crust. These will help prevent the bag from sticking to the crust as it thaws. Then return the pie to the plastic bag. Put the pie in the refrigerator for at least 24 hours.
Baking the Pie
- Preheat the oven to 425℉.
- While the oven is preheating, combine 1 tablespoon of sugar, ½ tsp of cinnamon and a pinch of ground nutmeg in a small bowl.1 tbsp granulated sugar, ½ tsp ground cinnamon, 1 pinch ground nutmeg
- Remove the pie from the plastic bag. Lightly spray or brush the top crust with water. Sprinkle the crust with the sugar mixture.
- Sprinkle the 2 tablespoons of coarse sparkling sugar on top of the crust.1-2 tbsp coarse sparkling sugar
- Put the pie on a parchment lined baking sheet to catch any drips.
- Bake the pie for 20 minutes at 425℉.
- Reduce the oven to 375℉. Continue to bake for an additional 40 minutes.
- When there are 30 minutes left on the timer, cover the edges with either strips of foil or a pie shield to prevent over-browning.
- The pie is done when the crust is golden brown and the filling is bubbling. Remove from oven and let it cool on a cooling rack completely.
Notes
- If you are baking the pie right away instead of freezing it, only use 2 tablespoons of flour in the apple mixture.
- The fresh or dried cranberries are optional, but highly recommended. Ocean Spray makes a variety of flavors of craisins that can be used with this recipe.
- If you can’t find coarse sparkling sugar, you can omit it.
- Apple pies need to cool completely before slicing. Otherwise, the filling might be runny since it needs to cool in order to set.
- The baked pie can be stored at room temperature in an airtight container.
- You can use homemade pie crust with this technique.
- Apple juice concentrate can be found in the frozen fruit section of the grocery store, in a can.
- When I make this for Thanksgiving, I take it out of the freezer on Tuesday evening and bake it on Wednesday evening. If you have time to bake it on Thanksgiving morning, then you can take it out of the freezer on Wednesday morning.
FAQ: Frozen Apple Pie for Special Occasions
Ideally, you’ll want a combination of tart and sweet apples for a balanced flavor. Varieties like Granny Smith (tart) and Honeycrisp (sweet) work well. These apples hold their shape during baking, ensuring your pie has the perfect texture. However, you can experiment with other apple varieties to suit your taste.
In addition to apples, you’ll need sugar, spices (cinnamon, nutmeg, allspice, and salt), lemon juice, flour, cornstarch, and boiled apple cider or apple juice concentrate for extra flavor. You can find apple juice concentrate in the frozen fruit section of your grocery store.
The choice is yours! You can use store-bought pie crusts for convenience, or if you’re feeling adventurous, make your own from scratch. Homemade crusts can add a personal touch to your pie, but store-bought options work perfectly well. However, do not use any crust that has been previously frozen. In general, you never want to refreeze something that has already been frozen once before.
You can freeze your apple pie for several months, but for the best taste and texture, it’s recommended to bake it within the first month. This allows you to plan well ahead for your special occasion without compromising on quality. When I make this frozen apple pie recipe for Thanksgiving, I typically assemble the pie a couple of weeks before and then start defrosting it two days before Thanksgiving.
To thaw your frozen apple pie, remove it from the freezer, and take it out of the bag. The toothpick trick (placing toothpicks into the crust to prevent sticking) is a great way to maintain the pie’s appearance as it thaws. Put it back into the bag, and place it in the refrigerator. Allow it to thaw for about 24 hours.
Absolutely! Get creative with your apple pie by adding extras like dried cranberries, raisins, or even chopped nuts to the filling mixture. Experimenting with different spices or adding a touch of vanilla extract can also give your pie a unique twist.
Yes, you can adapt this recipe to accommodate various dietary preferences. Look for gluten-free pie crusts and use gluten-free flour or a suitable flour substitute for thickening if you need a gluten-free version. For dairy-free options, choose dairy-free pie crusts and use a plant-based butter substitute.
Yes! Reduce the amount of flour in the filling to 2 tablespoons. After you put the top crust on and crimp the edges, skip to the step where you spray it with water and sprinkle it with the sugar/cinnamon/nutmeg mixture.
If you notice the crust edges are browning too quickly while baking, you can cover them with strips of aluminum foil or use a pie shield. This will prevent the edges from getting burnt while allowing the pie’s interior to cook to perfection.
Yes, you can reheat leftover baked apple pie in the oven at a low temperature to preserve its texture and flavor. Preheat the oven to 300 degrees F, cover the pie with foil, and heat for about 15-20 minutes until warmed through.
If you bake the pie immediately after assembling it, then you can freeze leftover slices after the pie is baked. Wrap each piece tightly in plastic wrap or aluminum foil and store them in an airtight container or freezer bag. This way, you can enjoy individual servings whenever you crave a slice of your delicious apple pie.
However, if you froze the unbaked pie, it is not recommended to freeze leftovers after it is baked.
No. If a filling contains milk or eggs, it does not do well with the freezing/thawing/baking process.

7 Responses
What a great idea. I want that shield! I have never tried this process. Your recipe is great and perfect blend of spice.
The shield is definitely easier than trying to shape foil around the edges without burning your fingers on the rim of the pie plate.
Thanks for this post! I had no idea you could do this haha
I tried it out of desperation a few years back when I knew that I wouldn’t have time to bake from scratch since I work a full day the day before Thanksgiving. It worked out so well, that I still do it this way even when I am not in as much of time crunch.
Sounds so delicious. My family loves apple pie. Thank you for sharing 😊
Pastor Natalie (ExamineThisMoment)
Letstakeamoment.com
This looks delicious. Apple pie was always my favorite dessert.
Thank you for such a great recipe! I will definitely try to cook it!