")
Do you find that your students often ask you for certain supplies that you have stashed in your desk? Usually, they ask right when you are in the middle of a great lesson. Or, you might be in the middle of handling several other issues as the children arrive to class, so you can’t get the requested item right away. Below, find out how to make a teacher toolbox with customized labels that you can create using a Cricut cutting machine.
Reducing Interruptions
A few years ago, it seemed like every day upon arrival, at least one student would ask for an envelope to put their money in. Another student wanted rubber bands to reattach the felt to the bottom of their chair legs. A few minutes later a different student would ask to go to the nurse to take care of a paper cut. Someone else wanted tape to fix their homework that ripped down the middle as they tore it out of their workbook.
I felt like I was constantly walking back to my desk to get them what they needed. Or I would make multiple trips to the closet for the “secret” stash of bandages to avoid sending them to the nurse. While it was good for getting my steps in, it wasn’t so great for conducting a lesson without interruptions.
So I wanted to figure out a way to give my students access to some of my supplies so that they could help themselves when needed. It had to be user-friendly and durable to withstand being used by fifth-graders.
Messy Bun & Markers describes Why Classroom Organization is Important for This School Year. She gives five great strategies to implement in the classroom.
Finding a “Just Right” Teacher Toolbox
Right about that time, there was a trend to buy plastic toolboxes with multiple small drawers and convert them into teacher toolboxes. Many teachers do this for their own supplies. They use it to store every imaginable office supply in its own little cubby. Instead of hunting through a desk drawer to find that little box of paper fasteners, you can just open the drawer and find what you need.
I was just about to order one of these toolboxes for my own desk when I noticed that some people had commented that the drawers are not long enough to fit pens. Hmm. That was one of the main reasons I wanted a toolbox. I wanted to sort out all the different pens, pencils, highlighters, and markers. So if no drawers were long enough to fit pens, that was a dealbreaker to me.
At about the same time, I came across an article about different Ikea products that can be used in a classroom. Someone mentioned that the Moppe organizer has drawers that are generously sized to fit pens. Ding, ding, ding, we have a winner!

I am lucky enough to have an Ikea less than a mile from where I teach, so it was a convenient purchase. Plus, it gave me an excuse to have Swedish meatballs. Totally worth the trip!
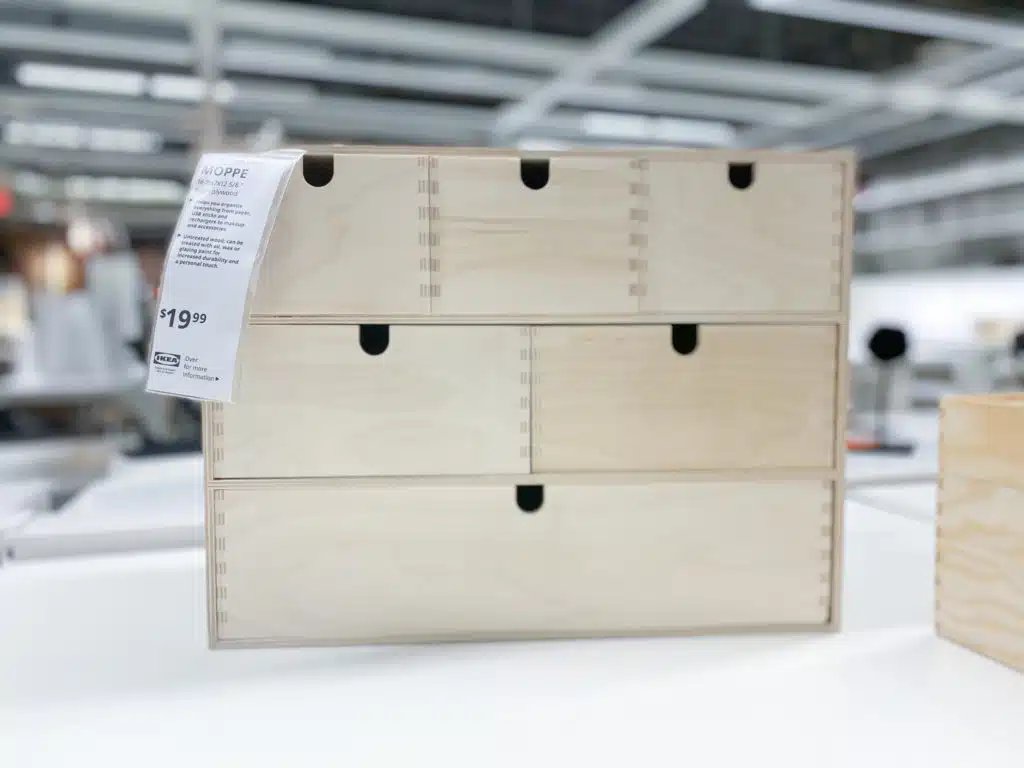
Once I got it home, I noticed just how sturdy it is, as it is made of wood. That is when I decided that I would set up this toolbox to be a “self-service station” for my students to use on their own.
Painting the Toolbox
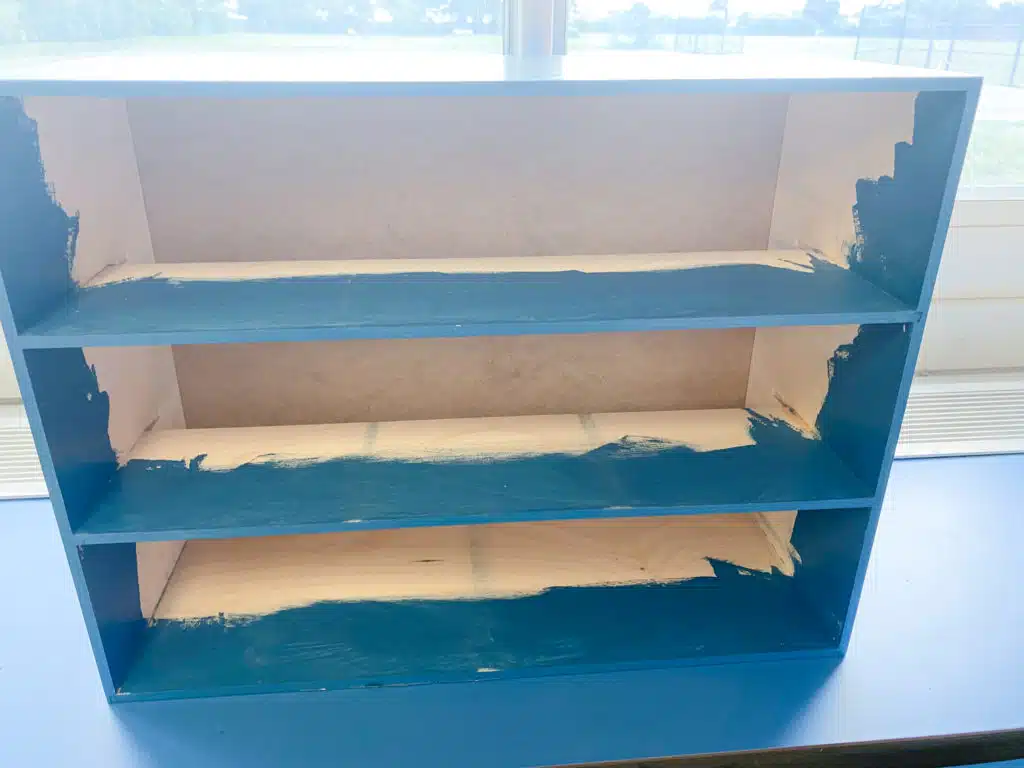
The beauty of this being unfinished wood is that you can easily do a DIY Ikea Moppe hack to totally customize your toolbox. You can paint it, stain it, cover it in Contact paper, or leave it as is.
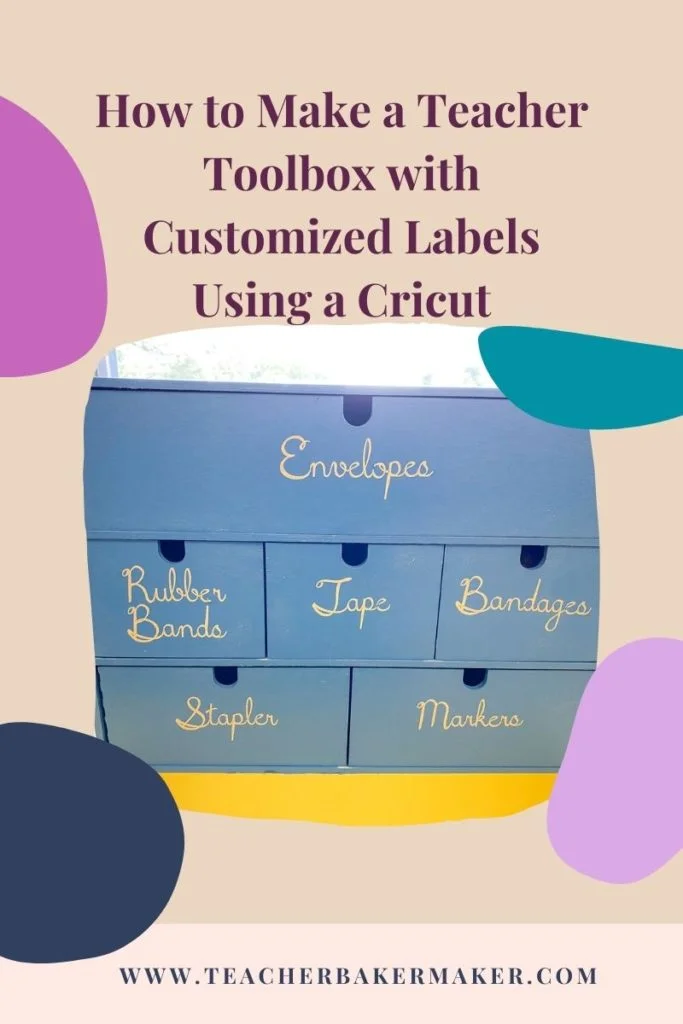
Right about the time I bought the toolbox, I had just finished painting a bathroom in my home. I had plenty of semi-gloss blue paint leftover. My schools’ colors happen to be blue and gold. I figured this would show school spirit on my yellow countertops. So I got out a paintbrush and put two coats of Behr Ultra semi-gloss paint in Bering Wave on all the exterior surfaces. I did not paint the interior walls, as you cannot see them when the drawers are in place.
[My blog posts contain affiliate links. These don’t cost you anything, but they allow me to continue running this site and providing free content for my readers. Full disclosure here.]
Drawer Sizes of Ikea Moppe
One of the huge benefits of the Ikea Moppe is the ample capacity of each of its drawers. It comes with one full-width drawer, two half-width drawers, and three third-width drawers. I have seen some Ikea hacks online where people bought more than one unit, and then mixed and matched the drawer sizes. Check out this pin for inspiration from someone who combined nine units to resemble a card catalog.
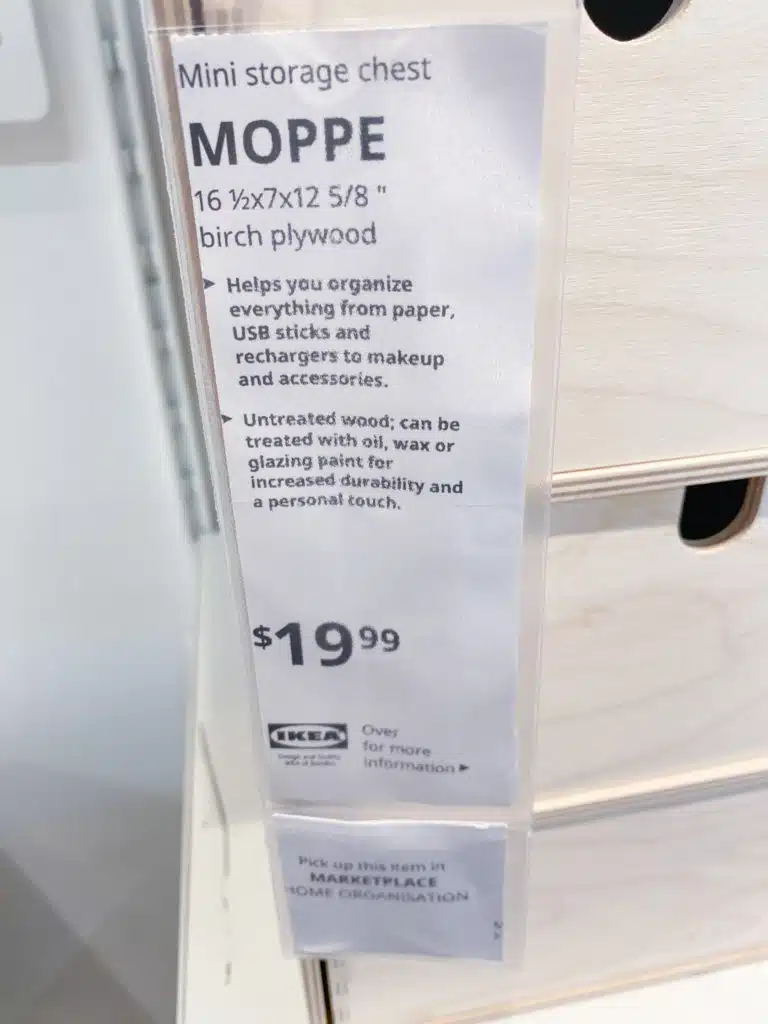
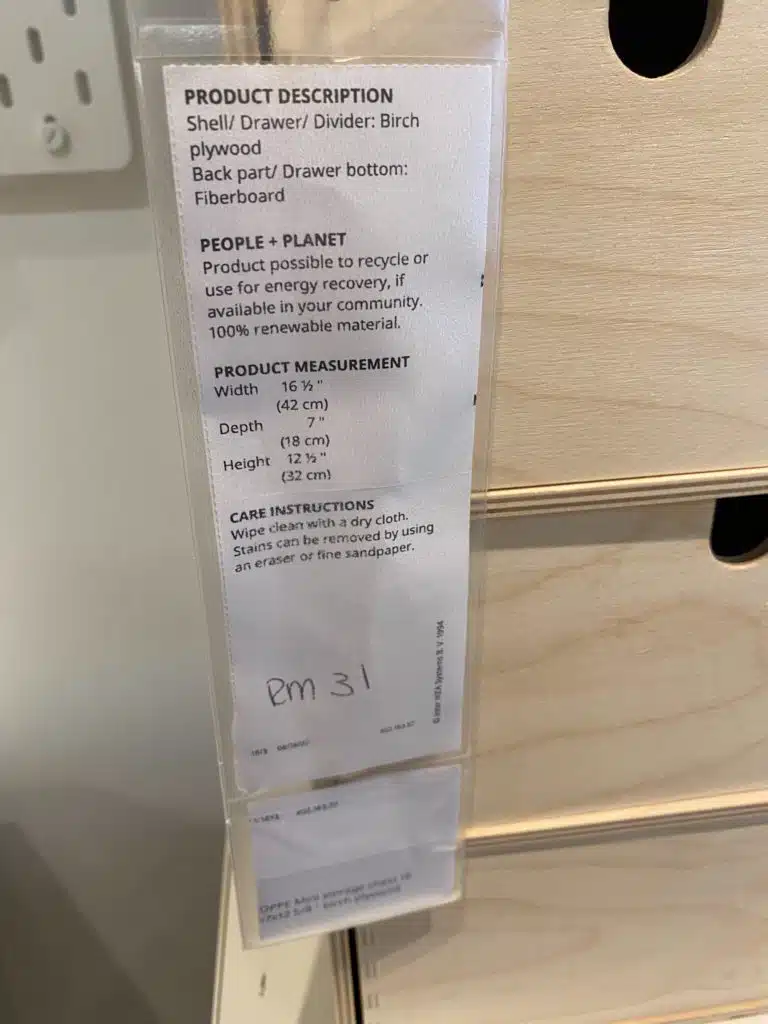
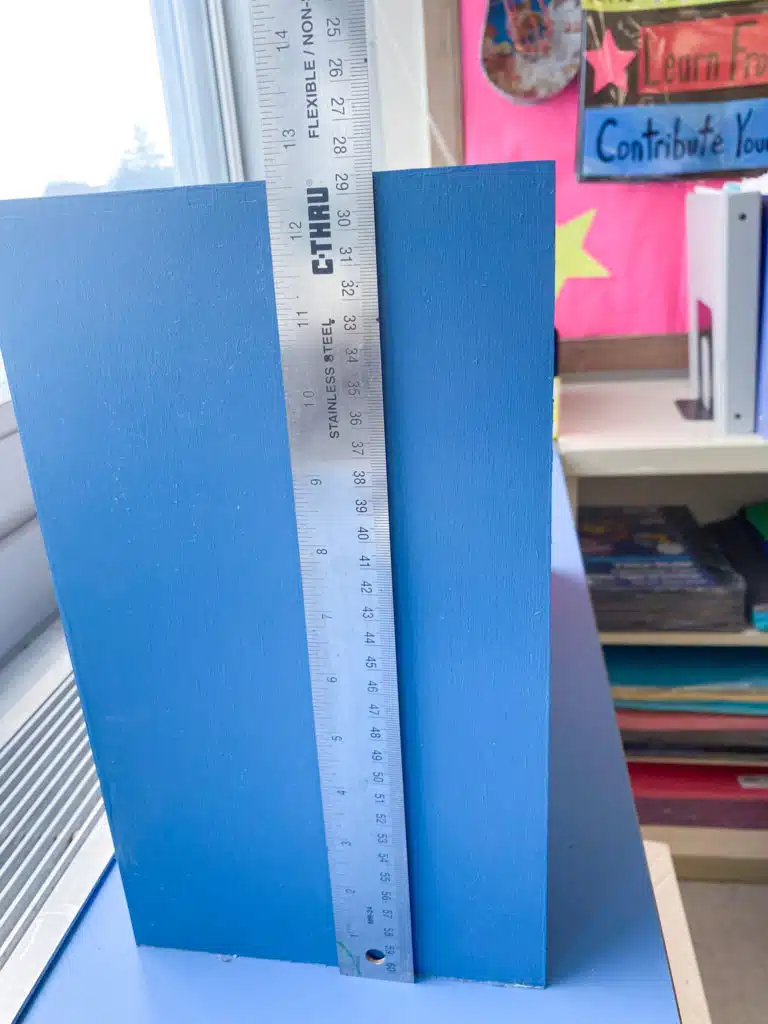
The overall dimensions of the entire unit are 16 1/2 inches wide by 7 1/4 inches deep by 12 5/8 inches high.
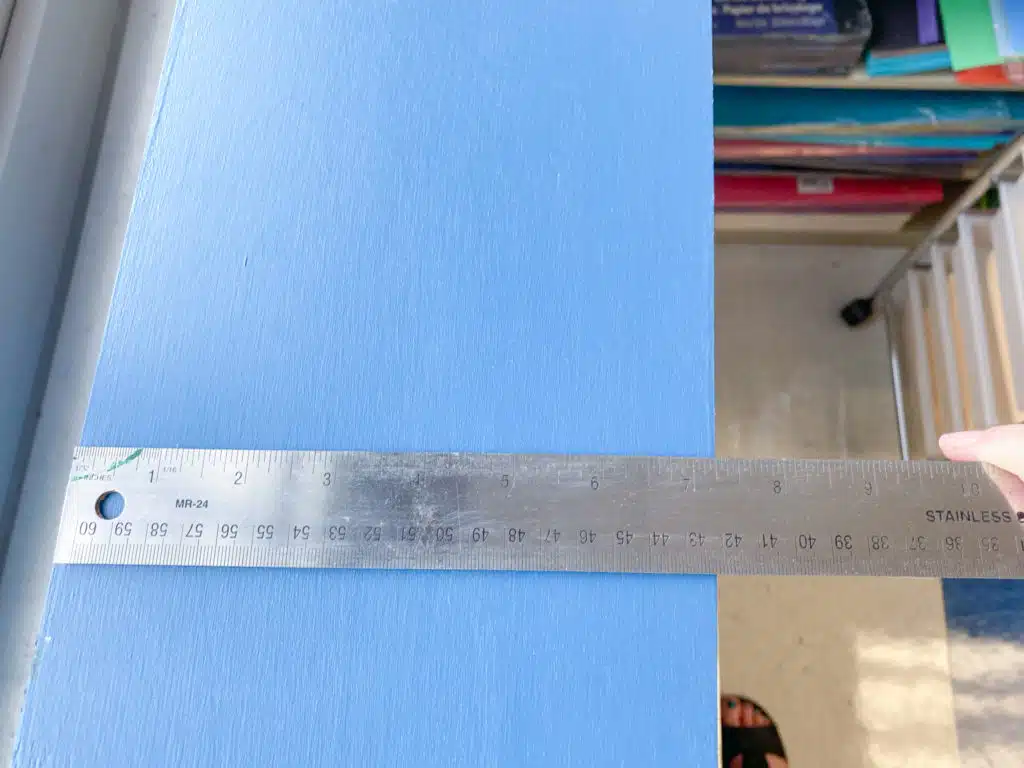
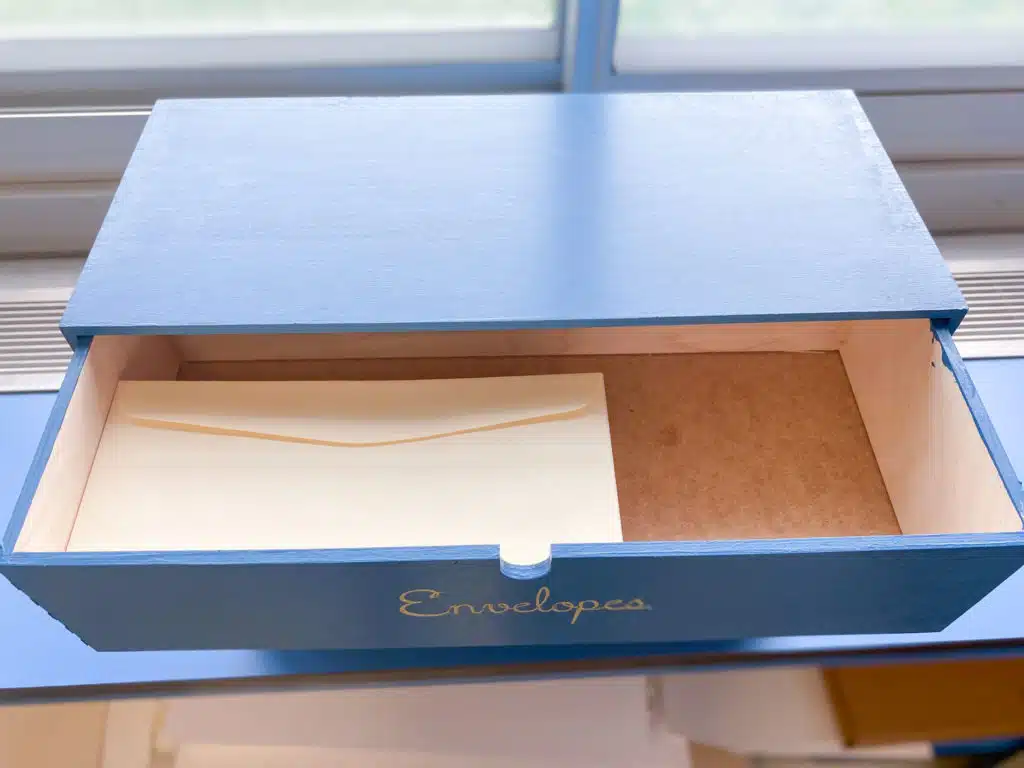
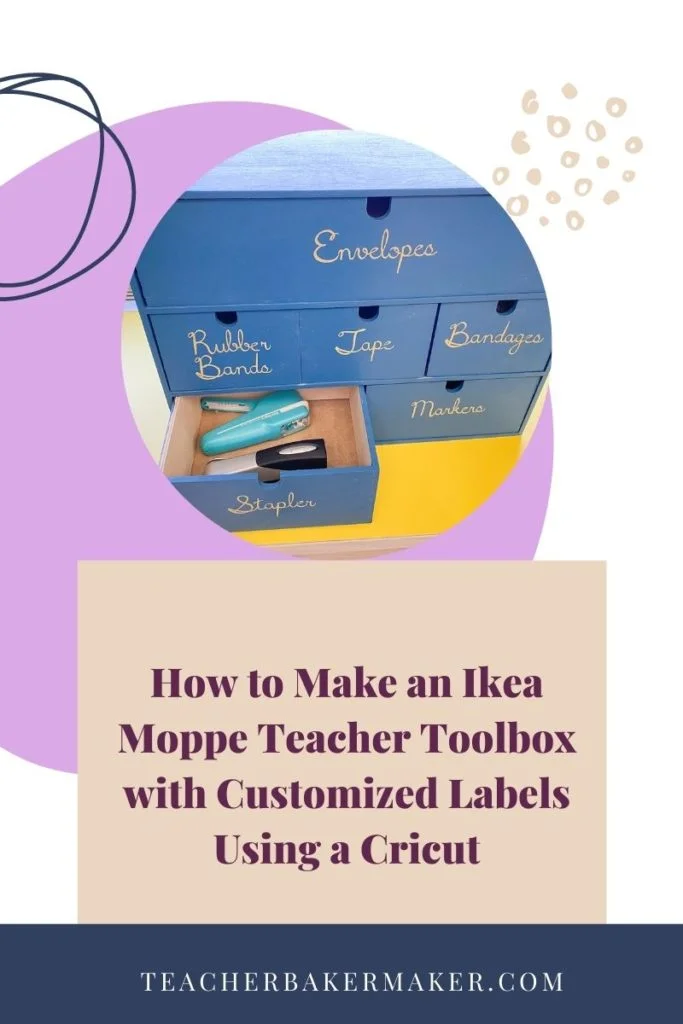
The biggest drawer has an interior size of 15 1/2 inches wide by 6 1/2 inches deep by 3 1/2 inches high. Regular business-size envelopes fit in this one with room to spare.
The two medium-sized drawers are each 7 1/2 inches wide by 6 1/2 inches deep by 3 1/2 inches high on the inside. This gives more than enough room for markers or staplers that are not full length.
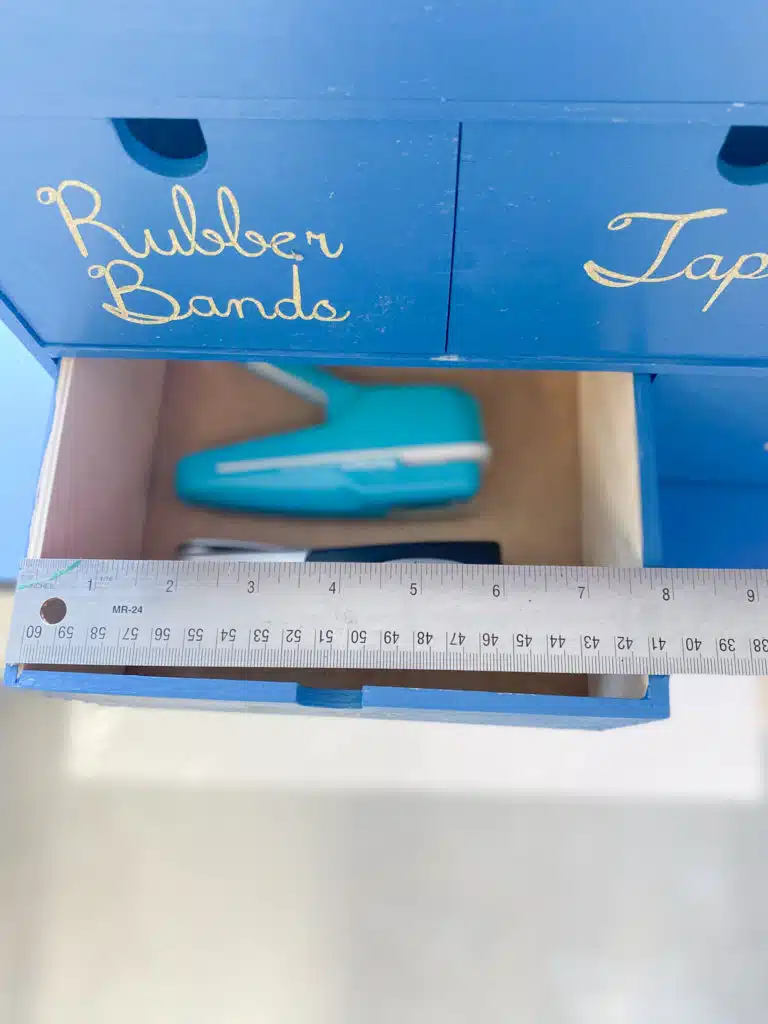
The three smallest drawers measure 4 3/4 inches wide by 6 1/2 inches deep by 3 1/2 inches high on the inside. I fit a standard-sized tape dispenser in these drawers.

Teacher Toolbox Customized Labels
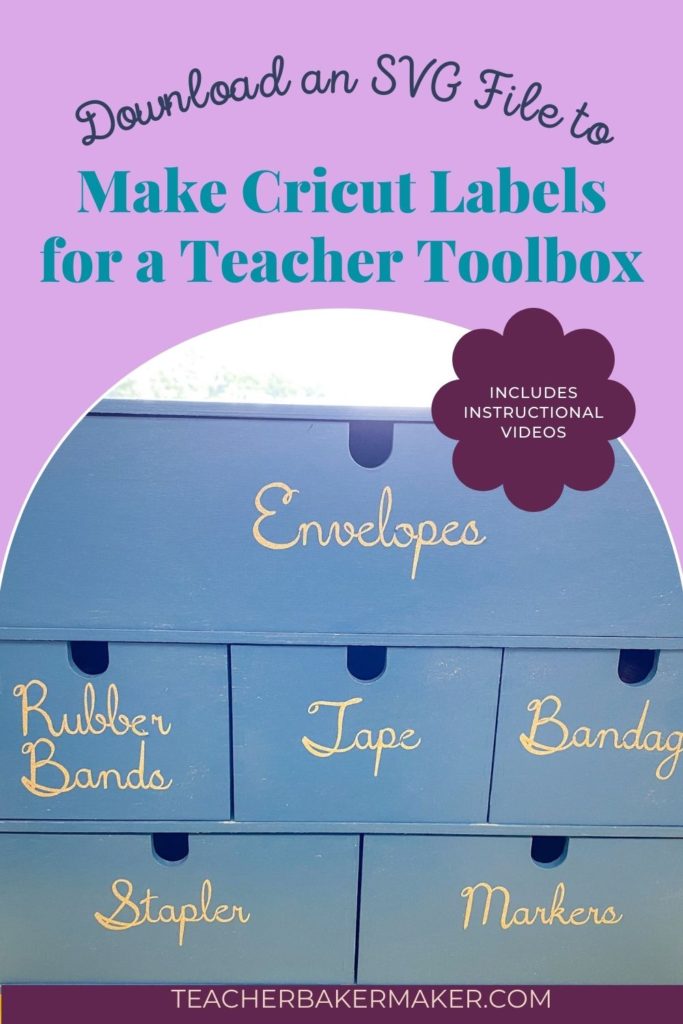
Next, I had to decide which six items to put in the drawers. The top six items my students request most frequently are envelopes, bandages, rubber bands, tape, markers, and the stapler. Ten-year-olds have a knack for jamming even the best “jam-free stapler.” I wanted to keep the “good” stapler for my own use, but an assortment of other staplers for the students to use.
In Cricut Design Space, I tinkered with various size fonts until I was happy. At that point, my district was once again adding cursive writing to the curriculum. So I wanted a font that was similar to the style of cursive that the children would be using. I decided I wanted the letters to be sized so that they would be approximately half the height of each drawer front. That way, they could be legible from a distance while still leaving some “clean” space on each drawer.
I used Cricut Glitter Vinyl in Glitter Gold, as I wanted to carry out my school colors. You can use any adhesive vinyl for this project. The glitter is just an added bonus since ten-year-olds love glitter. (Well, I love sparkles myself, but let’s just say the glitter was for my students, ok?)
How to Use Design Space to Make Your Own Labels
Visit my Teachers Pay Teachers store to get a set of these labels. I have included labels for a wide variety of types of school supplies that are typically found in a classroom.
Once you download the labels, you then need to upload them into Design Space. Check out my video about how to upload an SVG file into Design Space. Occasionally, Design Space can be quirky and will resize SVGs. So after uploading the file, check to see that the overall image size is 14.142 inches wide by 41.39 inches high.
Watch the video below to learn how to upload the SVG into Design Space and adjust the sizing if needed. The video also shows how to select just the labels you want, and then cut them out using your Cricut.
I already have each label sized to fit the drawer fronts. You do not need to adjust the sizes unless you feel like you want them to take up more or less of the space.
Since the Moppe has six drawers, you probably only want to cut out six labels. One way I like to easily do this is to click on a label I want to cut. Then change the color of that label by choosing the black square next to “Operation” in the toolbar at the top of the screen. (You can put any color vinyl you want onto your mat; it does not have to match the color you choose on your screen.) Then choose that same color for your other five labels.
Click on “Make It” at the top right. You will then see the six labels you want arranged onto one mat along the left side of the screen. Click on that mat, then click “Continue” at the bottom of the screen. The Cricut will begin cutting whatever mat you click on. When it is done cutting, simply cancel the rest of the job. It will not try to cut out all the other labels that you do not want.
Chances are that the six labels you chose will not take up a full 12”x12” mat. After clicking “Make It” click on the mat that is the color you chose when selecting your labels. It will show you exactly where on the mat each word will be cut. You probably only need about six inches of vinyl if you are using a 12” wide roll of vinyl. Therefore, you can cut off about six inches from the roll. Just put that on the mat rather than filling up the entire mat.
I also tested this out on my new Cricut Joy. The SVG file works fine on this machine as well. Even though the Joy has a smaller maximum project width than a full-size Cricut Explore or Cricut Maker, it is still big enough for these labels. The widest label is about 5 inches wide, and the tallest label is a tad longer than 3 inches.
The video below shows how to use the mobile version of Design Space to create the labels on a Cricut Joy cutting machine.
Applying the Labels to the Teacher Toolbox
After the Cricut is finished cutting, weed away all of the vinyl that will not be attached to the drawers. Use a Cricut weeding tool to pull away the excess vinyl.
To transfer the label onto the drawer, you will first need to use transfer tape. I use clear Contact paper, as it will not damage the painted drawer front. To do this, cut a piece of Contact paper slightly larger than the label. Peel the backing paper off of the Contact Paper. Place the clear sticky Contact paper onto the front of the label you cut out on the Cricut.
Using a Cricut XL scraper or credit card, smooth the Contact paper onto the label firmly.
Flip the label over so that the backing paper from the vinyl is facing up. Starting at a corner, peel off the label’s backing paper so that the label is now stuck to the clear Contact paper. (If the label is sticking to the backing paper and not the Contact paper, flip it over and rub it again with the scraper.)
Next, stand up the drawer on its back so the drawer front is pointing up at the ceiling. Carefully position the label so that it is centered vertically and horizontally on the drawer. It helps to have a ruler handy to determine the center of the label and the center of the drawer. Once you are satisfied with the position, use the scraper to rub the contact paper and label firmly onto the drawer front.
Carefully peel off the clear Contact paper starting at a corner and pulling up on the diagonal. If the label is not stuck to the drawer in a spot, do not continue pulling the Contact paper. Instead, go in reverse and smooth it back down. Next, rub it firmly with the scraper, and then try peeling it again.
You should not need to seal the labels onto the drawer fronts. After two years in my classroom, the labels are still sticking to the semi-gloss paint just as they did when I first applied them. They have even survived the heat and humidity of the classroom before air conditioning was installed. (Thank heavens my classroom finally has air conditioning!)
Student Usage
I introduced the toolbox to my fifth graders on the first day of school. I explained that I trusted them to use their judgment in when to use supplies from the drawers. Well, early that afternoon, one of my students accidentally sliced her hand with her new scissors. Instead of telling me, she quietly went over to the toolbox and bandaged herself up. I only realized what had happened when I saw blood on the countertop next to the toolbox! Apparently, the kids were so excited at the prospect of handling their own injuries that they wanted to avoid going downstairs to the nurse altogether!
As the year went on, the kids did a great job with using self-restraint when using supplies from the toolkit. I originally was a little nervous about the rubber band drawer, envisioning kids using them as slingshots. Instead, they were very respectful of the supplies and only used them for their intended purpose.
Sometimes they would ask me before getting something from the toolbox. But as the year went on, I would overhear students remind each other of what supplies they could get from the drawers to solve whatever problem they were having at that moment.
Whenever the PTA would have any type of fundraiser, kids used to show up with cash in hand. They would immediately come up to my desk to ask for an envelope. This would usually happen as I was trying to take attendance or read through the dismissal notes they were handing in. Now, with the toolbox, they became self-sufficient and would help themselves without asking.
The stapler drawer also turned out to be a big help. In the past, they would jam up my expensive stapler, which would take a long time to fix. Now, I bought them a smaller stapler sized for their hands, as well as a stapleless stapler. They are fascinated by the stapleless stapler, which creates an ingenious slot and tab that fold into each other. It is great for pages that will not be flipped too often, such as a homework assignment.
They also knew that the markers in the toolbox were for them to borrow and return. They no longer would “accidentally” borrow my good Flair markers. The fact that the toolbox contained supplies for which they felt responsible really worked well.
Midway through that year was when schools shut down due to the Coronavirus. Then the following year, I taught remote students, so I have not had a second class use the toolbox yet. However, it is fully stocked and ready to go for this coming school year, for a new group of fifth graders to use.
If you have a type of school supply that is not featured in the available SVG download file, please let me know in the comments below. I will update the SVG file and will let you know when it is ready!
Is this your first year in a new classroom or a new grade? Then check out Pencils & Planners 7 of the Best Practical Ideas for Classroom Setup.
Are you debating whether to use a paper plan book or an online planner this year? Learning More with Mrs. Morrison describes 5 Ways Digital Planning Will Save you time and Keep you Organized.
Overwhelmed with how to organize your classroom library? Teach, Travel, Read has 4 Secrets to Successfully Organize a Classroom Library.
If you are interested in learning how to start your own teacher blog, I highly recommend https://kaysemorris.com/7-helpful-tips-on-how-to-blog/ to learn 7 Helpful Tips on How to Blog Like a Boss.
If you are still lucky enough to have more time left in your summer vacation, visit Still Teaching, Still Learning’s site to find ideas for summer rejuvenation for teachers.

14 Responses
Brilliant! This is such a great idea. I can’t wait to use it next year. Also, now I’m impressed by the staple-less stapler. I just grabbed a couple for my classroom.
The staple-less stapler is definitely ingenious, plus the kids love using it.
You’ve got me wanting to redo the storage in my desk again!!
Whenever I get the new Ikea catalog, I am always inspired by all of their storage accessories.
I love the color blue. It looks so cute for the teacher tool box. I would use this for a regular office space. This is such a great idea.
Blue is such a soothing color to me. This toolbox would definitely work great in an office as well, since you can customize it to go with any decor.
I love how this came out! This is great for not only a teacher but also a home office and homeschool family. I love a good IKEA hack!
There are so many great ways to hack Ikea products to make something unique.
Thanks for sharing! I would use this for storage space.
This storage unit is a great size since it holds ample amounts of supplies.
Something like this is perfect for getting students to be self-sufficient!! Great idea, and I love the wooden box rather than plastic – the labels make sure students know what is in there but you don’t see the clutter like see-through drawers! I also need to get myself a staple-less stapler!!
It is definitely a sturdy box that can withstand being used by children. When my students first see the stapleless stapler, they go around finding things to “staple” with it! It is pretty ingenious.