
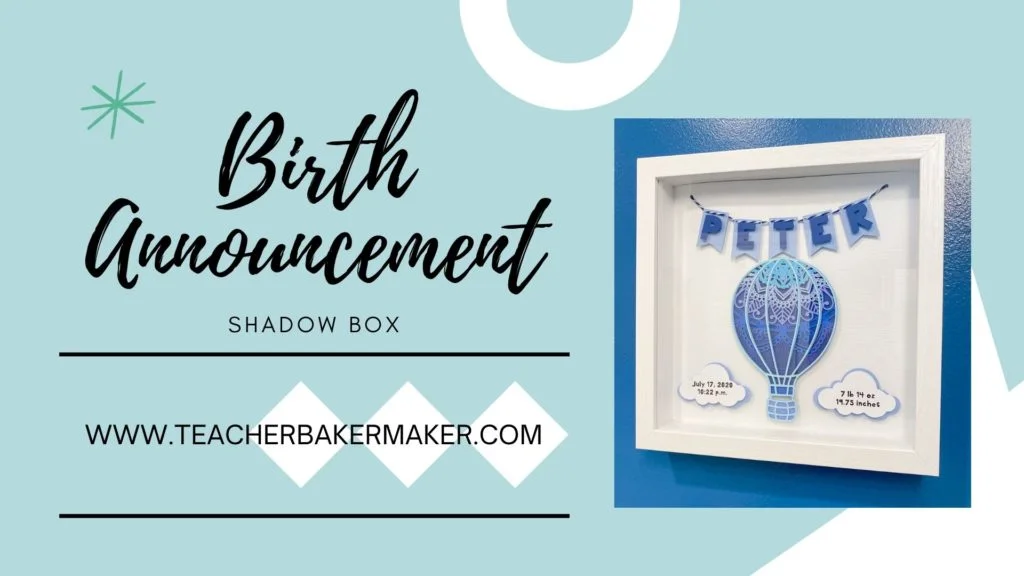
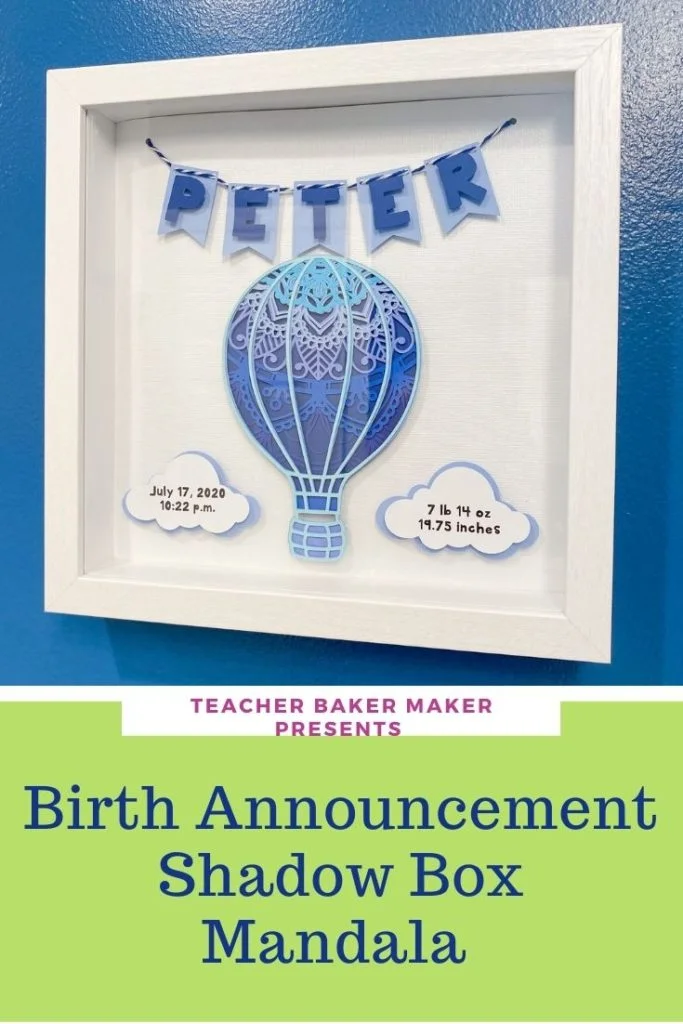
Many parents-to-be register for all sorts of baby gear in advance of a baby shower. However, if you are close with the family, you might be looking to give something a bit more personal after the baby is born. If you own a cutting machine, such as a Cricut, you can easily make a customized birth announcement shadow box mandala.
With the impending boom of the “coronial” babies, there is a good chance that you know someone having a baby in the next few months. In my own family, my nephew and his wife had a baby boy over the summer. My niece and her husband are expecting their first child in a few weeks. Neither had a traditional baby shower due to concerns about the virus, but instead had a drive-by shower or a virtual baby shower.
Begin that I am the Great Aunt, I wanted to make a special birth announcement. The three-dimensional mandala designs have become quite popular this year, so I sought out a design that would go with my great nephew’s nursery’s transportation theme. Since mandala SVGs are fairly new, I could not find any “ready to go” birth announcement designs that fit the bill. So I set out to customize one by combining elements from various sources.
In case you are wondering, SVG stands for Scalable Vector Graphics. These are two-dimensional graphics that are in the format used by the Cricut Design Space software. A mandala is an intricate pattern. So a mandala SVG usually contains multiple layers of a graphic that is meant to be cut out and then reassembled by stacking them on top of each other.
Supplies
[My blog posts contain affiliate links. These don’t cost you anything, but they allow me to continue running this site and providing free content for my readers. Full disclosure here.]
The first thing I searched for was a mandala SVG with some type of transportation design. I also wanted something I could do using shades of blue. While a school bus design looked great, I knew that would not work in blue.
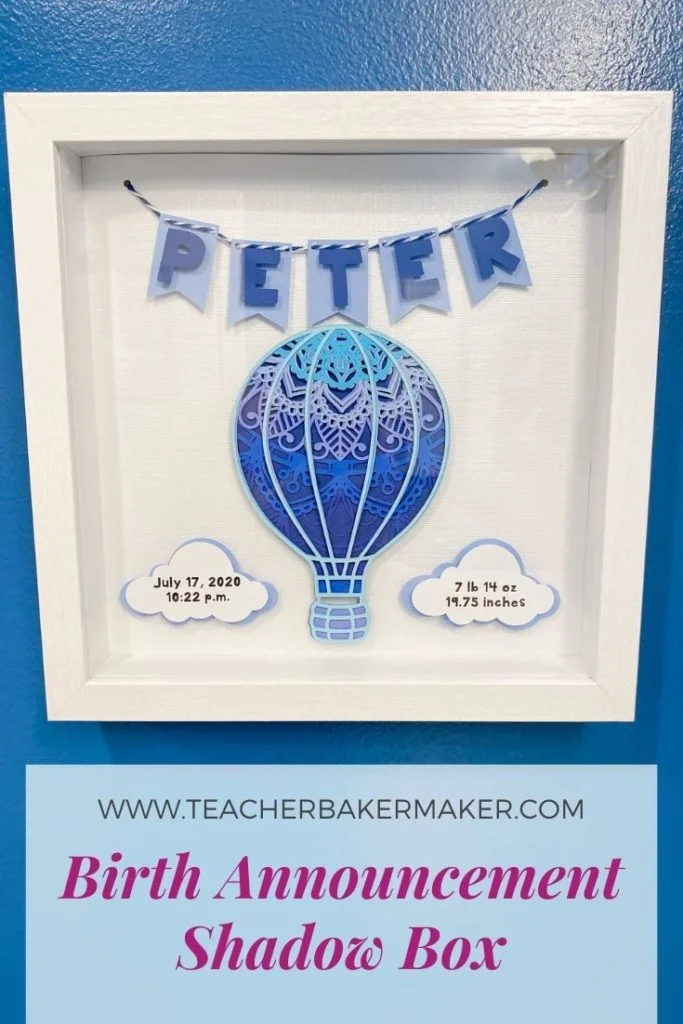
I kept returning to this hot air balloon SVG by Okadee SVG on DesignBundles.net. It has seven layers, which would give my design the depth I was looking for since I would be mounting it into a 9–inch by 9-inch shadowbox frame. Michael’s tends to have these frames on sale at least one week each month. I like to pick up a few when they have a “buy one get one free” special, or even better when it is “buy one get two free!”
For the backdrop paper, I chose a white, linen-textured 12-inch by 12-inch cardstock. I wanted to be able to mount my design onto card stock, rather than adhering the bottom layer of the design onto the fabric backing that comes with the frame, because I wanted a crisp, white background.
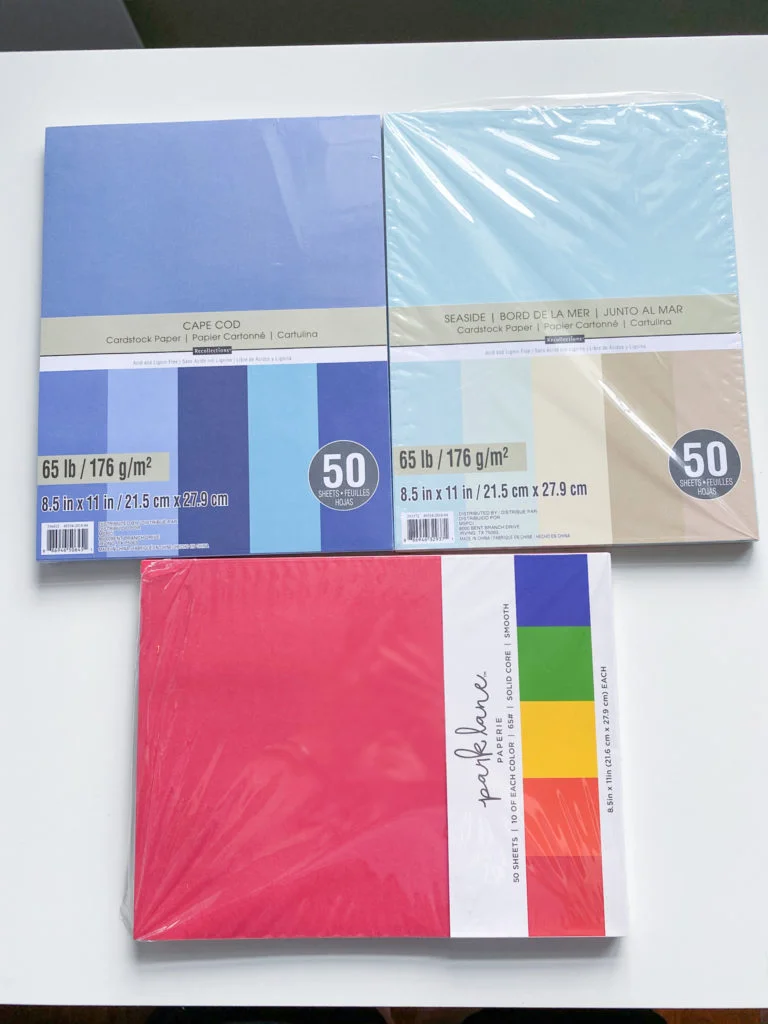
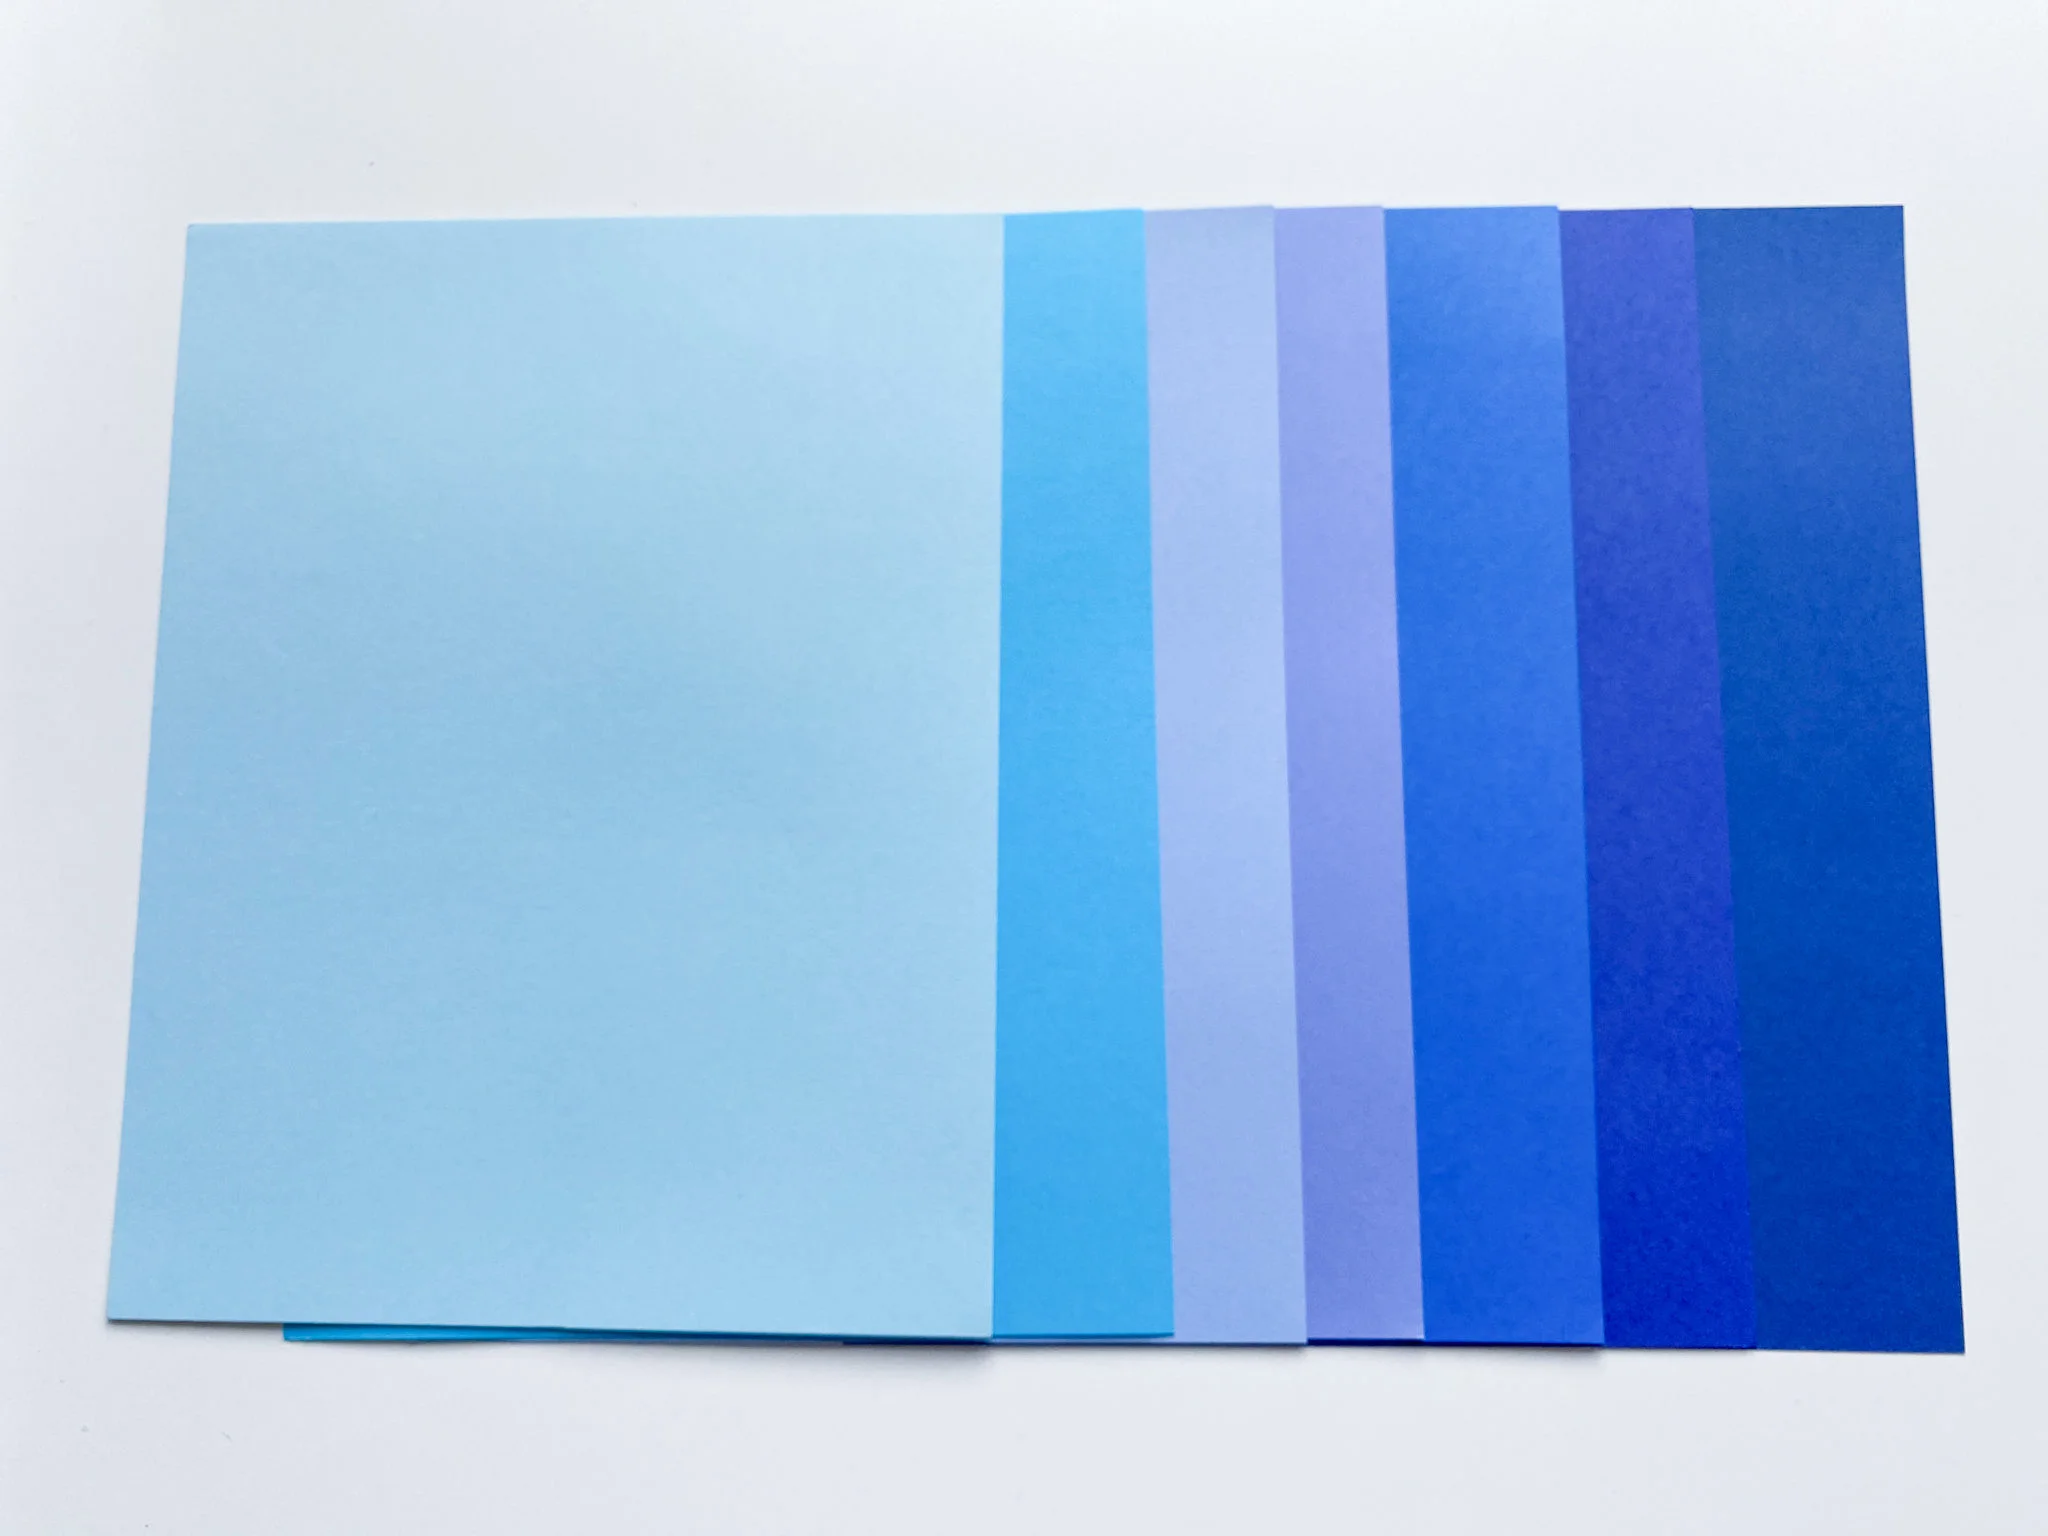
Choosing the shades of blue was made easier by using the Cape Cod assortment of 8.5-inch by 11-inch cardstock paper. This pack comes with five shades of blue. Since I needed two more shades of blue, I used the lightest shade of blue from the Seaside assortment of cardstock, and the blue from the Rainbow assortment of solid core cardstock. When buying cardstock for any type of craft that will be cut out, make sure to get solid core, NOT white core. While you may not notice it before the sheet is cut, cardstock with a white core will look “rough” at the edges after it is cut because you will be able to see the white. The Recollections brand sold at Michael’s has a solid core. It is often sold at a great sale price, so I stock up on these assorted packs.
To cut out the intricate mandala design, you will need a cutting machine such as the Cricut Explore Air 2 or Cricut Maker. If they are sold out locally, you might be able to snag the Cricut Explore Air 2 or Cricut Maker directly from Cricut. The machines became hot commodities this past year, with people spending more time at home.
(Check out how I used my Cricut to make a sign for a drive-by parade.)
In addition, you will need a blue light grip mat. I would not recommend the green mat, as it is stickier. Since a mandala design has thin lines, it would be more likely to get damaged when peeling it off of a stickier mat. The Cricut XL Scraper will make removing the cut-out design from any mat easier. The Cricut Weeding Tool will help to remove the bits of cardstock from within the design. You can get the weeding tool as part of the Cricut Tools Weeding Kit.
To give the name banner added depth, you will need foam adhesive dots. These can easily be cut smaller since you do not want the foam dots to show. I had originally planned on using the foam dots on the hot air balloon too. However, the lines on that design are so thin. This would have made hiding the foam dots next to impossible on the top layers.
For the layers of the hot air balloon, I used Aleene’s Clear Gel Tacky Glue. To apply just a fine bead of glue, I used an applicator bottle similar to this one.
I also used navy blue and white twine to string through the letters in the name banner.
Directions for Making a Birth Announcement Shadow Box Mandala
Check out my step-by-step video showing how to design and assemble this birth announcement shadow box project by clicking here, or click the image below.
1. To help visualize how large your design needs to be, insert a square in Design Space. Then enlarge the square to the dimensions of your frame. This square will be used to cut the white background that everything else will get attached to. You can change the color of the square onscreen by clicking the gray box up next to Linetype in the toolbar. I made mine 8.75″ by 8.75″ so that it fits inside the frame.
2. Upload the mandala SVG into Design Space. Then select that image and insert it into your project. Adjust the dimensions to the size you want by either dragging the corners or typing in the exact dimensions in the toolbar on top. I made mine 3.688″W by 5.55″ L
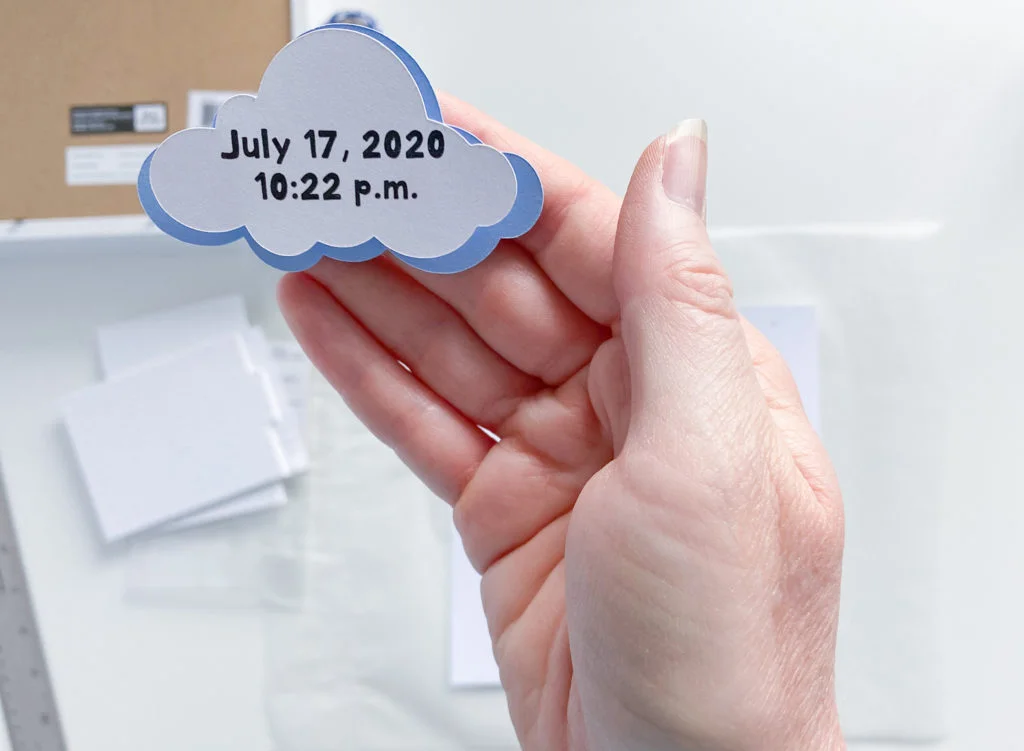
3. I downloaded this cloud from svg-clipart.com, then uploaded it into Design Space. Select it and insert it into your project. Adjust it to the size you want. Then right-click on it. Duplicate it to make an identical cloud on the other side of the hot air balloon. I used 2.735″ W by 1.613″ L.
4. To make a layered cloud, duplicate the cloud again. Change the color of the new cloud to white. Then shrink that one slightly so that when it sits on top of the original blue cloud, it will have some dimension. I made mine 2.272″ W by 1.34″L. Right-click on the white cloud to duplicate it and layer it on top of the other blue cloud.
5. Insert a text box and type the date and time of birth. Adjust the font and font size. I used the “KB Stick to the Plan” font, a free font that I downloaded onto my computer. To get the words to print onto the cloud, highlight the text. Then in the toolbar click on “Fill” and choose “Print.” Also, select the white cloud, click on “Fill” and choose “Print.”
6. Choose the text and the cloud together (hold down the shift button as you click on each). On the bottom right side of the screen click “Flatten.” Now the cloud and the text can be dragged together to place them where you want them.
(I did this as a “Print then Cut” piece of the project because I did not want each individual letter and number to print out as separate card stock. I don’t particularly like how Cricut pens look when they write directly onto the cardstock. So instead, I printed this on my computer’s laser printer. Then I put that sheet onto the Cricut mat so the Cricut could cut out the cloud shape around the text.)
7. Repeat steps 5 & 6 to add the height and weight to the other cloud.
8. Select one white and one blue cloud together, then click “Attach” on the bottom right side of the screen. Now you can drag the pair of clouds together. Repeat for the other pair of clouds. (Before you cut out your design, you will need to select the blue/white cloud pair and then “Detach” them. Otherwise, it will print both clouds on your computer printer using blue ink as opposed to making the blue cloud a separate layer of cardstock.)
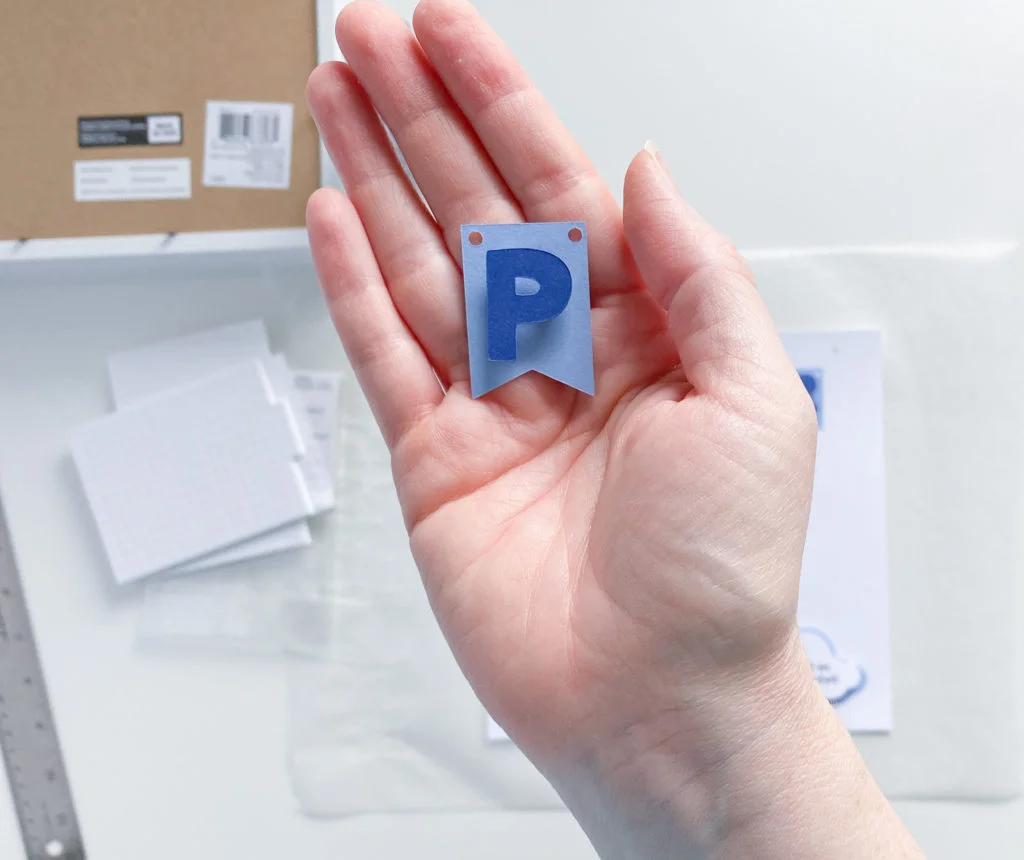
9. Get the free pennant image from Design Space. On the left side of the screen, click “Images.” Then search for “pennant.” On the left side, click the plus sign next to “Ownership.” Then choose “Free.” Click the pennant with the slits in the top two corners. These slits will help you place the holes that will be used to thread the twine through later. Click “Insert Image.” Resize the pennant to the desired size. I used 0.983″W by 1.369″L. Depending on how long the baby’s name is, you can size the pennants accordingly. Change the color of the pennant by clicking the color square below Operation in the toolbar.
(Tip: If you want it to match one of the layers of the mandala, choose one of the colors that is already in your design. That way, your Cricut will cut it from the same sheet of cardstock.)
10. To cut holes in the top of each pennant, choose “Shapes” on the far left, then select the circle. Shrink the circle down so that it just covers the slit. Then right-click it to duplicate it, and place it over the other slit.
11. Select one of the circles as well as the pennant by holding the shift key as you click on them. On the bottom right, select “Slice.” Drag the pennant away a little bit. Then select the circle that is left behind, and delete it. Repeat the process for the other circle.
12. Right-click on the pennant and duplicate it as many times as needed so that you have one for each letter of the baby’s name. Insert a text box onto each pennant and type one letter in each box. I used KB Stick to the Plan font size 72. Click on each pennant and letter separately. Then in the toolbar at the top, click the pulldown menu below “Operation” and choose “Basic Cut.”
13. Repeat steps 10 and 11 to add holes at the top corners of the white background square layer. That way you can thread the ends of the twine through these and hide the ends behind the bottom layer. I put these holes about 0.75 inch from the left and right edges and about 0.5 inch from the top edge.
14. Save your design. Then click “Make It.” Scroll down on the left side to see each mat. Change the size of the cardstock to 8.5″ by 11″ if that is the size you are using for that layer. The software will automatically rearrange each shape so that they fit on the size cardstock you have without wasting paper. In my project, the only layer that will not fit on 8.5″ by 11″ is the big white square base layer. This one used a 12″x12″ sheet of cardstock. Follow the on-screen instructions to cut out your project. Choose the “Intricate Cardstock” as your material on the screen, and set the dial on your Cricut to “Custom.”
The white clouds will print on your computer printer with a black rectangle printed around them. The rectangle will not be part of your project. It is used by the Cricut to detect where it needs to start cutting out the clouds once you put this sheet into the Cricut machine.
Use the blue light grip Cricut mat for each sheet of cardstock.
15. As each sheet finishes being cut, turn the mat face down. Bend up one corner of the mat to separate the mat from the cardstock. If there are any stubborn pieces of cardstock that continue to stick to the mat, use the XL scraper to gently pry them off. Use the Cricut Weeding Tool to carefully remove any bits of cardstock from within the design.
16. Use two of the small foam adhesive squares to attach a white cloud to a blue cloud. Cut the small squares in half so that they are not as wide as the letters in the name. Use those cut squares to attach each letter to a pennant.
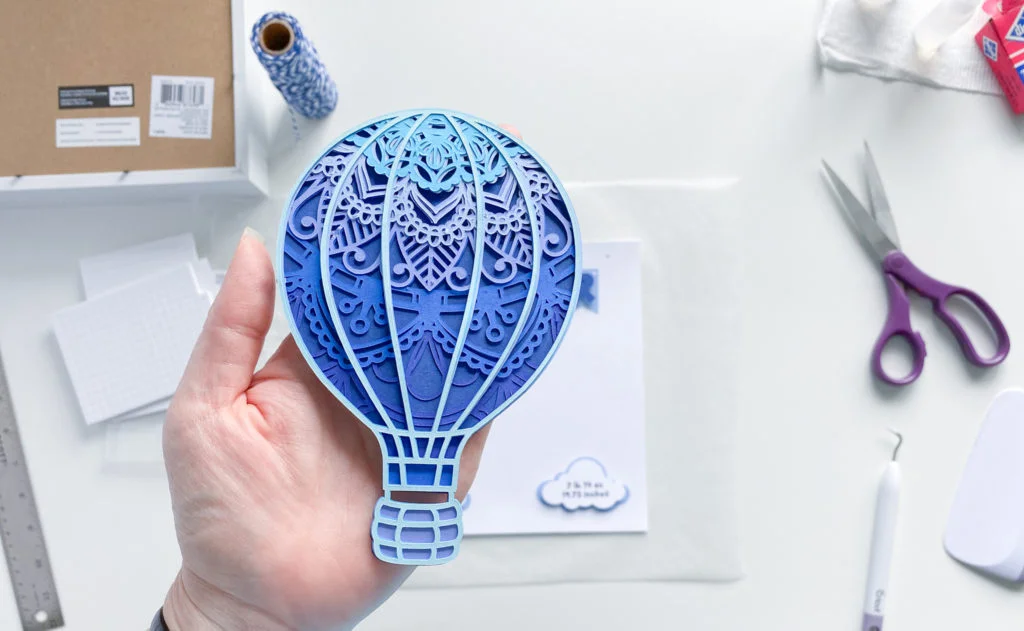
17. Use the tacky glue in the applicator bottle to glue each layer of the hot air balloon together.
18. Use the foam adhesive squares to attach the hot air balloon and clouds to the white backing sheet. Thread the twine through the holes in each pennant. Thread the ends of the twine through the holes on the white backing sheet. Then trim the ends and tape them to the back of the sheet.
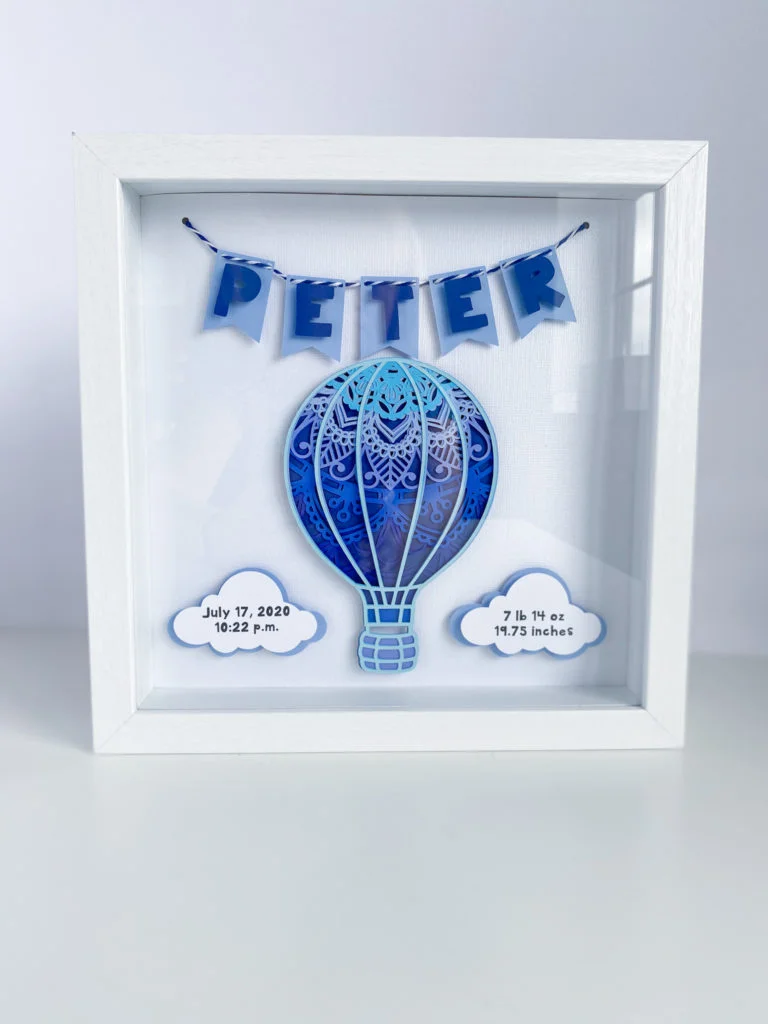
19. Put the finished project into the shadow box frame.
Even though this project has many steps, it is something that can be done successfully by a novice Cricut user. The supplies you need are ones that you can use for a whole variety of projects. Therefore, the actual cost of the consumable supplies (frame, cardstock, foam adhesive squares, glue) is well under $20.00. It can be completed in an afternoon.
Happy crafting!


8 Responses
So cute and such great gift idea! First time to encounter something like this so I know it will work with friends.
I love that idea! It’s so creative and looks cute too. Thank you for sharing your talents and ideas.
That’s a lot of work. I’m sure they appreciated such a lovely gift for their baby!
This is so beautiful! Such a wonderful gift!
This is really cute! I love the idea. Our first grandchild is due in July, so I will definitely keep this idea in mind.
Congratulations on the impending birth of your grandchild!
I love this idea for a birth announcement. I purchased a cricut last April. Now I am ready to move onto crafting with paper. Thank you for the great post and inspiration.
Once you begin crafting with cardstock, it gets addictive, especially since cardstock is reasonably priced!