
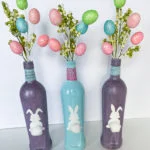
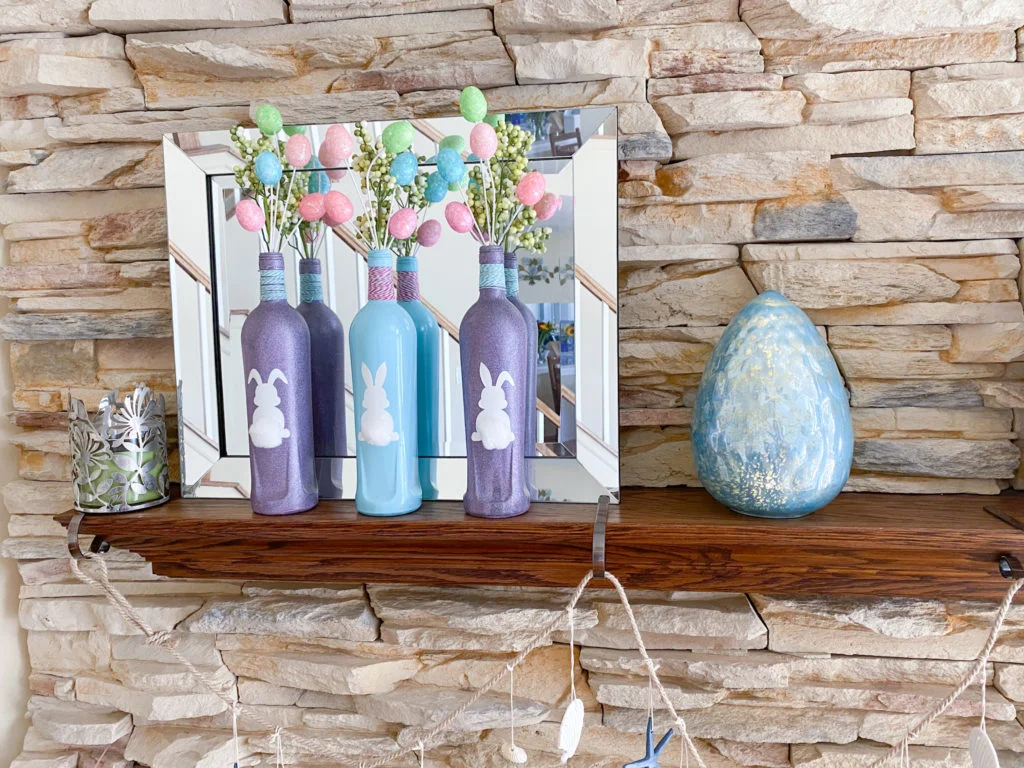
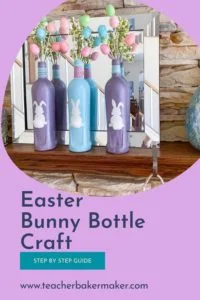
Spring is finally here! We can put away the dark, jewel-tones of winter and bring out the cheerful pastels associated with warmer weather. When thinking of Easter craft ideas, I came up with a way to upcycle empty glass bottles. Whenever I display my Easter Bunny bottles, they instantly add a whimsical touch to the mantel. It is an easy craft that involves upcycling glass bottles with some spray paint and permanent adhesive vinyl.
[My blog posts contain affiliate links. These don’t cost you anything, but they allow me to continue running this site and providing free content for my readers. Full disclosure here.]
When the local Target began putting out the Easter candy at the same time they were setting up Valentine’s Day displays, I wasn’t mad. Seeing the pastel colors at the end of the aisle beyond the sea of red boxes of chocolates really stood out. The light blues, lavenders, yellows, and pinks of spring just instantly make me feel that the warmer days are around the corner.
I have a rotating seasonal collection of painted glass bottles. I drink Ningxia Red juice daily, so I have a constant supply of these beautifully shaped bottles that I do not want to throw out. Ningxia Red is a wolfberry juice made by Young Living and is infused with essential oils. (If you would like to join Young Living to get a wholesale discount, click here. Disclosure: This is my Distributor link.) Being that I drink two bottles each month, I have plenty to decorate for all occasions! I have used them to make fall decor, patriotic 4th of July bottles, and beachy bottles.
The Ningxia Red juice bottles are about the same size as a typical wine bottle, so this craft can also be made with those bottles instead. You could even do this with mason jars if you prefer a shorter arrangement.
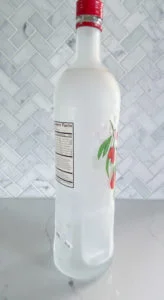
Ningxia Red bottles have labels that are painted on, rather than adhesive labels, so they are not removable. But if you are using wine bottles, you can soak off the adhesive labels first. Also, make sure to thoroughly clean the outside of the bottles. After I started spraying the blue one, I realized that there must have been a trace of where the essential oils dripped down the side of the bottle, because the paint would not adhere to that spot.
Spray Painting the Bottles
To completely cover the labels on my bottles, I use Krylon ColorMaxx spray paint. I have found that these printed-on labels are usually covered with four light coats of spray paint. For the blue bottle, I used the Gloss Blue Ocean Breeze shade. For the lavender ones, I started with two coats of the Gloss Gum Drop shade. Then I followed that with two coats of Rust-Oleum Glitter spray paint in Multicolor Purple Glitter. This glitter paint has a very pretty subtle iridescent sparkle to it. It does not flake off, so it does not leave a trail of glitter behind.
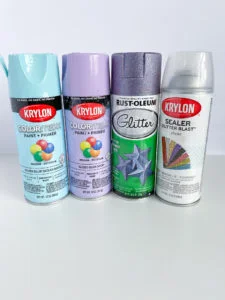
Since the glitter paint leaves a rough texture, I also sprayed the lavender bottles with two light coats of the Krylon Glitter Blast Sealer in Clear. This smoother sealed surface is needed in order to get the adhesive vinyl to stick to it well. When I first tried it without the sealer, the vinyl started to peel off after a day. After trying again with the sealer, the vinyl is still adhering well two years later.
It is best to use multiple thin coats of paint, instead of fewer thicker coats. Thick coats are bound to leave drips. You only have to wait a few minutes between coats. Therefore, all four coats of the colors, plus the two sealer coats, can be done in less than an hour.
Make sure to follow the directions on the back of the can. Shake the Krylon paints for 1 to 2 minutes, as well as during use. Spray the bottles from a distance of 8 to 10 inches away. Shake the Rust-oleum glitter spray paint for one minute. Spray it from a distance of 12 to 14 inches.
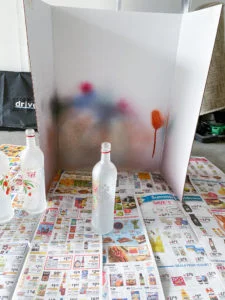
My advice would be to do the spray painting outdoors but in a sheltered area such as in a garage. I recommend wearing a face mask. The aerosol tends to float through the air, and you probably do not want glittery lungs! If you are looking to avoid getting paint on your hands, wear rubber gloves. I also have used this Krylon Snap and Spray Can Handle. I use a cardboard trifold board whenever I spray paint to contain some of the overspray.
Even with a few coats of paint on each bottle, the cans of gloss spray paint are still almost full. I can definitely use these for future projects. (I also used the Gloss Blue Ocean Breeze shade in my beach bottles.)
Cutting the Decals on a Cricut
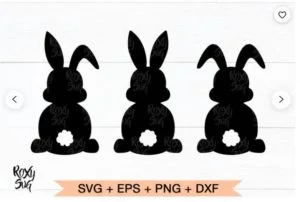
While you are waiting for the bottles to dry completely for 24 hours, create the bunny decals using a Cricut cutting machine. I used the Explore Air 2, but you can also do this on a Joy or Maker. I downloaded this bunny SVG from RoxySVG on Etsy. If you need help with uploading and resizing an SVG file, refer to this video. You do not need to mirror the image when you are up to cutting the file since you are not ironing it on.
I used Siser EasyPSV Permanent Glitter adhesive vinyl in Sparkling White, but that seems to have been discontinued. A good alternative would be Ultra Glitter Permanent Vinyl in white. If you use any type of adhesive vinyl that is not labeled as permanent, they are likely to peel off. You want the decals to remain stuck on the curved surface of the bottle.

Finishing Touches
To decorate the bottles, I used Sew Fancy baker’s twine in tertiary colors. I attached the twine with Aleene’s Clear Gel Tacky Glue. The Easter egg sprays and green pip sprays were from the now-defunct A.C. Moore (RIP, sniff!), but Michael’s has pretty speckled egg sprays, Amazon sells similar sprays, and Jo-Ann’s has these egg and berry sprays. The bunnies’ tails are jumbo cotton balls.
You can display these bottles on a mantle, shelf, or countertop. If you plan on putting them on your kitchen counters, you will not have room for the sprays if you have upper cabinets. However, you could make these with mason jars to fit in places without as much vertical room.
Easter Bunny Bottles
Equipment
- Cricut cutting machine
Materials
- 3 Glass bottles
- 1 Trifold board or cardboard box to use as a spray booth
- Newspaper or drop cloth
- 1 can Krylon ColorMaxx Paint + Primer Gloss Blue Ocean Breeze
- 1 can Krylon ColorMaxx Paint + Primer Gloss Gum Drop
- 1 can Rust-oleum Glitter spray paint Multicolor Purple Glitter
- 1 can Krylon Sealer Glitter Blast Clear
- Rubber gloves
- Mask
- 1 bottle Aleene's Clear Gel Tacky Glue
- 1 package Sew Fancy Baker's Twine Tertiary
- 1 Downloadable SVG of Bunnies https://shrsl.com/2vo0b
- 1 roll Siser Easy PSV Permanent Glitter Adhesive Vinyl Sparkling White
- 1 Green Cricut Mat
- 1 roll Siser Easy PSV Application Tape
- 1 Cricut Weeding Tool
- 3 Jumbo Cotton Balls
Instructions
Preparation
- Wear rubber gloves and a mask. Even with no breeze, you are bound to inhale some of the fine overspray, so masks are very helpful. Also, wear old clothes and shoes just in case the overspray lands on you.
- Wash and dry the bottles well. If you are using wine bottles, you can soak off the labels and then use an adhesive remover such as lemongrass oil or Goo Gone to create a smooth surface.
Painting
- Set up a “spray booth” by using a cardboard tri-fold board and newspapers. It is best to do this in a well-ventilated area that is protected from the wind, such as in a garage.
- Follow the directions on the can, which generally say to shake the can for 1-2 minutes. Spray from a distance of about a foot away. Spray on just a light first coat, no matter how tempting it might be to try to cover everything with a thick coat. A thick coat is bound to run, which will leave unsightly lumps on your finished product. Make sure that you move your freshly painted bottle far enough away so that when you spray a different color on the next bottle, the overspray won’t reach the other bottles. (Move them by sticking your pointer finger in the neck of the bottle.)Spray 4 coats of the Paint + Primer, (or 2 coats of the Paint + Primer and then 2 coats of the glitter spray paint). You only have to wait a couple of minutes between coats.
- If you used glitter spray paint, apply two thin coats of the clear sealer.
- Let dry completely for 24 hours.
Decorating
- Put a dot of glue at the top of the neck of the bottle, just under the rim, on the rear of the bottle.
- Put one end of the twine in the glue. Continue to wrap the twine tightly around the neck in a spiral. Secure the tail end of the twine with anther dot of glue. You can use a hot glue gun instead of the tacky glue.

- Download the bunny SVG from RoxySVG on Etsy at https://shrsl.com/2vo0b. Then upload it into the Cricut Design Space software.

- Adjust the size of the bunnies so that they are approximately 4 inches tall. (Measure the width of your bottle and adjust the size of the bunnies proportionately so that they fit and/or fill up the width.)
- Put the permanent adhesive vinyl onto the green (medium grip) Cricut mat.
- Follow the on-screen directions to cut out the design.
- Use the Cricut weeding tool to remove the vinyl that is not part of the design.
- Remove the backing from the application tape. Smooth it onto the bunnies. Cut apart the bunnies so that each one is on its own tape.
- Flip over the bunnies. Remove the backing from the vinyl, so that it is now only stuck to the application tape.
- Place a bunny onto the bottle, and press down firmly on the application tape to secure it. Then peel off the application tape in a diagonal direction. Repeat with the other two bunnies.
- Use the tacky glue to attach the cotton ball tails.
- Add Easter egg sprays, if desired.

Video
Notes
What other types of upcycled bottle décor would you like to see? Let me know in the comment section below.

17 Responses
These are so cute! I’m gonna have to have my sister print out cute bunnies on her Cricut so we can make these!
It is definitely useful to have someone in the family with a Cricut!
Oh my these are so cute!! What a clever way to reuse bottles.
Thank you! My town doesn’t recycle glass anymore, so I found a way to keep some out of the landfill.
What a cool way to upcycle your empty bottles.
What a cute idea! I can see totally doing something similar for other holidays like santa with a cotton beard and candy canes inside. Love this
Great idea! I have been meaning to do a snowman one, but the temperatures around here didn’t cooperate this winter for me to do outdoor spray painting.
OMG what a cute idea!! That is definitely a clever way to reuse bottles that are just going to be tossed away. It would even be easy enough for the kids to do (with supervision of course LOL).
Since the decal does not have any thin parts, children can easily handle it to place it on the bottle and glue on the tail. Plus, I think they would like choosing the paint colors to really make it their own creation.
This is such a cute idea! It also seems like it wouldn’t be too difficult. A fun craft day needs to be in my future!
These are so cute and the tutorial is great. This is really easy to follow. Thanks for this fabulous idea!
Thanks, Christine! It is good for all ages.
I LOVE these! Awesome tutorial 🙂
These are so cute! I love that yiu repurpose the bottles.
Great post. I Love these
Thank you! The cotton tails make me smile whenever I see them.
Very cute crafting ideas ☺️