
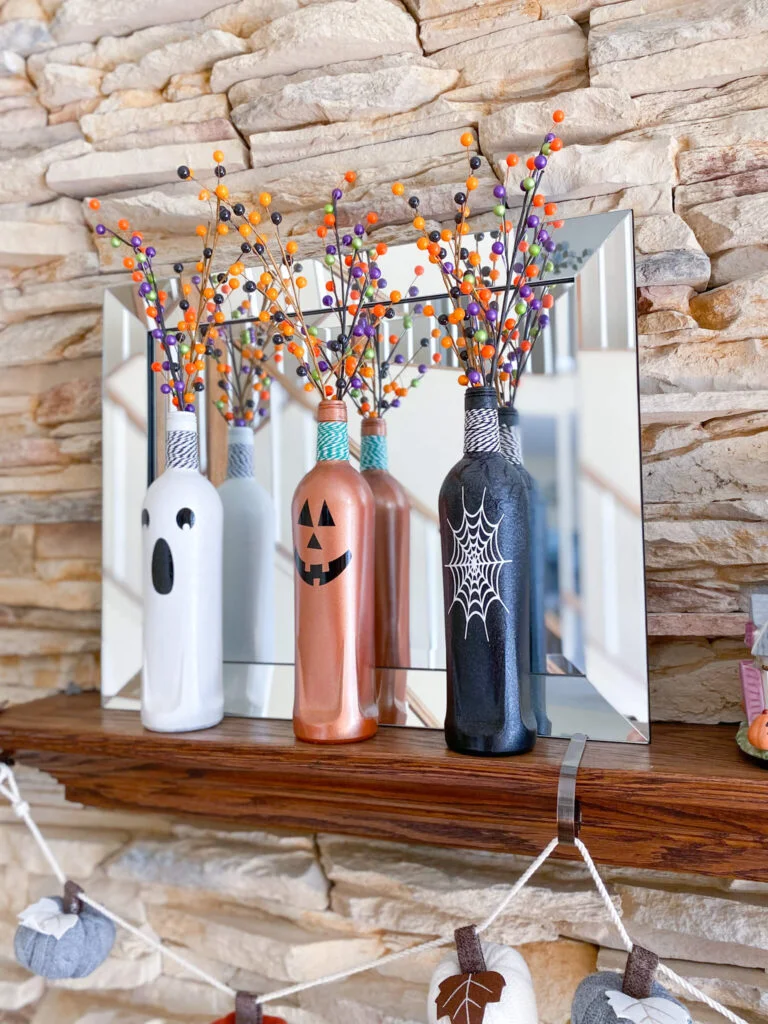
At the beginning of autumn, I like to change out the decorations on my mantel. These stay there until the Christmas decorations go up. But in mid-October, I switch out some of the muted warm colors for something bolder. My Halloween wine bottle craft is easy to make with orange, white, and black spray paint and some adhesive vinyl cut out on my Cricut. The jack o’lantern face, ghost face, and spider web add just the right touch of Halloween flair to my decor.
[My blog posts contain affiliate links. These don’t cost you anything, but they allow me to continue running this site and providing free content for my readers. Full disclosure here.]
Bottle Decor for All Seasons
Since I always have tall glass bottles on hand, I have looked for unique ways to reuse them. Check out my St. Patrick’s Day bottles, Easter bunny bottles, fall decor, patriotic 4th of July bottles, and beachy bottles. The fall decor bottles are more neutral fall colors that are appropriate to stay up through Thanksgiving. But I wanted something fun for October, so I created this Halloween wine bottle craft.
My bottles are actually not wine bottles, but Ningxia Red bottles. (Ningxia Red is a wolfberry juice made by Young Living and is infused with essential oils. If you want to join Young Living for a wholesale discount, click here.)
A typical wine bottle is about the same size as a Ningxia Red juice bottle. So this craft can also be made with wine bottles. You can mix and match shapes and sizes, or you can use three identical bottles.
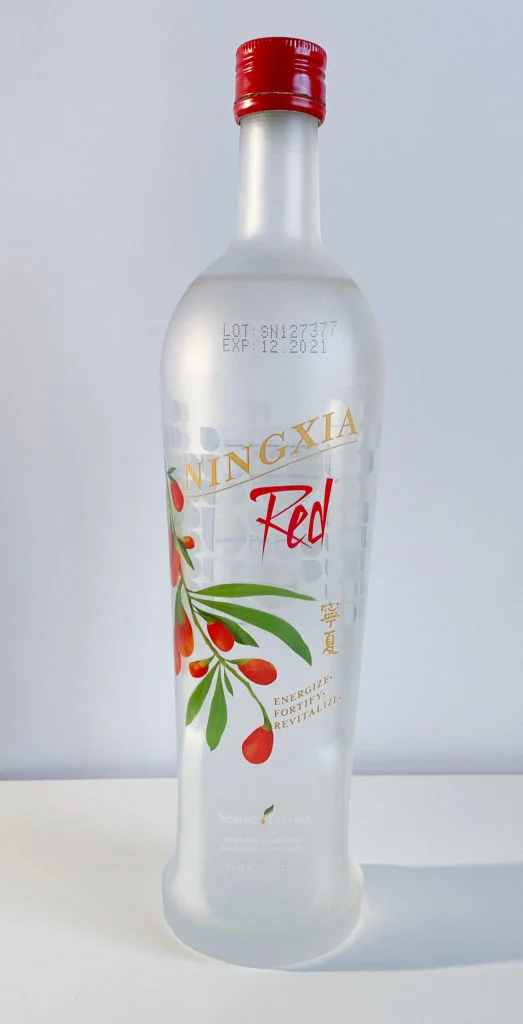
Remove any adhesive labels by soaking them off. You can also use lemongrass essential oil to remove any stubborn labels or residue. Ningxia Red bottles have labels printed directly on the glass, rather than adhesive labels, so they are not removable. Also, make sure to thoroughly clean the outside of the bottles, as any traces of oils will prevent the paint from adhering to the glass. (However, I had a “happy accident” with this Halloween bottle craft, as the glitter spray paint ended up having a crackle finish since there must have been some traces of oil still on the outside of the bottles. More on that later.)
Painting the Bottles
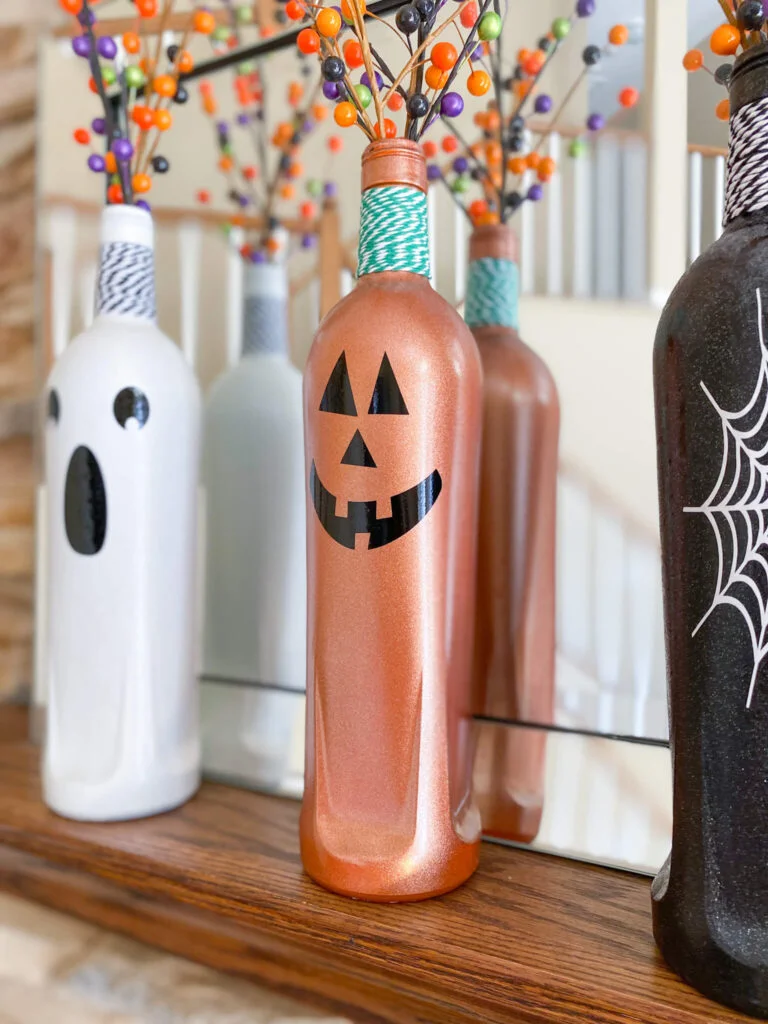
I needed to cover the labels on my bottles completely since they were printed on the glass. I used two coats of Rust-oleum Painter’s Touch 2X Ultra Cover Paint + Primer in Gloss White followed by two coats of Rust-Oleum spray paint in Glitter Pearl White for the ghost bottle. (That brand of glitter paint is hard to come by now. You can do three to four coats of the Paint + Primer instead.)
For the pumpkin bottle, I used Rust-oleum Painter’s Touch 2X Ultra Cover Paint + Primer in Gloss Real Orange and two coats of Krylon Shimmer Metallic in Candy Corn.
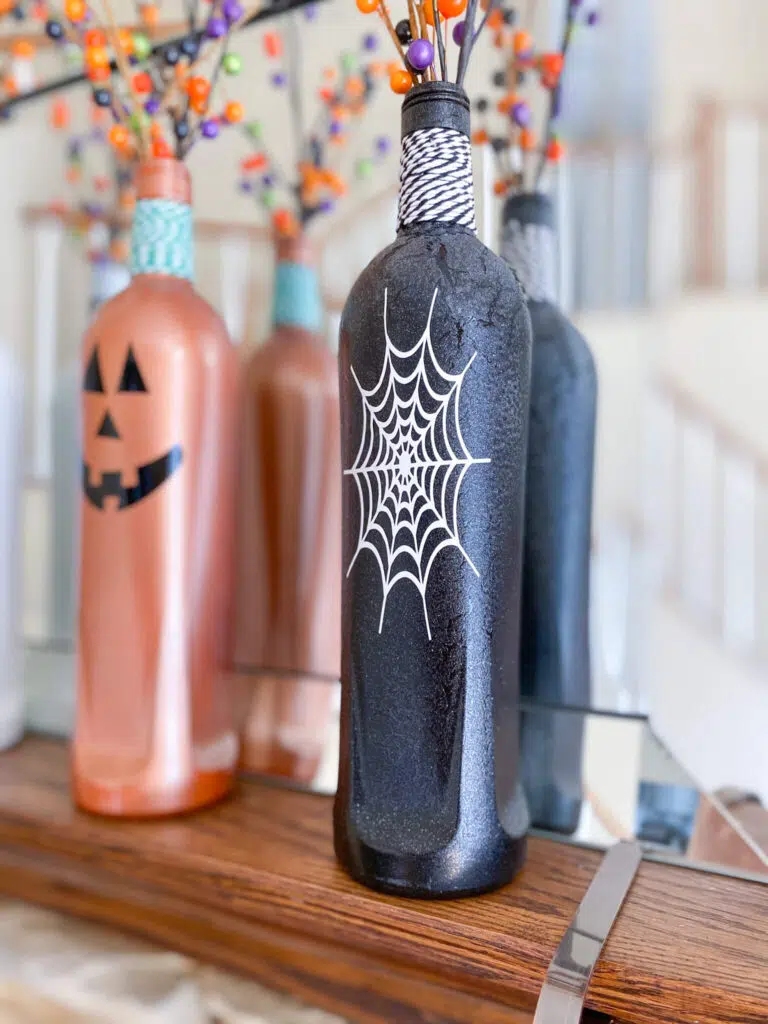
You can’t have a Halloween decoration without something black, so I used Rust-oleum Painter’s Touch 2X Ultra Cover Paint + Primer in Gloss Black and two coats of Rust-Oleum spray paint in Glitter Midnight Black. Again, the Rust-Oleum glitter paints are hard to come by, but the Krylon Glitter Blast Spray Paint in Starry Night is a good alternative.
You could make any of these bottles with just the Paint + Primer and skip the glitter top coats if you want.
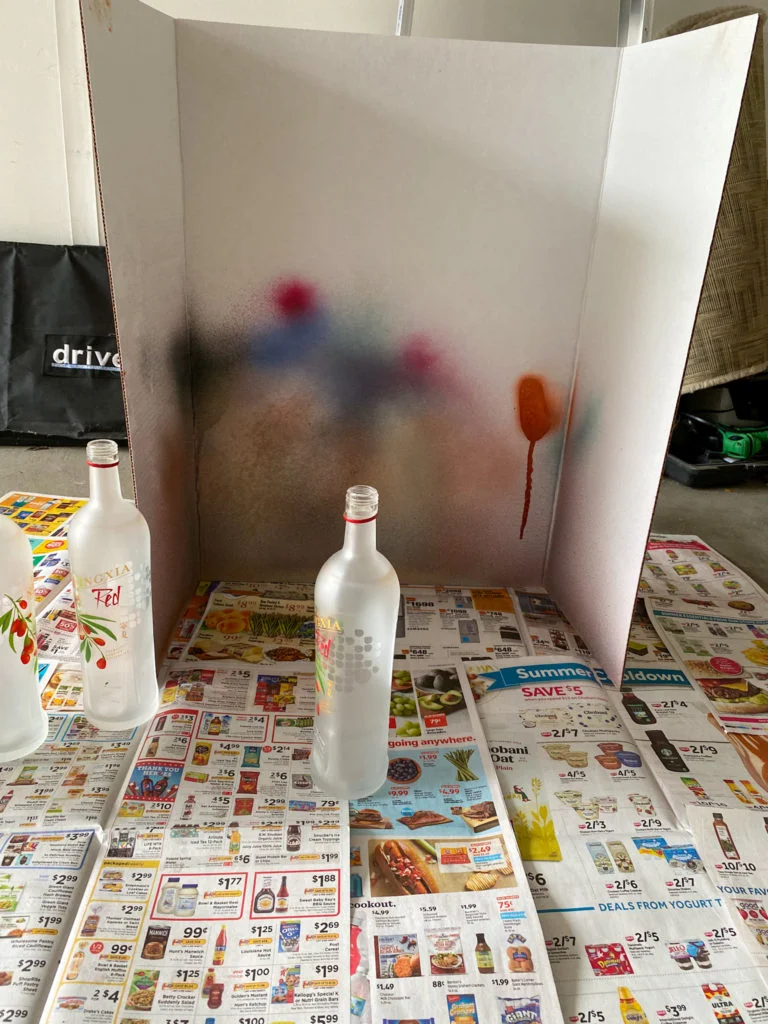
I spray bottles in my garage with the door open. I put down some newspaper on the floor and set up a dollar store cardboard trifold board to catch any overspray. If you want to avoid getting paint on your hands, use disposable gloves and/or a Krylon Snap and Spray Can Handle.
Just follow the directions on the spray can label, which typically say to shake the can for 60 seconds. Then shake it every so often during the spraying process. Each coat should be very thin. If you think you will save time by putting on a thicker coat, think again. Instead, the paint will just drip, leaving lumps. But for DIY Halloween wine bottle crafts, a drippy appearance might actually be the look you are going for!
Wait a few minutes in between coats. Once you have the desired amount of coverage, let the bottles completely dry for 24 hours before handling them.
As I was applying the glitter black spray paint, I noticed that it wasn’t sticking to some spots on the top of the bottle. It ended up creating a streaky effect that actually enhanced the spooky mood of the spiderweb bottle!
Designing the Adhesive Decorations
I am the first to admit that I am not talented when it comes to freehand painting. If you are, then you could use a fine brush to paint on the faces and spider web. But since I have a Cricut Explore Air 2, I used that to cut out the designs. You can also do this on a Joy or Maker, as well as the newer Explore Air 3 or Maker 3.
For the jack o’ lantern face and spider web, I used free SVGs. The ghost face I used was a free SVG from Cricut Design Space, but it does not seem to be available anymore. A similar ghost face SVG is available for free. Since my bottles are tall and straight with fairly flat sides, I was looking for designs that were long and narrow.
I measured the width of my bottle and decided that my designs should be about 2.4 inches wide and between three to five inches long. The beauty of Design Space is that you can adjust the size of an SVG by inserting it onto the canvas on your screen. After you click on the design, look for the size in the top toolbar and click on the lock to unlock it. Then type in your desired dimensions. (If you keep the size locked, it will change the dimensions proportionally, which could work for you depending on the size of the bottles you are using for this Halloween wine bottle craft.)
Cutting Out the Designs
Once you are satisfied with the designs on your canvas, it is time to let your cutting machine do its magic.
You do NOT need to mirror the image since you are not ironing it onto the bottle. (The mirror setting is typically used when you are using heat transfer vinyl, aka iron-on vinyl.)
For the spider web, I used Cricut Premium Permanent Glossy Vinyl in White. For the ghost face and jack o’ lantern face, I used Cricut Premium Permanent Glossy Vinyl in Black.
Just follow the on-screen instructions within the Design Space software to cut out your design. Typically, if you are cutting adhesive vinyl, it will tell you to use the fine point blade. This is the standard blade that comes with your machine.
I use the green standard grip cutting mat when cutting adhesive vinyl. (If you use the light grip blue mat, the vinyl might shift around as you try to cut it.)
After the cutting is complete, use a Cricut weeder tool to pick away the parts of the vinyl that are not part of the design.
Applying the Designs
Next, cut a piece of matte adhesive Contact paper slightly larger than one of your designs. (I have had good success using Contact paper instead of the typical transfer tape that sometimes comes with the vinyl.) Peel off the paper backing of the Contact paper. Then put your design face down onto the sticky side of the contact paper. Use the Cricut XL scraper to firmly rub the design onto the Contact paper. (If you don’t have a scraper, use the edge of a credit card instead.) Slowly peel away the backing from the vinyl so that the design is now only stuck to the Contact paper. If some of the design is still sticking to the vinyl backing as you are peeling it away, sandwich the two backings together again and repeat the rubbing process.
Now determine where you want the design on your bottle, and place the Contact paper with the design on it onto the bottle. Use the scraper to firmly rub the design onto the glass. Then start at one corner and peel away the Contact paper slowly. Voila! You now have a decorated bottle.
You can use the same piece of Contact paper multiple times.
Wrapping the Necks
I like to decorate the necks of my Halloween wine bottle craft with striped twine. Green and white twine was used for the jack o’ lantern bottle to resemble a pumpkin stem. I used black and white twine for the ghost and spider web bottles.
Begin by putting a small dot of hot glue or craft glue at the base of the neck on the back of the bottle. Put one edge of the twine into the glue and begin wrapping it up the neck. Use another small dot of hot glue or craft glue at the top of the neck to finish off the twine.
Finishing Touches
I added sprays of black and orange berries, and purple, green and orange berries that I had bought at A.C. Moore craft store when it was still in business. (I really miss that store!) You can get similar black and orange glitter berry picks or this orange and black spray of berries. Or this spider spray would be perfect for the bottle with the web design. For a more modern look, you could use these purple, orange, and black glittery branches.
This Halloween wine bottle craft is a great project for someone just learning to use a Cricut cutting machine. The designs are fairly simple to weed and apply to the bottles. You can make truly one-of-a-kind decor when you DIY Halloween wine bottle crafts!
.

9 Responses
Love it! As a knitter, I’m tempted to incorporate fiber somehow! Hmmm now I’m going to be brainstorming this at work today. 🤔
Perhaps you could crochet the spiderweb and knit a stem for the pumpkin bottle? I’d love to see the finished product!
This looks fun and definitely something I would like to try out. Thanks for sharing.
It’s an easy project that puts empty bottles to good use, rather than taking up space in a landfill.
Looks so interesting, hope these tips make my Halloween more horrible😋
There are so many free SVG cut files for spooky ghost faces and jack o’lantern faces, so you can definitely make the bottles as creepy as you want!
Love the idea! Looks amazing! 🙂
I love these! I love that it seems so simple but they look so effective!
Changing out the bottles for each season or holiday is also more cost-effective than purchasing pre-made decor.